
Leveling L1–68
- Act 1: run SunderSunder isn't a Duelist quest reward until Merveil — use Frost Blades or Cleave from Tarkleigh until then, both are fine filler. Swap to Sunder immediately at Merveil. Grab Leap Slam from Mud Flats — it stays as your travel skill through the entire build. Ruthless Support makes Sunder bossing hurt. Don't touch Blade Vortex yet — you have neither the gem nor the stats for it.
- Act 2: run SunderAdd Melee Physical Damage Support as soon as you hit a 4-link. Warlord's Mark from Bandits (kill all for +2 passives) gives life leech + endurance charges. Ancestral Protector totem from the Sharp and Cruel reward is the strongest boss damage boost of the acts. Slot a Steelskin on left-click for panic button.
- Act 3: run SunderHerald of Purity from Clarissa is your main aura — flat phys damage plus sentinels. Fortify Support on Leap Slam keeps fortify always up. Lab 1 in Act 3: take Painforged — at this point you probably only have 30% block, but the damage bonus scales automatically as block climbs. Visit Siosa after clearing the Library to buy Blade Vortex and level it in a spare slot for the Act 4–5 swap.
- Act 4–5 (L28 BV swap): run Blade VortexThe swap. Around L28, swap Sunder out for Blade Vortex — you now have Spell Echo Support, enough cast speed to hold 8+ blades, and a workable 5-link option. Keep Leap Slam as travel + fortify. Ancestral Protector stays on the bar for bossing. Lab 2 at Kaom: take Versatile Combatant — this doubles your block by making your attack-block chance also apply to spells, which matters a lot once you're standing still spinning blades.
- Act 6–7 (block scaling): run Blade VortexDetermination unlocks at the Act 6 Brine King quest reward — slot immediately, the armour multiplier is massive for a Duelist life/block pool. Added Fire Damage Support is a cheap early 5-link choice that works nicely because Gladiator's passive tree runs close to several phys-as-fire conversion nodes. Buy a Rumi's Concoction flask in trade if you can afford one — block flask uptime is one of the biggest campaign power spikes for this build.
- Act 8–10 (Gratuitous Violence): run Blade VortexLab 3 in Act 9: take Gratuitous Violence — this is where the bleed half of the build turns on. Unbound Ailments Support adds to the bleed damage directly (ailment magnitude). By Act 10 you want 60%+ attack AND spell block, capped resists, and a functional 5-link. Kitava at Act 10: the -30% res phases are dangerous — drop Determination briefly and chug a topaz/ruby/sapphire flask for the phase.
 Sunder
  Onslaught Support
  Ruthless Support
  Leap Slam
 Sunder isn't a Duelist quest reward until Merveil — use Frost Blades or Cleave from Tarkleigh until then, both are fine filler. Swap to Sunder immediately at Merveil. Grab Leap Slam from Mud Flats — it stays as your travel skill through the entire build. Ruthless Support makes Sunder bossing hurt. Don't touch Blade Vortex yet — you have neither the gem nor the stats for it.
Sunder  Melee Physical Damage Support Ruthless Support Onslaught Support Leap Slam
  Ancestral Protector
  Steelskin
  Warlord's Mark
 Add Melee Physical Damage Support as soon as you hit a 4-link. Warlord's Mark from Bandits (kill all for +2 passives) gives life leech + endurance charges. Ancestral Protector totem from the Sharp and Cruel reward is the strongest boss damage boost of the acts. Slot a Steelskin on left-click for panic button.
Sunder Melee Physical Damage Support  Pulverise Support
  Fortify Support Leap Slam
  Herald of Purity Ancestral Protector
  Cast when Damage Taken Steelskin Warlord's Mark
 Herald of Purity from Clarissa is your main aura — flat phys damage plus sentinels. Fortify Support on Leap Slam keeps fortify always up. Lab 1 in Act 3: take Painforged — at this point you probably only have 30% block, but the damage bonus scales automatically as block climbs. Visit Siosa after clearing the Library to buy Blade Vortex and level it in a spare slot for the Act 4–5 swap.
 Blade Vortex
  Spell Echo Support
  Controlled Destruction Support
  Unleash Support Leap Slam Herald of Purity Ancestral Protector Cast when Damage Taken Steelskin Warlord's Mark
 The swap. Around L28, swap Sunder out for Blade Vortex — you now have Spell Echo Support, enough cast speed to hold 8+ blades, and a workable 5-link option. Keep Leap Slam as travel + fortify. Ancestral Protector stays on the bar for bossing. Lab 2 at Kaom: take Versatile Combatant — this doubles your block by making your attack-block chance also apply to spells, which matters a lot once you're standing still spinning blades.
Blade Vortex Spell Echo Support Controlled Destruction Support Unleash Support  Added Fire Damage Support Leap Slam Herald of Purity
  Determination Ancestral Protector Cast when Damage Taken
  Immortal Call Steelskin Warlord's Mark
 Determination unlocks at the Act 6 Brine King quest reward — slot immediately, the armour multiplier is massive for a Duelist life/block pool. Added Fire Damage Support is a cheap early 5-link choice that works nicely because Gladiator's passive tree runs close to several phys-as-fire conversion nodes. Buy a Rumi's Concoction flask in trade if you can afford one — block flask uptime is one of the biggest campaign power spikes for this build.
Blade Vortex Spell Echo Support Controlled Destruction Support Unleash Support Added Fire Damage Support  Unbound Ailments Support Leap Slam Herald of Purity Determination Ancestral Protector Cast when Damage Taken
  Molten Shell Immortal Call Warlord's Mark
 Lab 3 in Act 9: take Gratuitous Violence — this is where the bleed half of the build turns on. Unbound Ailments Support adds to the bleed damage directly (ailment magnitude). By Act 10 you want 60%+ attack AND spell block, capped resists, and a functional 5-link. Kitava at Act 10: the -30% res phases are dangerous — drop Determination briefly and chug a topaz/ruby/sapphire flask for the phase.
Blade Vortex  Greater Spell Echo Controlled Destruction Support Unleash Support Unbound Ailments Support
  Spell Cascade Support Leap Slam Herald of Purity Determination
  Blood and Sand Ancestral Protector Cast when Damage Taken
  Vaal Molten Shell Immortal Call Warlord's Mark
 At maps, swap in Spell Cascade Support for wide clear. Uber Lab ASAP for Outmatch and Outlast — bonus endurance/frenzy charges stack with Gladiator's already generous charge generation. In 3.28 Mirage, Greater Spell Echo is the Exceptional Support upgrade for Spell Echo Support and drops from red maps; it's the largest single-slot damage upgrade on the build. Blood and Sand stance swaps between clear (Sand) and bossing (Blood) for free damage.
How leveling works
Blade Vortex Gladiator is the block-and-bleed variant. Gladiator stacks block chance with Versatile Combatant (one pool for attacks AND spells), then Painforged turns every successful block into 20% more damage for 4 seconds — with 75%/75% block uptime and constant spinning blades, that buff is effectively permanent in maps. The other half of the build is physical bleed: Gratuitous Violence adds 15% chance to bleed on hit and makes your bleeds deal 25% more damage, which — combined with keeping Blade Vortex as a pure physical spell (no conversion, no Avatar of Fire) — turns every blade into a bleed applicator.
The campaign runs Duelist-style through Acts 1–4: level with Sunder or Frost Blades on a 2H weapon or dual-wield, then transition into Blade Vortex around Act 4–5 once you have the cast speed + spell damage to sustain 8+ blades. Duelist doesn't have a great natural spell gem, so the early acts are pure attack-based — that's fine, the block foundation is what you're really building. Lab-pick order is Painforged → Versatile Combatant → Gratuitous Violence → Outmatch and Outlast. Painforged is first because it gives immediate damage scaling even before block chance is high.
The tree route grabs Resolute Technique from the Marauder side to guarantee hits — Blade Vortex cannot crit effectively on a non-crit Duelist tree, and the alternative (taking spell accuracy nodes) is a waste of passive points. Resolute Technique is not usually taken on BV builds, but it pairs well with Gratuitous Violence bleed (bleed doesn't need crit to scale), and removes the entire "do I have enough spell accuracy" problem.
Budget notes: Tabula Rasa for the 6-link, Cloak of Defiance as a cheap mid-act chest for the mind-over-matter layer, and a Rumi's Concoction flask as soon as you can afford one (usually 10c week 1) to shore up block during the Acts 6–10 window. Save real currency for a max-block shield with +1 to Physical Spell Gems sceptre, a Bringer of Rain if you're comfortable without a helmet slot, and a proper crafted 6-link body armour for maps.
Gear while leveling
- · Weapon: a +1 to Physical Spell Gems sceptre or wand, crafted via Essence of Rage on a wand or bought as a sceptre. Flat spell damage and cast speed are what matter — Blade Vortex is a spell and ignores weapon damage. Divinarius at L20 is a cheap dagger option for Act 2–5.
- · Shield: a 30% block Rotted Round Shield upgraded via Titanium/Divine Orbs is the campaign goal — block chance scales Versatile Combatant directly. Endgame, a crafted Titanium Spirit Shield with "+X% chance to block" and life is the target. Don't dual-wield wands on this build — you give up the block foundation.
- · Body armour: Tabula Rasa carries the 6-link through acts. Cloak of Defiance around L40 adds mind-over-matter and is cheap. Post-maps, a crafted armour/ES hybrid chest with life, resists, and a 6-link.
- · Helmet: life + resists during acts. The Blade Vortex helm enchant ("X% increased Damage" or "gain Unholy Might on kill") is one of the biggest slot upgrades — farm Merciless Lab around L75. Bringer of Rain is a meme endgame option (no helmet slot, but free 6-link of itself) — skip during leveling.
- · Gloves: life + resists + cast speed. Haemophilia is an interesting endgame gloves pick for bleed scaling, but unnecessary during the campaign.
- · Boots: 30% movement + life + resists. Wanderlust for Act 1–3, then rare boots.
- · Rings: life, resists, and a flat phys-to-spells roll on at least one slot. No specific unique is required.
- · Amulet: rare with life, cast speed, flat spell damage, and a resist. Anoint with Retribution (more block + reflect) or Disciple of the Unyielding if you want more endurance charge scaling.
- · Belt: leather belt with life and resists during acts, stygian vise with abyss jewel flat-phys-to-spells for maps.
- · Flasks: bubbling life flask with "of Staunching", Rumi's Concoction for block, granite flask with "of Iron Skin", quicksilver for movement, silver flask for Onslaught. Lion's Roar is a potential endgame flask swap for more phys damage.
Weapon progression
Blade Vortex Gladiator doesn't scale with weapon damage — every blade is a spell damage hit. What the weapon provides is spell damage, cast speed, and flat-phys-add-to-spells rolls. You DO use a shield (not dual-wield wands) because Versatile Combatant doubling attack-block into spell-block is central to the build — the shield's block chance is more valuable than a second wand's damage. Vendor-recipe early: magic wand + Sapphire Ring + Orb of Alteration for Act 1–4. Lifesprig at L12 is a cheap upgrade. Around L40, craft a +1 to Physical Spell Gems wand via Essence of Rage — a +1 phys spell gems wand plus a max-block shield carries you all the way to maps. The endgame weapon is a crafted +1 Socketed Gems / +1 All Spell Gems sceptre with flat spell damage and cast speed — multi-divine, waits for red maps.
Tree to aim for (by level 90)
Watch out for
- ! Do NOT dual-wield wands on this build. The whole point of Gladiator is Versatile Combatant — attack-block applying to spells too. Dual-wielding gives attack block but no shield block, which collapses the doubled-up spell block number. A max-roll block shield beats a second wand on total DPS once you factor in Painforged uptime.
- ! Painforged requires you to actually block to get the buff. If you're at L50 with 30% block and fighting a slow boss that doesn't swing often, the buff won't reliably stay up. The buff becomes permanent-in-maps ONLY after block hits 60%+ and you're in packs. Don't judge the build at L50 — it ramps heavily during Acts 8–10 as block climbs.
- ! Resolute Technique is unusual for a BV build but correct here — you're a Duelist running a non-crit physical spell, and the passives around you are all attack-based. RT frees you from ever caring about spell accuracy. Don't second-guess it because online guides for BV Elementalist/Occultist skip it — those are crit builds.
- ! Bleed scaling is NOT the primary damage — hit damage is. Gratuitous Violence gives 15% chance to bleed and makes bleeds hit harder, which is a clear layer, but the core damage still comes from stacked blade hits. Don't respec into full bleed-magnitude passives expecting that to double your DPS — it won't.
- ! 3.28 Mirage: Greater Spell Echo drops from red maps as the Exceptional Support upgrade — replaces Spell Echo Support in the main link as your first big endgame upgrade. Greater Volley and Greater Multiple Projectiles do NOT apply to BV (not a projectile).
- ! Blood and Sand stance swap is free — you switch between Blood (more damage, less AoE) for bosses and Sand (less damage, more AoE) for clear. There's no downside to having it slotted, but players forget it exists and leave it on one stance the whole map. Bind the stance swap to a free key.
- ! Block cap is 75% for attacks and 75% for spells. Going over that is wasted — don't stack block past cap if the gear slot could give you resistance or life instead. Once both numbers hit 75% with Rumi's Concoction up, you're done with block.
Early Mapping L70–84
- Swap the crafted Abyssal Sceptre for a Death Breaker-style corrupted sceptre with +1 spell gems + explosive-on-kill implicit
- Pick up Forbidden Flame + Forbidden Flesh allocating Brutal Fervour — the Slayer crossover ascendancy notable that grants 20% increased attack damage and speed while leeching, massive throughput for the BV crit loop
- Add a second Watcher's Eye with a Determination block-chance mod + a Hatred cold-penetration mod for stacked aura value


 Blade Vortex
 Arcane Surge
 Increased Critical Damage
 Lifetap
 Minion PactAdded Fire Damage
Full gear (30 items)
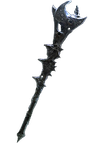 Death Breaker Weapon 1
- Quality does not increase Physical Damage
- Grants 1% increased Area of Effect per 4% Quality
- Enemies you Kill have a 15% chance to Explode, dealing a tenth of their maximum Life as Physical Damage
- 67% increased Spell Damage
- 102% increased Spell Critical Strike Chance
- +1 to Level of all Spell Skill Gems
- Gain 5% of Non-Chaos Damage as extra Chaos Damage
- Can have up to 3 Crafted Modifiers (crafted)
- +25% to Global Critical Strike Multiplier (crafted)
- Gain 7% of Physical Damage as Extra Chaos Damage (crafted)
Azadi Crest Weapon 2
- 5% Chance to Block Spell Damage
- +30 to maximum Life
- +5% Chance to Block
- 8% chance to avoid Projectiles
- Your Lucky or Unlucky effects use the best or worst from three rolls instead of two
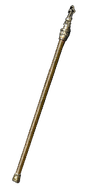 Rift Post Weapon 1 Swap
- +25% Chance to Block Spell Damage while wielding a Staff
- +31 to Intelligence
- 35% increased Lightning Damage
- Adds 83 to 150 Fire Damage to Spells
- 17% increased Attack Speed
- +123 to maximum Mana
 Beast Glance Helmet
- 7% of Physical Damage from Hits taken as Lightning Damage
- 9% increased Area of Effect
- +2 to Level of all Minion Skill Gems
- +12% chance to Suppress Spell Damage
- +144 to maximum Life
- +46% to Lightning Resistance
- 60% chance to Avoid being Shocked
- +1 to Level of Socketed AoE Gems (crafted)
- 10% increased Area of Effect (crafted)
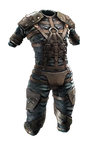 Empyrean Sanctuary Body Armour
- 15% increased Explicit Life Modifier magnitudes
- 200% increased Attribute Requirements
- +1 to Level of Socketed Support Gems
- +9% to Quality of Socketed Support Gems
- +19% chance to Suppress Spell Damage
- +197 to maximum Life
- 10% chance to gain a Frenzy Charge on Hit
- 9% increased Area of Effect
- Enemies you Kill have a 35% chance to Explode, dealing a tenth of their maximum Life as Physical Damage
- +20% to Fire and Cold Resistances (crafted)
 Rapture Touch Gloves
- 0.4% of Chaos Damage Leeched as Life
- 25% chance to Unnerve Enemies for 4 seconds on Hit
- +2 to Level of Socketed Minion Gems
- +13% chance to Suppress Spell Damage
- +123 to maximum Life
- +48% to Cold Resistance
- +34% to Chaos Resistance
- 11% increased Area of Effect (crafted)
- 16% increased Area Damage (crafted)
 Entropy Hoof Boots
- +96 to Evasion Rating
- +2 to Level of all Raise Spectre Gems
- +43% to Fire Resistance
- 27% increased Movement Speed
- 100% chance to Avoid being Chilled
- 24% increased Effect of Tailwind on you
- You have Tailwind if you have dealt a Critical Strike Recently
- +68 to maximum Life (crafted)
 Rapture Gorget Amulet
- Allocates Crystal Skin
- -1 Prefix Modifier allowed
- -2 Suffix Modifiers allowed
- Implicit Modifiers Cannot Be Changed
- 100% increased Explicit Modifier magnitudes
- +83% to Global Critical Strike Multiplier
- +2 to Level of all Skill Gems
- 82% increased Damage while Leeching (crafted)
Death Rush Ring 1
- +23% to Chaos Resistance
- Recover 6% of Life on Kill
- Gain Adrenaline for 3 seconds on Kill
 Dusk Spiral Ring 2
- +27% to Chaos Resistance
- Adds 4 to 8 Cold Damage to Attacks
- +46 to maximum Energy Shield
- +58 to maximum Life
- 22% increased Rarity of Items found
- +19% to all Elemental Resistances
- +42% to Chaos Resistance
Headhunter Belt
- +37 to maximum Life
- +54 to Strength
- +40 to Dexterity
- +59 to maximum Life
- 30% increased Damage with Hits against Rare monsters
- When you Kill a Rare monster, you gain its Modifiers for 60 seconds
 Soul Ruin Jewel
- Adds 8 Passive Skills
- 2 Added Passive Skills are Jewel Sockets
- Added Small Passive Skills grant: 10% increased Spell Damage
- Added Small Passive Skills also grant: +3% to all Elemental Resistances
- 1 Added Passive Skill is Conjured Wall
- 1 Added Passive Skill is Essence Rush
- 1 Added Passive Skill is Mage Hunter
 Watcher's Eye Jewel
- 5% increased maximum Energy Shield
- 6% increased maximum Life
- 4% increased maximum Mana
- +908 to Armour while affected by Determination
- Consecrated Ground you create while affected by Zealotry causes enemies to take 10% increased Damage
- 120% increased Critical Strike Chance against Enemies on Consecrated Ground while affected by Zealotry
 Unnatural Instinct Jewel
- 5% increased Damage
- Allocated Small Passive Skills in Radius grant nothing
- Grants all bonuses of Unallocated Small Passive Skills in Radius
 Stormshroud Jewel
- 24% reduced Effect of Chill on you
- +13% to Lightning Resistance
- Modifiers to Chance to Avoid being Shocked apply to all Elemental Ailments
 Glyph Spark Jewel
- Adds 4 Passive Skills
- 1 Added Passive Skill is a Jewel Socket
- Added Small Passive Skills grant: 10% increased Area Damage
- Added Small Passive Skills also grant: 3% increased Area of Effect
- Added Small Passive Skills also grant: +4% to Fire Resistance
- 1 Added Passive Skill is Assert Dominance
- 1 Added Passive Skill is Towering Threat
 The Light of Meaning Jewel
- Passive Skills in Radius also grant 6% increased Physical Damage
 Elegant Hubris Jewel
- Commissioned 45480 coins to commemorate Caspiro
- Passives in radius are Conquered by the Eternal Empire
- Historic
Phoenix Hope Jewel
- Adds 4 Passive Skills
- 1 Added Passive Skill is a Jewel Socket
- Added Small Passive Skills grant: 10% increased Area Damage
- Added Small Passive Skills also grant: 3% increased Area of Effect
- Added Small Passive Skills also grant: 5% increased Mana Regeneration Rate
- 1 Added Passive Skill is Assert Dominance
- 1 Added Passive Skill is Towering Threat
Empyrean Bliss Jewel
- Adds 5 Passive Skills
- 1 Added Passive Skill is a Jewel Socket
- Added Small Passive Skills grant: 10% increased Area Damage
- Added Small Passive Skills also grant: 3% increased Area of Effect
- Added Small Passive Skills also grant: +2 to All Attributes
- 1 Added Passive Skill is Assert Dominance
- 1 Added Passive Skill is Towering Threat
Armageddon Cut Jewel
- Adds 8 Passive Skills
- 2 Added Passive Skills are Jewel Sockets
- Added Small Passive Skills grant: 12% increased Chaos Damage
- Added Small Passive Skills also grant: +4% to Cold Resistance
- 1 Added Passive Skill is Grim Oath
- 1 Added Passive Skill is Overwhelming Malice
- 1 Added Passive Skill is Wicked Pall
 Foulborn Might of the Meek Jewel
- 75% increased Effect of non-Keystone Passive Skills in Radius
- Notable Passive Skills in Radius grant nothing
 Impossible Escape Jewel
- Passive Skills in Radius of Elemental Equilibrium can be Allocated without being connected to your tree
- Passage
 Forbidden Flame Jewel
- Allocates Brutal Fervour if you have the matching modifier on Forbidden Flesh
 Dragon Essence Jewel
- Corrupted Blood cannot be inflicted on you
- +3% Chance to Block Spell Damage while holding a Shield
- +11% to Global Critical Strike Multiplier
- +14% to Fire Resistance
- +12 to Maximum Charges
- Recharges 5 Charges when you Consume an Ignited corpse
- Enemies Ignited by you during Effect have Malediction
- Enemies Ignited by you during Effect take 10% increased Damage
- Recover 1% of Mana when you Kill an Enemy during Effect

- 40% increased Duration
- 30% increased Rarity of Items found during Effect (crafted)

- 28% reduced Charges per use
- 13% increased Movement Speed during Effect
- 23% reduced Duration
- Consecrated Ground created by this Flask has Tripled Radius
- Consecrated Ground created during Effect applies 9% increased Damage taken to Enemies
- 148% increased Critical Strike Chance against Enemies on Consecrated Ground during Effect

- +60 to Maximum Charges
- 50% increased Charges per use
- Grants a random Divination Buff for 20 seconds when Used
All gem links (9 groups)
- Arcane Surge 20/20
- Increased Critical Damage 20/20
- Lifetap 20/20
- Minion Pact 3/20
- Blade Vortex 20/20
- Added Fire Damage 20/20
-
 Cast when Damage Taken 20/20
 - Lifetap 20/20
-
 Flesh and Stone 20/20
- Minion Pact L1
- Minion Pact L1
- Minion Pact L1
-
 Zealotry 20/20
 -
 Enlighten L4
 -
 Herald of Ash 20/20
 -
 Tempest Shield 20/20
-
 Raise Spectre 20/20
 -
 Minion Life 20/20
 -
 Empower L4
 -
 Companionship 3/20
-
 Shield Charge 20/20
 - Lifetap 20/20
-
 Faster Attacks 20/12
-
 Assassin's Mark 20/20
 - Arcane Surge 20/20
-
 Frostblink 20/20
-
 Unknown Gem L1
 - Unknown Gem L1
How this stage plays (mechanics, defences)
Blade Vortex Gladiator at early mapping is already running the full endgame shell — the L84 reference is degenerate in the best way. The 6-link in Empyrean Sanctuary (a rare Syndicate's Garb, +1 socketed supports / +9% quality socketed supports) runs Blade Vortex + Minion Pact Support + Arcane Surge Support + Increased Critical Damage Support + Lifetap Support + Added Fire Damage Support. Minion Pact Support is universal in the BV meta — it trades minion life for spell damage, with the minion life fed by a Raise Spectre + Minion Life Support + Empower Support + Companionship Support stack in the helmet. The weapon is a crafted rare Abyssal Sceptre (102% spell crit chance + +1 all spell gems + 67% spell damage) with socketed Assassin's Mark self-curse and Arcane Surge Support. Headhunter is on the belt from the start — a 22% meta share at this tier, but the reference commits to it early for the rare-kill scaling loop.
The ascendancy picks are More Than Skill, Determined Survivor, and Weapon Master — Gladiator's defensive-first ascendancy skeleton. More Than Skill grants +2% max attack/spell block chance per 5% over cap, which is THE reason this build can reach 98% block. Weapon Master grants a free Onslaught-style weapon-skill buff. Supreme Ostentation (transformed from Elemental Equilibrium via Impossible Escape in the Elemental Equilibrium radius) removes attribute requirements from items, unlocking Headhunter's +54 Str / +40 Dex contribution without attribute-stacking the tree. Foulborn Might of the Meek in the Scion cluster converts the Ranger-adjacent small passives into +75% effect non-keystone passives scaling — huge value density near Influence/Charisma. Bottled Faith flask creates consecrated ground with tripled radius for +148% crit chance on ground, and Watcher's Eye pairs a Zealotry mod that adds +120% crit chance on consecrated ground — the two stack to make every BV tick crit.
EHP 1.48M. The block wall is the story: 98% attack / 98% spell block via Azadi Crest (grants three-roll lucky on block rolls), Safeguard (+block cap), More Than Skill (+2% max block per 5% over cap), and The Red Nightmare (converts fire-res nodes to attack block at 50% value). Ancestral Vision converts spell suppression to avoid-elemental-ailments at half effect, layering on top of the block wall. 100% spell suppression is fully capped via gloves + boots + chest rolls. Resistances all sit at 75-76% capped with +75% chaos resist — chaos is essentially solved at this tier already via Dusk Spiral ring (+42% chaos res) + Azadi Crest + gloves. 3 endurance / 3 power / 4 frenzy charges stack through the tree and Blood Rage-adjacent cluster nodes. The only real death condition at this budget is an uncounterable chaos DoT or a forced-hit mechanic that bypasses block (Sirus die beams, Maven memory).
Stand and spin. Blade Vortex stacks up in one or two casts thanks to Arcane Surge Support's cast-speed breakpoint, and once stacks are up the rotation is walk-into-pack, Death Rush-kill triggers Adrenaline, Headhunter-triggered rare kills layer temporary mods, and the screen explodes in a continuous chain. 3.73 casts/sec base with x2.15 movement speed means the character moves like a zoomer despite no movement-skill commitment on the tree. Bossing is stand-on-top and let the three-roll-lucky block soak every hit while the blade ring ticks through. Cinderswallow Urn + Bottled Faith on-flask covers ignite-immunity and consecrated-ground crit scaling.
Passive tree (129 points)
The desktop app shows this tier's full tree on an interactive canvas.
Endgame L85–94
- The endgame reference is stylistically different from the early_mapping and aspirational picks — this L92 character runs The Brass Dome + Cane of Kulemak + Kalandra's Touch for an armour-stacker variant rather than the pure block wall. EHP drops to 66k and block falls to 54/62%, but physical damage reduction climbs to 90% via 44.6k armour and Determination. This is an atypical endgame route — most endgame Gladiators continue the block-stacker path into aspirational. The reference is included because it scored highest on balanced-score at this tier, but the block route is the more continuous progression.
- Return to the block-stacker path for the aspirational tier — Azadi Crest + Safeguard + The Red Nightmare is the mainline Gladiator continuity
- Pick up Forbidden Flame + Forbidden Flesh allocating Brutal Fervour — both tiers of the aspirational reference use this combo
- Target a Militant Faith timeless jewel with Devotion-scaling increased elemental damage per 10 Devotion for the large-cluster-adjacent Templar radius


 Blade VortexControlled DestructionMinion PactIncreased Critical Damage
 Greater Unleash
 Void ManipulationLifetap
Full gear (27 items)
Obliteration Weapon 1
- Quality does not increase Physical Damage
- Grants 1% increased Area of Effect per 4% Quality
- 31% increased Spell Damage
- Gain 40% of Physical Damage as Extra Chaos Damage
- Enemies you Kill have a 20% chance to Explode, dealing a quarter of their maximum Life as Chaos Damage
Azadi Crest Weapon 2
- 4% Chance to Block Spell Damage
- +86 to maximum Life
- +3% Chance to Block
- 8% chance to avoid Projectiles
- Your Lucky or Unlucky effects use the best or worst from three rolls instead of two
Cane of Kulemak Weapon 1 Swap
- +22% Chance to Block Attack Damage while wielding a Staff
- 88% increased Unveiled Modifier magnitudes
- +3 to Level of Socketed Support Gems
- +13% to Quality of Socketed Support Gems
- +88% to Chaos Damage over Time Multiplier
- Minions have 109% increased maximum Life
- Minions deal 103% increased Damage
 Fate Dome Helmet
- 9% increased Mana Reservation Efficiency of Skills
- Minions have 22% increased maximum Life
- +2 to Level of all Minion Skill Gems
- +136 to maximum Life
- Regenerate 127.2 Life per second
- +43% to Fire Resistance
- +32% to Chaos Resistance
- 73% increased Armour (crafted)
The Brass Dome Body Armour
- +2 to Level of Socketed Minion Gems
- 4% reduced Chaos Damage taken
- 374% increased Armour
- +5% to all maximum Elemental Resistances
- Strength provides no bonus to Maximum Life
- Take no Extra Damage from Critical Strikes
 Dread Grip Gloves
- 0.3% of Chaos Damage Leeched as Life
- 20% chance to Unnerve Enemies for 4 seconds on Hit
- +117 to maximum Life
- 72% increased Armour
- +43% to Fire Resistance
- +48% to Cold Resistance
- +31% to Chaos Resistance
- 12% increased Area of Effect (crafted)
- 16% increased Area Damage (crafted)
 Beast Slippers Boots
- 33% increased Armour
- +113 to maximum Life
- +2 to Level of all Raise Spectre Gems
- +47% to Lightning Resistance
- 30% increased Movement Speed
- 14% increased Stun and Block Recovery
- 23% increased Effect of Tailwind on you
- You have Tailwind if you have dealt a Critical Strike Recently
Marylene's Fallacy Amulet
- Allocates Retaliation
- +26 to Intelligence
- +93 to Accuracy Rating
- +303% to Global Critical Strike Multiplier
- +75 to Evasion Rating
- 14% increased Light Radius
- 50% less Critical Strike Chance
- Critical Strikes have Culling Strike
 Oblivion Knot Ring 1
- 14% increased Chaos Damage
- 9% increased maximum Life
- +36 to Dexterity
- +134 to maximum Life
- +38% to Cold Resistance
- Minions have 34% increased maximum Life
- Regenerate 30 Life per second (crafted)
- +50 to maximum Mana (crafted)
 Kalandra's Touch Ring 2
- Reflects opposite Ring
 Screams of the Desiccated Belt
- +31 to maximum Life
- You have Diamond Shrine Buff while affected by no Flasks
- +26 to Intelligence
- +27% to Chaos Resistance
Dragon Prism Jewel
- Adds 8 Passive Skills
- 2 Added Passive Skills are Jewel Sockets
- Added Small Passive Skills grant: 10% increased Spell Damage
- Added Small Passive Skills also grant: +5% to Lightning Resistance
- 1 Added Passive Skill is Conjured Wall
- 1 Added Passive Skill is Mage Hunter
- 1 Added Passive Skill is Sap Psyche
Unnatural Instinct Jewel
- Allocated Small Passive Skills in Radius grant nothing
- Grants all bonuses of Unallocated Small Passive Skills in Radius
Gale Stone Jewel
- Adds 5 Passive Skills
- 1 Added Passive Skill is a Jewel Socket
- Added Small Passive Skills grant: 10% increased Area Damage
- Added Small Passive Skills also grant: +3% to Cold Resistance
- Added Small Passive Skills also grant: +4% to Fire Resistance
- 1 Added Passive Skill is Assert Dominance
- 1 Added Passive Skill is Towering Threat
 Foul Stare Jewel
- 22% chance to Avoid being Shocked
- 21% chance to Avoid Bleeding
- +177 to Armour
- +38 to maximum Life
- +13% to Fire Resistance
- Minions have 9% increased maximum Life
 Foulborn The Red Dream Jewel
- Gain 6% of Fire Damage as Extra Chaos Damage
- Passives granting Fire Resistance or all Elemental Resistances in Radius also grant increased Maximum Life at 50% of its value
Stormshroud Jewel
- 20% reduced Bleed Duration on you
- +14% to Lightning Resistance
- Modifiers to Chance to Avoid being Shocked apply to all Elemental Ailments
The Light of Meaning Jewel
- Passive Skills in Radius also grant 6% increased Physical Damage
 Replica Reckless Defence Jewel
- +6% Chance to Block Spell Damage
- +4% Chance to Block Attack Damage
- +10% chance to be Frozen, Shocked and Ignited
Phoenix Eye Jewel
- Adds 4 Passive Skills
- 1 Added Passive Skill is a Jewel Socket
- Added Small Passive Skills grant: 10% increased Area Damage
- Added Small Passive Skills also grant: +3 to All Attributes
- Added Small Passive Skills also grant: +5% to Fire Resistance
- 1 Added Passive Skill is Assert Dominance
- 1 Added Passive Skill is Towering Threat
Watcher's Eye Jewel
- 5% increased Damage
- 4% increased maximum Energy Shield
- 6% increased maximum Life
- 6% increased maximum Mana
- 29% of Physical Damage Converted to Lightning Damage while affected by Wrath
- Gain 23 Life per Enemy Hit while affected by Vitality
- Unaffected by Vulnerability while affected by Determination
Elegant Hubris Jewel
- Commissioned 148520 coins to commemorate Caspiro
- Passives in radius are Conquered by the Eternal Empire
- Historic
Vivid Curio Jewel
- Adds 8 Passive Skills
- 2 Added Passive Skills are Jewel Sockets
- Added Small Passive Skills grant: 12% increased Chaos Damage
- 1 Added Passive Skill is Unspeakable Gifts
- Added Small Passive Skills also grant: +5% to Fire Resistance
- 1 Added Passive Skill is Overwhelming Malice
- 1 Added Passive Skill is Unwaveringly Evil
 Empyrean Scar Jewel
- Adds 2 Passive Skills
- Added Small Passive Skills grant: 15% increased Armour
- Added Small Passive Skills also grant: +8 to Dexterity
- Added Small Passive Skills also grant: +3 to Intelligence
- Added Small Passive Skills also grant: +4 to Maximum Energy Shield
- 1 Added Passive Skill is Enduring Composure

- 66% reduced Amount Recovered
- Instant Recovery
- Grants Immunity to Bleeding for 9 seconds if used while Bleeding
- Grants Immunity to Corrupted Blood for 9 seconds if used while affected by Corrupted Blood
- 66% reduced Amount Recovered
- Instant Recovery
- Recover an additional 26% of Flask's Life Recovery Amount over 10 seconds if used while not on Full Life

All gem links (9 groups)
- Raise Spectre L21
- Lifetap L1
- Frostblink L3
- Controlled Destruction 20/20
- Minion Pact 3/20
- Increased Critical Damage 20/20
- Greater Unleash 3/11
- Blade Vortex 20/20
- Void Manipulation 20/20
- Lifetap L1
- Enlighten 3/20
- Tempest Shield L20
- Determination L21
- Flesh and Stone L20
- Raise Spectre 21/20
- Empower L3
- Minion Life 21/20
-
 Divine Sentinel 3/20
 - Companionship 3/23
-
 Eclipse 3/17
-
 More Duration 21/20
 -
 Automation L20
 - Lifetap L1
- Faster Attacks 20/20
- Lifetap L1
- Shield Charge L20
- Herald of Ash 20/21
-
 Vitality L1
 -
 Portal 1/20
- Unknown Gem L1
- Unknown Gem L1
How this stage plays (mechanics, defences)
The endgame reference's damage engine is Cane of Kulemak — a unique Serpentine Staff with +22% attack block while wielding a staff and 88% increased unveiled modifier magnitudes, paired with +3 to socketed support gems and +88% chaos DoT multi. The 6-link runs Blade Vortex + Controlled Destruction Support + Minion Pact Support + Increased Critical Damage Support + Greater Unleash Support + Void Manipulation Support — a cleaner crit build than the early-mapping Arcane Surge Support variant. Marylene's Fallacy on the neck is the signature unique — it grants +303% global crit multi but -50% less crit chance, which is a net win when crit chance hits 100% via power charges + tree and then cannot go higher. Kalandra's Touch in ring 2 mirrors the rare Oblivion Knot Bone Ring for doubled life and minion-life rolls.
The Brass Dome is the signature chest — 374% increased armour, +5% max all elemental resistances, take no extra damage from crits, and the drawback Strength provides no bonus to life. The crit-immune clause is huge — it converts every incoming crit to a regular hit, which after 90% armour mitigation rarely dents the 4.2k life pool. Determination is the main aura now, running alongside Tempest Shield + Flesh and Stone. The Raise Spectre setup in the weapon slot (Raise Spectre + Empower Support + Minion Life Support + Divine Sentinel Support + Companionship Support + Eclipse Support) turns the spectres into self-sustaining damage procs via Minion Pact Support.
EHP 66k, built on armour rather than block. 90% physical damage reduction from Determination + 44.6k armour + The Brass Dome's 374% armour. Take no extra damage from crits removes the biggest one-shot risk. Resistances overcap to 85% fire / 85% cold / 84% lightning thanks to The Brass Dome's +5% max all. Chaos resist stays at 75%. 54/62% block is a major downgrade from the early-mapping block wall, and is the main reason this reference feels like a stylistic break from the rest of the tier — this variant is tanking hits, not blocking them. Unwavering Stance provides stun immunity so Blade Vortex channeling isn't interrupted by incoming hits.
Slower and tankier than the block variant. The build trades the "stand in arena and block everything" of early mapping for "stand in arena and eat everything on armour." 2.38 casts/sec is significantly slower than the block-stacker (3.73), and Headhunter is not running at this tier — Screams of the Desiccated replaces it for the Diamond Shrine on-flask permanent crit multiplier. The playstyle feels more like a classic armour-stacker channeller — slam in with Shield Charge, stack blades, let armour eat phys, let resist/Brass-Dome-overcap eat ele.
Passive tree (131 points)
The desktop app shows this tier's full tree on an interactive canvas.
Aspirational L95–100
- Aspirational returns to the block-stacker chassis from early mapping — same Azadi Crest + 98% block shell, same Headhunter belt, same 3.73 casts/sec pacing, but upgraded into the mirror-tier versions of every rare. The endgame tier's Brass Dome detour is abandoned. Forbidden Flame + Forbidden Flesh now allocate Brutal Fervour, and Militant Faith replaces Elegant Hubris for Devotion-based elemental damage scaling.
 Blade VortexLifetapIncreased Critical DamageAdded Fire DamageArcane SurgeMinion PactUnleash
Full gear (32 items)
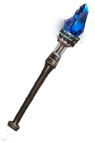 Woe Breaker Weapon 1
- Quality does not increase Physical Damage
- Grants 1% increased Area of Effect per 4% Quality
- Enemies you Kill have a 15% chance to Explode, dealing a tenth of their maximum Life as Physical Damage
- 18% increased Cold Damage
- 105% increased Spell Critical Strike Chance
- +1 to Level of all Spell Skill Gems
- Can have up to 3 Crafted Modifiers (crafted)
- 46% increased Spell Damage (crafted)
- Gain 7% of Physical Damage as Extra Chaos Damage (crafted)
- Gain 4% of Non-Chaos Damage as extra Chaos Damage (crafted)
Azadi Crest Weapon 2
- 4% Chance to Block Spell Damage
- +94 to maximum Life
- +5% Chance to Block
- 7% chance to avoid Projectiles
- Your Lucky or Unlucky effects use the best or worst from three rolls instead of two
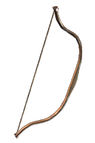 Synthesised Upgraded Thicket Bow Weapon 1 Swap
- +3% to Quality of Socketed Gems
- Gain 14 Life per Enemy Killed
- +8% to Quality of Socketed Gems (crafted)
Maloney's Mechanism Weapon 2 Swap
- Has 1 Socket
- Has 2 Sockets
- Trigger a Socketed Bow Skill when you Attack with a Bow, with a 1 second Cooldown
- 7% increased Attack Speed
- +51 to maximum Life
- 5% chance to Blind Enemies on Hit with Attacks
Corpse Glance Helmet
- 7% of Physical Damage from Hits taken as Lightning Damage
- 18% increased Area of Effect
- +2 to Level of all Minion Skill Gems
- +13% chance to Suppress Spell Damage
- +129 to maximum Life
- +47% to Fire Resistance
- 60% chance to Avoid being Shocked
- +1 to Level of Socketed AoE Gems (crafted)
- 10% increased Area of Effect (crafted)
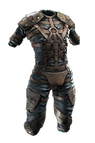 Maelstrom Mantle Body Armour
- +1 to Level of Socketed Support Gems
- +5% to Quality of Socketed Support Gems
- +21% chance to Suppress Spell Damage
- +156 to maximum Life
- +46% to Cold Resistance
- 10% increased Area of Effect
- Enemies you Kill have a 35% chance to Explode, dealing a tenth of their maximum Life as Physical Damage
- +35% to Fire Resistance (crafted)
Entropy Talons Gloves
- 0.4% of Chaos Damage Leeched as Life
- 15% chance to Unnerve Enemies for 4 seconds on Hit
- +2 to Level of Socketed Minion Gems
- +12% chance to Suppress Spell Damage
- +117 to maximum Life
- +43% to Cold Resistance
- +35% to Chaos Resistance
- 12% increased Area of Effect (crafted)
- 16% increased Area Damage (crafted)
Fate Urge Boots
- 38% increased Evasion Rating
- +120 to maximum Life
- +2 to Level of all Raise Spectre Gems
- 30% increased Movement Speed
- 15% increased Stun and Block Recovery
- 15% increased Effect of Tailwind on you
- You have Tailwind if you have dealt a Critical Strike Recently
- 23% chance to Avoid Elemental Ailments (crafted)
Victory Medallion Amulet
- Allocates Force of Darkness
- -1 Prefix Modifier allowed
- -2 Suffix Modifiers allowed
- Implicit Modifiers Cannot Be Changed
- 100% increased Explicit Modifier magnitudes
- +90% to Global Critical Strike Multiplier
- +2 to Level of all Skill Gems
- +2 to Level of all Physical Skill Gems
Gloom Coil Ring 1
- Your Chilling Towers freeze enemies for 0.2 seconds while they are affected by chilling beams
- Minions have +15% to all Elemental Resistances
- +35% to Chaos Resistance
- +128 to maximum Life
- +84 to maximum Mana
- +47% to Lightning Resistance
- Minions have 37% increased maximum Life
- 17% increased Damage (crafted)
Death Rush Ring 2
- +27% to Chaos Resistance
- Recover 5% of Life on Kill
- Gain Adrenaline for 3 seconds on Kill
Headhunter Belt
- Zealotry has 19% increased Aura Effect
- +64 to Strength
- +48 to Dexterity
- +58 to maximum Life
- 28% increased Damage with Hits against Rare monsters
- When you Kill a Rare monster, you gain its Modifiers for 60 seconds
Fulgent Cut Jewel
- Adds 8 Passive Skills
- 2 Added Passive Skills are Jewel Sockets
- Added Small Passive Skills grant: 10% increased Spell Damage
- Added Small Passive Skills also grant: 4% increased Mana Regeneration Rate
- 1 Added Passive Skill is Conjured Wall
- 1 Added Passive Skill is Essence Rush
- 1 Added Passive Skill is Mage Hunter
 Forbidden Flesh Jewel
- Allocates Brutal Fervour if you have the matching modifier on Forbidden Flame
Unnatural Instinct Jewel
- Allocated Small Passive Skills in Radius grant nothing
- Grants all bonuses of Unallocated Small Passive Skills in Radius
Pandemonium Essence Jewel
- Adds 5 Passive Skills
- 1 Added Passive Skill is a Jewel Socket
- Added Small Passive Skills grant: 10% increased Area Damage
- Added Small Passive Skills also grant: 3% increased Area of Effect
- Added Small Passive Skills also grant: +5% to Fire Resistance
- 1 Added Passive Skill is Assert Dominance
- 1 Added Passive Skill is Towering Threat
Bramble Creed Jewel
- Adds 4 Passive Skills
- 1 Added Passive Skill is a Jewel Socket
- Added Small Passive Skills grant: 10% increased Area Damage
- Added Small Passive Skills also grant: 3% increased Area of Effect
- Added Small Passive Skills also grant: +7% to Fire Resistance
- 1 Added Passive Skill is Assert Dominance
- 1 Added Passive Skill is Towering Threat
Stormshroud Jewel
- 5% increased Area of Effect
- +11% to Lightning Resistance
- Modifiers to Chance to Avoid being Shocked apply to all Elemental Ailments
The Light of Meaning Jewel
- Passive Skills in Radius also grant 6% increased Physical Damage
Elegant Hubris Jewel
- Commissioned 45480 coins to commemorate Caspiro
- Passives in radius are Conquered by the Eternal Empire
- Historic
Luminous Vessel Jewel
- Adds 4 Passive Skills
- 1 Added Passive Skill is a Jewel Socket
- Added Small Passive Skills grant: 10% increased Area Damage
- Added Small Passive Skills also grant: 3% increased Area of Effect
- Added Small Passive Skills also grant: +4% to Chaos Resistance
- 1 Added Passive Skill is Assert Dominance
- 1 Added Passive Skill is Towering Threat
Carrion Sliver Jewel
- Adds 4 Passive Skills
- 1 Added Passive Skill is a Jewel Socket
- Added Small Passive Skills grant: 10% increased Area Damage
- 1 Added Passive Skill is Assert Dominance
- Added Small Passive Skills also grant: 3% increased Area of Effect
- Added Small Passive Skills also grant: Regenerate 0.15% of Life per Second
- 1 Added Passive Skill is Towering Threat
Bramble Joy Jewel
- Adds 8 Passive Skills
- 2 Added Passive Skills are Jewel Sockets
- Added Small Passive Skills grant: 12% increased Chaos Damage
- 1 Added Passive Skill is Unspeakable Gifts
- Added Small Passive Skills also grant: +3 to All Attributes
- 1 Added Passive Skill is Overwhelming Malice
- 1 Added Passive Skill is Touch of Cruelty
Foulborn Might of the Meek Jewel
- 75% increased Effect of non-Keystone Passive Skills in Radius
- Notable Passive Skills in Radius grant nothing
Impossible Escape Jewel
- Passive Skills in Radius of Elemental Equilibrium can be Allocated without being connected to your tree
- Passage
Forbidden Flame Jewel
- Allocates Brutal Fervour if you have the matching modifier on Forbidden Flesh
 Rapture Drop Jewel
- Corrupted Blood cannot be inflicted on you
- +2% Chance to Block Spell Damage while holding a Shield
- +10% to Global Critical Strike Multiplier
- +8% to all Elemental Resistances
- +60 to Maximum Charges
- 31% increased Charges per use
- Grants a random Divination Buff for 20 seconds when Used
- +17 to Maximum Charges
- Recharges 5 Charges when you Consume an Ignited corpse
- Enemies Ignited by you during Effect have Malediction
- Enemies Ignited by you during Effect take 9% increased Damage
- Recover 3% of Mana when you Kill an Enemy during Effect
- 17% reduced Duration
- Consecrated Ground created by this Flask has Tripled Radius
- Consecrated Ground created during Effect applies 10% increased Damage taken to Enemies
- 139% increased Critical Strike Chance against Enemies on Consecrated Ground during Effect
- 38% increased Duration
- 30% increased Rarity of Items found during Effect (crafted)
- 39% increased Duration
- 14% increased Movement Speed during Effect
All gem links (9 groups)
- Frostblink 20/20
- Assassin's Mark 20/20
- Arcane Surge L2
-
 Added Chaos Damage L1
- Shield Charge 20/20
- Lifetap L3
-
 Momentum 20/20
 - Faster Attacks L1
- Lifetap 20/20
- Increased Critical Damage 20/23
- Added Fire Damage 21/20
- Arcane Surge 21/20
- Blade Vortex 20/20
- Minion Pact 4/23
- Unleash L1
- Empower 4/20
- Minion Life 21/20
- Raise Spectre L21
- Companionship 3/20
- Enlighten L4
- Tempest Shield 21/20
- Zealotry L21
- Herald of Ash 21/20
- Enlighten L3
- Enlighten L3
- Lifetap L1
- Cast when Damage Taken L4
- Flesh and Stone L21
- Unknown Gem L1
- Unknown Gem L1
- Unknown Gem L1
How this stage plays (mechanics, defences)
DPS climbs to 1.3M at 46.88% crit chance with 4.56x multi — notably below the Elementalist ceiling but this variant is not optimized for raw damage. The rare Opal Sceptre main weapon runs 105% spell crit chance + +1 all spell gems + 46% spell damage + explosive-on-kill implicit. The 6-link chest (Maelstrom Mantle, +1 socketed supports / +5% quality Syndicate's Garb) runs Blade Vortex + Lifetap Support + Increased Critical Damage Support + Added Fire Damage Support + Arcane Surge Support + Minion Pact Support. Lifetap Support removes mana cost entirely for the main skill, freeing the mana pool for Zealotry + Herald of Ash + Tempest Shield + Flesh and Stone auras + Herald of the Hive from Lost Unity-adjacent uniques.
Brutal Fervour from the Forbidden jewel pair is the Slayer ascendancy's signature — 20% increased damage and speed while leeching, plus cannot be stunned while leeching. BV sustains leech permanently through the cluster jewel Doryani's Lesson node (life leech from elemental damage) and the rare ring's life per enemy killed, so the Brutal Fervour buff is effectively permanent. Militant Faith with the Devotion increased elemental damage per 10 Devotion roll scales the Templar-radius passives into a large elemental multiplier — at 90-100 Devotion that's roughly +30-40% more elemental damage. Foulborn Might of the Meek stays in the Scion radius for the +75% effect of non-keystone passives value. Cluster jewels lean into Assert Dominance + Towering Threat (medium cluster meta for BV) and Overwhelming Malice (large cluster crit-multi).
EHP 1.58M — essentially unchanged from early mapping, the block wall is already at its ceiling by L84. 98% block / 98% spell block holds, 100% spell suppression holds, all resistances sit at 75% capped with meaningful overcap on cold (+25). Chaos resist 75% capped. 12% physical damage reduction is the main change from early mapping — this build does NOT stack armour, relying entirely on block + suppress + resist layers. Unwavering Stance provides stun immunity. The three-roll-lucky mechanic from Azadi Crest effectively means any hit that would otherwise succeed past block needs to roll the bottom 2% of the distribution three times in a row — in practice, you do not die to normal hits. Uncounterable mechanics (Sirus die beams, Uber Maven memory-game) remain the only consistent death vectors.
The classic Gladiator power fantasy. Headhunter + Death Rush + Adrenaline turns map clear into a kill-chain where every rare kill stacks temporary mods for a minute, and those mods feed back into Blade Vortex's damage, speed, and AoE. Shield Charge + Momentum Support + Faster Attacks Support traverses the map at ludicrous speed while BV maintains stacks between charges. Bossing is genuinely trivial — 98/98 block + 100% suppress + Brutal Fervour's permanent leech-speed buff means you cannot be stunned, cannot be ailment-chained, and regen-heal through whatever damage slips past block. The rotation is essentially "walk forward." This is what Gladiator was supposed to be.
Passive tree (133 points)
The desktop app shows this tier's full tree on an interactive canvas.