
Leveling L1–68
- Act 1: run Caustic ArrowBuy Caustic Arrow from Nessa after killing Hillock — it is the smoothest Act 1 bow skill and carries on any crude bow. Pierce Support from the Brutus quest reward turns it into a lane-clearer. Slot a low-level Clarity for mana sustain. Dash from the Mercy Mission reward is your main mobility tool until you get Blink Arrow. Don't bother with crit gear this early — the build is hit-based, not ignite, and you're only running Caustic Arrow as a stand-in for clear.
- Act 2: run Caustic ArrowPick up Herald of Ice from Yeena — the shatter effect clears packs that Caustic Arrow's DoT is slow against. Add Void Manipulation Support once you have a 4-link. Slot Cast when Damage Taken + Steelskin for panic defense once you hit L10. Take "Oak" (kill Kraityn and Alira, help Oak — +1 endurance charge, +40 life, +18% phys reduction) bandit reward for the leveling survivability — you will respec to "kill all" later for the passive points.
- Act 3: run Tornado ShotTornado Shot from the Library quest reward takes over as main skill — it is the best general-purpose projectile clear skill in the game and trains your positioning for Elemental Hit of the Spectrum later. Grab Hatred from the Library quest and run it as main aura. Sniper's Mark from Yeena becomes your single-target curse. Blink Arrow from Clarissa replaces Dash. Lab 1 here: Gathering Winds — the attack speed + projectile speed buff feels great on Tornado Shot.
- Act 6: run Elemental Hit of the SpectrumL28: buy Elemental Hit of the Spectrum from Lilly Roth in Act 6 — this is the transition moment. Trinity Support and Inspiration Support are also on her list. Pick up Wrath from the Ankhs quest reward and run it alongside Hatred. Unlike vanilla Elemental Hit, Spectrum rolls fire/cold/lightning on every hit — do NOT slot Combat Focus Support, it is a trap for this variant. Initial damage will feel soft for a zone or two while Trinity Support charges ramp, then it snaps into place. Lab 2 in Act 6: Endless Munitions for the extra projectile.
- Act 9: run Elemental Hit of the SpectrumAnger from the Lani quest reward stacks with Hatred and Wrath for all three flat-elemental auras running simultaneously — this is the Spectrum aura trinity and carries the build through endgame. Greater Volley (3.28 Exceptional Support Gem replacement for Greater Multiple Projectiles) becomes your clear-link once you have a 5-link; it adds projectiles with less damage penalty than the old GMP. Lab 3 in Act 9: Far Shot — projectile damage scales with distance, so you now want to be shooting from the edge of your screen.
- Act 10: run Elemental Hit of the SpectrumIntroduce a low-level Precision for accuracy without eating too much mana. Carry a boss-swap: replace Greater Volley with Barrage Support in the chest link for single-target fights — Barrage Support concentrates every projectile on the boss, while Greater Volley is the clear-link. Most bow builds carry this two-gem swap from Act 10 through endgame. Work toward capping all 75% resist values before maps — Focal Point (Lab 4, Uber Lab) converts Sniper's Mark into a permanent buff and is the final ascendancy spike.
 Caustic Arrow
  Pierce Support
  Mirage Archer Support
  Dash
Dash  Clarity
 Buy Caustic Arrow from Nessa after killing Hillock — it is the smoothest Act 1 bow skill and carries on any crude bow. Pierce Support from the Brutus quest reward turns it into a lane-clearer. Slot a low-level Clarity for mana sustain. Dash from the Mercy Mission reward is your main mobility tool until you get Blink Arrow. Don't bother with crit gear this early — the build is hit-based, not ignite, and you're only running Caustic Arrow as a stand-in for clear.
Caustic Arrow Pierce Support Mirage Archer Support  Void Manipulation Support Dash
  Herald of Ice Clarity
  Cast when Damage Taken
  Steelskin
 Pick up Herald of Ice from Yeena — the shatter effect clears packs that Caustic Arrow's DoT is slow against. Add Void Manipulation Support once you have a 4-link. Slot Cast when Damage Taken + Steelskin for panic defense once you hit L10. Take "Oak" (kill Kraityn and Alira, help Oak — +1 endurance charge, +40 life, +18% phys reduction) bandit reward for the leveling survivability — you will respec to "kill all" later for the passive points.
 Tornado Shot Pierce Support Mirage Archer Support
  Elemental Damage with Attacks Support
  Blink Arrow
  Hatred Herald of Ice Cast when Damage Taken Steelskin
  Sniper's Mark
 Tornado Shot from the Library quest reward takes over as main skill — it is the best general-purpose projectile clear skill in the game and trains your positioning for Elemental Hit of the Spectrum later. Grab Hatred from the Library quest and run it as main aura. Sniper's Mark from Yeena becomes your single-target curse. Blink Arrow from Clarissa replaces Dash. Lab 1 here: Gathering Winds — the attack speed + projectile speed buff feels great on Tornado Shot.
 Elemental Hit of the Spectrum Elemental Damage with Attacks Support
  Trinity Support
  Inspiration Support Pierce Support Blink Arrow Hatred
  Wrath Herald of Ice Cast when Damage Taken Steelskin Sniper's Mark
 L28: buy Elemental Hit of the Spectrum from Lilly Roth in Act 6 — this is the transition moment. Trinity Support and Inspiration Support are also on her list. Pick up Wrath from the Ankhs quest reward and run it alongside Hatred. Unlike vanilla Elemental Hit, Spectrum rolls fire/cold/lightning on every hit — do NOT slot Combat Focus Support, it is a trap for this variant. Initial damage will feel soft for a zone or two while Trinity Support charges ramp, then it snaps into place. Lab 2 in Act 6: Endless Munitions for the extra projectile.
Elemental Hit of the Spectrum Elemental Damage with Attacks Support Trinity Support Inspiration Support  Greater Volley Blink Arrow Hatred Wrath
  Anger Herald of Ice Cast when Damage Taken Steelskin Sniper's Mark
 Anger from the Lani quest reward stacks with Hatred and Wrath for all three flat-elemental auras running simultaneously — this is the Spectrum aura trinity and carries the build through endgame. Greater Volley (3.28 Exceptional Support Gem replacement for Greater Multiple Projectiles) becomes your clear-link once you have a 5-link; it adds projectiles with less damage penalty than the old GMP. Lab 3 in Act 9: Far Shot — projectile damage scales with distance, so you now want to be shooting from the edge of your screen.
Elemental Hit of the Spectrum Elemental Damage with Attacks Support Trinity Support Inspiration Support Greater Volley Blink Arrow Hatred Wrath Anger  Precision Herald of Ice Cast when Damage Taken Steelskin Sniper's Mark
 Introduce a low-level Precision for accuracy without eating too much mana. Carry a boss-swap: replace Greater Volley with Barrage Support in the chest link for single-target fights — Barrage Support concentrates every projectile on the boss, while Greater Volley is the clear-link. Most bow builds carry this two-gem swap from Act 10 through endgame. Work toward capping all 75% resist values before maps — Focal Point (Lab 4, Uber Lab) converts Sniper's Mark into a permanent buff and is the final ascendancy spike.
Elemental Hit of the Spectrum Elemental Damage with Attacks Support Trinity Support Inspiration Support Greater Volley Pierce Support Blink Arrow Hatred Wrath Anger Precision Herald of Ice Cast when Damage Taken Steelskin Sniper's Mark Run Uber Lab as soon as you hit L68 to grab Focal Point — this is the quality-of-life spike that makes maps click. Your 6-link now looks like Elemental Hit of the Spectrum + Elemental Damage with Attacks Support + Trinity Support + Inspiration Support + Greater Volley + Pierce Support for clear, swapping Greater Volley → Barrage Support for bosses. Elemental penetration on tree (Lethality, Master Fletcher) now scales faster than added-damage nodes, so prioritise pen clusters next. Acrobatics is the defensive keystone the endgame guide is built around — take it once you have the dex and a spare point.
How leveling works
Elemental Hit of the Spectrum is the transfigured variant of Elemental Hit that rolls all three elements simultaneously on every attack instead of one at random. This completely changes how the skill scales: vanilla Elemental Hit wants Combat Focus Support to lock a single element, but Spectrum wants the opposite — it stacks fire, cold, and lightning together and rewards every flat elemental penetration and added-elemental-damage-to-attacks mod you can find. Paired with a Deadeye, the projectile ascendancy path (Gathering Winds → Endless Munitions → Far Shot → Focal Point) turns a bow setup into a screen-wide projectile clearer that scales all three elements through one attack.
The transfigured gem itself only becomes available at L28 from Lilly Roth in Act 6, so the leveling path uses stand-in bow skills. Caustic Arrow carries Acts 1–3 with trivial gear (any bow + a bit of chaos scaling), Tornado Shot takes over from Act 3 onward once the quest reward drops and projectile scaling starts to matter, and Frost Blades is the recommended alternative for anyone who prefers a melee-flavoured leveler before committing to the bow. The ascendancy path you'll grab in the Labs is Gathering Winds → Endless Munitions → Far Shot → Focal Point. Focal Point is the build-defining node: it converts nearby marks into permanent buffs for you, which is why Sniper's Mark ends up as the default curse.
Uniques like Quill Rain (for raw attack speed while leveling a bow), Storm Cloud (flat added lightning on a cheap short bow), Goldrim (resists), Wanderlust (freeze immunity + move speed), and a Lifesprig if you happen to pick one up early are all cheap accelerators. Rush a Tabula Rasa if you can find one — a guaranteed 6-link turns the Spectrum transition into an instant powerspike the moment you hit L28. Save real currency for endgame bows; the campaign runs fine on vendor-recipe elemental quivers and rares.
Gear while leveling
- · Bow: any rare bow with added elemental damage through the campaign — vendor recipe (magic bow + topaz/sapphire/ruby ring + Blacksmith's Whetstone) keeps you topped up. Quill Rain is a fantastic leveling bow the moment you can afford one — the raw attack speed carries Spectrum until your rare upgrades land.
- · Body armour: rush a Tabula Rasa if you can find or buy one — a guaranteed 6-link turns the L28 Spectrum transition into a massive powerspike. Otherwise a 4-link evasion chest with life and resists.
- · Helmet/gloves/boots: life and resists above everything else. Goldrim (helmet) and Wanderlust (boots) are both cheap leveling uniques that solve resist and freeze-immunity problems at the same time.
- · Rings/amulet: life + resists + attribute fix-ups. Lifesprig (an early leveling wand) is worth a mention if you pick one up for the offhand swap slot, though for a bow main it matters less.
- · Quiver: rare quiver with life, resists, and added physical or added elemental damage to attacks. This is one of the easiest slots to upgrade — farm divination cards or buy cheap rares every 20 levels.
- · Flasks: a life flask with bleed-removal, a quicksilver for travel, a granite + iron skin or stibnite for mid-campaign armour, and a diamond flask from Act 6 onwards once crit starts mattering for the ramp phase.
Weapon progression
Use vendor-recipe elemental bows (magic bow + topaz/sapphire/ruby + Whetstone → guaranteed elemental damage roll) through Acts 1–5. Storm Cloud is a useful short-bow leveling unique around L18 — flat added lightning damage pairs nicely with Tornado Shot. Around the Elemental Hit of the Spectrum transition at L28, pivot to Quill Rain if you haven't already — the attack speed carries the build until you can craft or buy a real rare. The endgame target is a rare bow with multiple "added X damage to attacks" prefixes on a fast bow base (Thicket Bow or Short Bow), ideally with attack speed and a crafted +1 socketed gems mod, but this is far above leveling priorities — get to maps with anything.
Tree to aim for (by level 90)
Watch out for
- ! Do NOT slot Combat Focus Support in Elemental Hit of the Spectrum. Combat Focus locks Elemental Hit to a single element — which is correct for vanilla Elemental Hit, but Spectrum's entire point is rolling all three simultaneously. Slotting Combat Focus will silently reduce your damage by a large margin because the gem still rolls all three, and you lose the rest of the gem's utility.
- ! Elemental penetration scales all three elements at once for Spectrum, which is why penetration nodes on tree (Lethality, Master Fletcher) and Trinity Support are disproportionately powerful compared to added-flat-damage nodes after the midgame. Weigh pen > added damage once you're past L75.
- ! Focal Point converts Sniper's Mark into a permanent aura-style buff on you — but it stops affecting the cursed enemy. This is normally a huge DPS upgrade, but if you're relying on the mark for a specific boss mechanic it can surprise you. Don't panic if your single-target feels different the first time you enter a boss after Uber Lab.
- ! Point Blank is tempting for a projectile bow build but conflicts with the Deadeye Far Shot ascendancy — Far Shot wants you at max distance, Point Blank wants you at zero distance. Pick one. The endgame guide takes Far Shot and skips Point Blank.
- ! Acrobatics requires dexterity and gives up a chunk of armour/block — don't take it early, it will make leveling feel squishier. Wait until you have L68+ gear and the evasion tree investment to actually benefit from the dodge.
- ! The 6-link for Elemental Hit of the Spectrum has two modes: Greater Volley for clear, Barrage Support for single-target. Carry both gems leveled and swap them in the chest link before boss fights — the boss-swap is the biggest single-target increase the build has access to pre-weapon-upgrade.
Early Mapping L70–84
- Swap to Heatshiver helmet once chill uptime is reliable — massive cold-to-fire conversion multiplier
- Pick up Focal Point as the fourth ascendancy for Sniper's Mark empowerment

 Elemental Hit of the Spectrum
 Returning ProjectilesTrinity
 Increased Critical DamageElemental Damage with AttacksMirage Archer
Full gear (15 items)
 Blight Guide Weapon 1
- Adds 128 to 266 Cold Damage
- Adds 127 to 246 Fire Damage
- Adds 31 to 506 Lightning Damage
- 31% increased Critical Strike Chance
- +38% to Global Critical Strike Multiplier
- 11% increased Attack Speed (crafted)
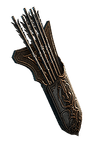 Brimstone Arrow Weapon 2
- 28% increased Projectile Speed
- Adds 5 to 10 Physical Damage to Attacks
- Adds 7 to 12 Fire Damage to Attacks
- +13% to Fire Resistance
- +20% to Lightning Resistance
- Gain 14 Life per Enemy Killed
 Carrion Shelter Helmet
- 9% increased Global Accuracy Rating
- +126 to Evasion Rating
- +89 to maximum Life
- +7% to Lightning Resistance
- 5% increased Light Radius
- +16% to Fire and Lightning Resistances (crafted)
 Torment Carapace Body Armour
- 71% increased Evasion Rating
- +11 to Dexterity
- +409 to Evasion Rating
- 28% increased Evasion Rating
- +48% to Cold Resistance
- 13% increased Stun and Block Recovery
- +28% to Lightning Resistance (crafted)
 Corpse Palm Gloves
- +9% chance to Suppress Spell Damage
- +36 to Dexterity
- +137 to Evasion Rating
- +114 to maximum Life
- +34% to Fire Resistance
- 18% increased Evasion Rating (crafted)
- +14 to maximum Life (crafted)
 Plague League Boots
- +148 to Evasion Rating
- +127 to maximum Life
- +29% to Lightning Resistance
- 30% increased Movement Speed
- 16% increased Stun and Block Recovery
- +4% chance to Suppress Spell Damage (crafted)
Hyrri's Truth Amulet
- +29 to Dexterity
- Grants Level 30 Precision Skill
- +76 to Dexterity
- +49% to Global Critical Strike Multiplier
- Bow Attacks have Culling Strike
- Precision has 100% increased Mana Reservation Efficiency
The Taming Ring 1
- +10% to all Elemental Resistances
- +24% to all Elemental Resistances
- 10% chance to Freeze, Shock and Ignite
- 36% increased Elemental Damage with Hits and Ailments for each type of Elemental Ailment on Enemy
The Taming Ring 2
- +10% to all Elemental Resistances
- +23% to all Elemental Resistances
- 10% chance to Freeze, Shock and Ignite
- 36% increased Elemental Damage with Hits and Ailments for each type of Elemental Ailment on Enemy
 Sorrow Trap Belt
- +38 to maximum Life
- +16 to Strength
- +46 to Armour
- Regenerate 20 Life per second
- +27 to maximum Mana
- +22% to Cold Resistance
- 26% increased Elemental Damage with Attack Skills (crafted)

- 66% reduced Amount Recovered
- Instant Recovery
- Grants Immunity to Bleeding for 8 seconds if used while Bleeding
- Grants Immunity to Corrupted Blood for 8 seconds if used while affected by Corrupted Blood

- 66% reduced Amount Recovered
- Effect is not removed when Unreserved Mana is Filled
- Effect does not Queue
- Grants Immunity to Chill for 10 seconds if used while Chilled
- Grants Immunity to Freeze for 10 seconds if used while Frozen

- 23% chance to gain a Flask Charge when you deal a Critical Strike
- 23% chance to Freeze, Shock and Ignite during Effect

- 21% chance to gain a Flask Charge when you deal a Critical Strike
- 48% increased Evasion Rating during Effect

- 13% chance to gain a Flask Charge when you deal a Critical Strike
- 41% increased Armour during Effect
All gem links (6 groups)
-
 Cast On Critical Strike L18
 - Sniper's Mark L19
-
 Manaforged Arrows L19
 -
 Power Charge On Critical L7
 -
 Tornado L17
 -
 Storm Rain L19
-
 Blood Rage L17
 - Manaforged Arrows L19
-
 Frenzy L19
 -
 Puncture L18
- Blink Arrow L19
-
 Flesh and Stone L8
 -
 Flame Dash L5
 -
 Grace L18
-
 Focused Ballista L18
 -
 Artillery Ballista L18
 - Inspiration L15
- Elemental Damage with Attacks L15
- Returning Projectiles L18
- Trinity L17
- Elemental Hit of the Spectrum 18/9
- Increased Critical Damage L7
- Elemental Damage with Attacks L15
- Mirage Archer L19
- Precision L30
How this stage plays (mechanics, defences)
Elemental Hit of the Spectrum is the transfigured variant that breaks the gem's defining rule: vanilla Elemental Hit rolls one of fire, cold, or lightning per swing, but Spectrum rolls ALL THREE at once. That changes the entire scaling philosophy — you never want Combat Focus (it locks the skill back to a single element), and every source of flat elemental damage, penetration, and added-damage-with-attacks scales ALL three rolls simultaneously. The gem shares a 6-link with Trinity Support + Elemental Damage with Attacks Support + Inspiration Support + Returning Projectiles + Mirage Archer in Carrion Siege (a rare Solarine Bow) with huge tri-element flat rolls: 128–187 fire, 120–205 cold, 31–561 lightning. Trinity Support's resonance multiplier is always-on here because every hit applies all three elements, which is the whole reason the transfigured gem exists.
Ailment layering compounds the damage. The Taming is double-stacked in both rings, granting 38% + 30% increased Elemental Damage with Hits and Ailments per type of Elemental Ailment on Enemy, and Yoke of Suffering adds another 9% per ailment type on top. Because Spectrum hits with all three elements, the player reliably inflicts Ignite (via ignite) and shock — Yoke's "Your Elemental Damage can Shock" line plus 10% chance to Shock seals that floor. Hyrri's Ire contributes 120–164 added cold damage with bows and 30% suppress. The tree at 120 points grabs Forces of Nature, One With Nature, Multishot, Endless Munitions, Longshot, and Piercing Shots — pure elemental-projectile scaling. Gathering Winds, Endless Munitions, and Far Shot form the ascendancy core, with The Fledgling helmet stacking its own Far Shot on top for a doubled far-shot multiplier.
Defence is the Deadeye evasion-plus-suppress stack, not armour or block. 100% spell suppression is hit thanks to Hyrri's Ire (+30%) plus suppress rolls layered across tree nodes and gear. 15.5k evasion from Hyrri's Ire + The Fledgling + rare boots/gloves keeps physical and attack hits whiffing, and Purity of Elements + Haste run in the boots as the aura pair — Purity removes elemental ailments entirely and frees up the build from any elemental ailment avoidance investment. The Fledgling's "Projectiles cannot collide with Enemies in Close Range" keeps melee packs off the face while the bow fires. 2.5k life and 9k EHP are low by endgame standards but normal for a L83 reference — chaos resist at -40% is the only real compromise and gets fixed with a Thread of Hope + rare ring swap later.
Point-and-explode bow clear. Elemental Hit of the Spectrum fires returning multishot arrows that each roll all three elements, and Endless Munitions + Multishot + Solarine Bow's extra arrow stack four total projectiles per shot. Frenzy in the chest serves as a charge generator paired with Sniper's Mark + Cast On Critical Strike + Tornado + Power Charge On Critical for automatic curse + charge upkeep. Blink Arrow handles traversal. Damage feels explosive on packs because three ailments apply simultaneously and The Taming multiplier compounds instantly; single-target is weaker at this tier and relies on Ensnaring Arrow + stacking time.
Passive tree (113 points)
The desktop app shows this tier's full tree on an interactive canvas.
Endgame L85–94
- The main swap is helmet: The Fledgling is replaced by Heatshiver for its cold-to-fire conversion engine, and Hatred joins Purity of Elements as the second damaging aura. A Spine Bow with huge tri-element rolls replaces the Solarine Bow, and Ahuana's Bite quiver enables the chill-effect scaling that Heatshiver demands.
- Upgrade to Hyrri's Truth (72% of ladder) for ranger-specific crit and accuracy scaling
- Slot a Lethal Pride in the Karui cluster and seek Akoya seeds with crit/attack-speed conversions
- Add Unnatural Instinct once the tree has a viable socket for free notable scaling


 Elemental Hit of the SpectrumIncreased Critical DamageElemental Damage with AttacksTrinityReturning ProjectilesMirage Archer
Full gear (19 items)
Corruption Horn Weapon 1
- Quality does not increase Physical Damage
- 1% increased Attack Speed per 8% Quality
- Bow Attacks fire 2 additional Arrows
- +27 to Strength and Intelligence
- Adds 179 to 317 Fire Damage
- Adds 102 to 175 Cold Damage
- Adds 34 to 601 Lightning Damage
- 28% increased Critical Strike Chance
- 13% increased Attack Speed (crafted)
Ghoul Impaler Weapon 2
- 26% increased Projectile Speed
- 43% increased Damage with Bow Skills
- Adds 12 to 26 Cold Damage to Attacks
- Adds 8 to 130 Lightning Damage to Attacks
- Bow Attacks fire an additional Arrow
- 24% increased Projectile Speed
- 12% increased Attack Speed (crafted)
 Apocalypse Branch Weapon 1 Swap
- Adds 2 to 6 Cold Damage to Spells and Attacks
- 20% increased Spell Damage
- Adds 16 to 27 Fire Damage to Spells
- 11% increased Attack Speed
- 15% increased Cast Speed
- Gain 14 Mana per Enemy Killed
The Fledgling Helmet
- 176% increased Armour and Evasion
- 48% increased Projectile Speed
- 46% increased Projectile Damage
- Projectiles cannot collide with Enemies in Close Range
- Far Shot
Daresso's Defiance Body Armour
- 212% increased Armour and Evasion
- +90 to maximum Life
- 2% of Attack Damage Leeched as Life
- You lose all Endurance Charges when Hit
- You gain an Endurance Charge on Kill
- You gain Onslaught for 5 seconds per Endurance Charge when Hit
- 100% increased Effect of Onslaught on you
 Dusk Talons Gloves
- +5% chance to Suppress Spell Damage
- Gain 1 Rage on Attack Hit
- +8% chance to Suppress Spell Damage
- 59% increased Evasion Rating
- +30% to Chaos Resistance
- 25% increased Projectile Speed
- 19% increased Projectile Damage
- +26 to Strength (crafted)
 Blight Hoof Boots
- 21% increased Evasion Rating
- +119 to maximum Life
- +34% to Fire Resistance
- +29% to Chaos Resistance
- 30% increased Movement Speed
- 11% increased Stun and Block Recovery
- +33% to Lightning Resistance (crafted)
Hyrri's Truth Amulet
- Allocates Sovereignty
- +23 to Dexterity
- Grants Level 30 Precision Skill
- +69 to Dexterity
- +48% to Global Critical Strike Multiplier
- Bow Attacks have Culling Strike
- Precision has 100% increased Mana Reservation Efficiency
The Taming Ring 1
- +10% to all Elemental Resistances
- +25% to all Elemental Resistances
- 10% chance to Freeze, Shock and Ignite
- 33% increased Elemental Damage with Hits and Ailments for each type of Elemental Ailment on Enemy
The Taming Ring 2
- +10% to all Elemental Resistances
- +25% to all Elemental Resistances
- 10% chance to Freeze, Shock and Ignite
- 33% increased Elemental Damage with Hits and Ailments for each type of Elemental Ailment on Enemy
Bisco's Leash Belt
- +42 to Strength
- +18 to all Attributes
- +40% to Cold Resistance
- 1% increased Rarity of Items found per 15 Rampage Kills
- Rampage
 Thread of Hope Jewel
- Only affects Passives in Massive Ring
- Passive Skills in Radius can be Allocated without being connected to your tree
- -10% to all Elemental Resistances
- Passage
 Inspired Learning Jewel
- With 4 Notables Allocated in Radius, When you Kill a Rare monster, you gain 1 of its Modifiers for 20 seconds
Inspired Learning Jewel
- With 4 Notables Allocated in Radius, When you Kill a Rare monster, you gain 1 of its Modifiers for 20 seconds
- 20% reduced Charges per use
- Grants Immunity to Bleeding for 14 seconds if used while Bleeding
- Grants Immunity to Corrupted Blood for 14 seconds if used while affected by Corrupted Blood

- 40% increased Duration
- 51% increased Critical Strike Chance during Effect
- 21% increased Duration
- 53% increased Evasion Rating during Effect
- 30% reduced Duration
- 25% increased effect
- 42% increased Critical Strike Chance during Effect
- 31% chance to gain a Flask Charge when you deal a Critical Strike
- 14% increased Movement Speed during Effect
All gem links (9 groups)
-
 Frostblink 3/20
-
 Cast when Damage Taken 2/20
 - Blink Arrow L18
-
 Haste 20/20
 - Flesh and Stone L20
- Blink Arrow 20/20
-
 Purity of Elements 20/20
-
 Kinetic Blast 9/12
 -
 Kinetic Fusillade 11/17
-
 Portal 1/17
- Sniper's Mark 20/20
- Cast On Critical Strike 20/20
- Storm Rain 20/20
- Manaforged Arrows 20/20
- Power Charge On Critical 18/20
- Tornado 20/20
- Elemental Hit of the Spectrum 20/20
- Increased Critical Damage L18
- Elemental Damage with Attacks 20/20
- Trinity 20/20
- Returning Projectiles 20/20
- Mirage Archer 20/20
- Manaforged Arrows 20/20
- Puncture 20/20
- Frenzy 20/20
- Blood Rage 20/20
- Precision L30
How this stage plays (mechanics, defences)
The damage engine pivots toward cold-first scaling while keeping all three elements alive for Trinity Support. Heatshiver grants "1% of Cold Damage as Extra Fire Damage per 1% Chill Effect on Enemy" — with Ahuana's Bite ("Chill Enemies as though dealing 100% more Damage" + "Enemies Chilled by your Hits have Damage taken increased by Chill Effect") the chill magnitude maxes out, converting cold into a massive fire bonus on top of the existing cold roll. Because Elemental Hit of the Spectrum rolls all three elements per hit, the fire portion is already there natively — the conversion is pure gravy, not a replacement. Cataclysm Bane (rare Spine Bow) carries 42–76 phys, 94–165 cold, 36–614 lightning and an extra arrow, and the 6-link moves to Miracle Shelter (rare Supreme Leather) running Trinity Support + Elemental Damage with Attacks Support + Inspiration Support + Returning Projectiles + Increased Critical Damage.
The Taming is still in ring 2 (36% increased elemental damage per ailment type), and Bisco's Leash remains on the belt for Rampage and the quantity bonus. Hatred aura (~77% of ladder) is the big cold multiplier added this tier, paired with Herald of Ice in the helmet for pack-clear shatter chains. The tree adds Oath of Winter, Oath of Summer, Assassination, Trickery, and the Bloodsoaked Blade keystone for damage-while-bloodied scaling. Auto-cast supports in the bow (Cast On Critical Strike + Tornado + Sniper's Mark + Manaforged Arrows) sustain the curse and mana loop on crit.
Suppression drops slightly to 84% but chaos resist finally caps at 75% via layered rolls on rare gloves, boots, and ring. Evasion sits around 14k with Haste + Purity of Elements up, and 11.4k EHP with 2.85k life matches the tier baseline. Miracle Shelter's "50% of Damage from your Hits cannot be Reflected" line plus Purity of Elements's ailment immunity solves the reflect problem that plagues all-elements builds. No Acrobatics yet — the build relies on suppress + evasion + kill speed, accepting that physical hits land harder in exchange for the damage the chest damage-reflect immunity unlocks. Flasks include a Silver (crit attack speed) and a Prismatic Tincture for 111% increased Elemental Damage with Melee Weapons (tinctures affect bow attacks in the transfigured ele-hit interaction via Martial Prowess-style nodes).
Bigger hits, slightly slower cadence. 2.15 attacks per second feels heavy compared to the early-mapping build's faster pace, but Focal Point-adjacent tree scaling and Hatred make each hit drop a pack. Herald of Ice shatters on chilled enemies trigger chain-explosions through packs, Manaforged Arrows + Power Charge On Critical keep crit charges capped automatically, and Frenzy on a separate link generates Frenzy charges between engagements. Boss damage gains a meaningful lift from Heatshiver conversion against chilled targets, and Ahuana's Bite's "Chill as though dealing 100% more" line guarantees the chill floor even on high-resist pinnacle bosses.
Passive tree (127 points)
The desktop app shows this tier's full tree on an interactive canvas.
Aspirational L95–100
- The apex build rebalances uniques: The Fledgling returns in the helmet for its doubled Far Shot + projectile-damage stack, Daresso's Defiance body armour replaces the rare chest for permanent Onslaught on hit, Headhunter slots in on the belt, and Watcher's Eye + Lethal Pride + cluster jewels fill the tree.
 Elemental Hit of the SpectrumTrinityMirage ArcherReturning ProjectilesInspirationElemental Damage with Attacks
Full gear (23 items)
Vortex Reach Weapon 1
- Adds 209 to 355 Fire Damage
- Adds 170 to 289 Cold Damage
- Adds 26 to 500 Lightning Damage
- Can have up to 3 Crafted Modifiers (crafted)
- +23 to Strength and Intelligence (crafted)
- 13% increased Attack Speed (crafted)
- 24% increased Critical Strike Chance (crafted)
 Corpse Spike Weapon 2
- Adds 9 to 16 Physical Damage to Attacks
- Adds 9 to 139 Lightning Damage to Attacks
- +142 to Accuracy Rating
- 44% increased Critical Strike Chance with Bows
- +144 to maximum Life
- 50% increased Damage with Bow Skills
- +23 to Strength and Intelligence (crafted)
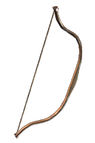 Sharpshooter's Thicket Bow of the Remora Weapon 1 Swap
- +2 to Level of Socketed Bow Gems
- 2.24% of Physical Attack Damage Leeched as Life
The Fledgling Helmet
- 156% increased Armour and Evasion
- 46% increased Projectile Speed
- 38% increased Projectile Damage
- Projectiles cannot collide with Enemies in Close Range
- Far Shot
Daresso's Defiance Body Armour
- +2 to Level of Socketed AoE Gems
- 199% increased Armour and Evasion
- +90 to maximum Life
- 2% of Attack Damage Leeched as Life
- You lose all Endurance Charges when Hit
- You gain an Endurance Charge on Kill
- You gain Onslaught for 5 seconds per Endurance Charge when Hit
- 100% increased Effect of Onslaught on you
Rapture Hand Gloves
- Projectiles Pierce an additional Target
- 8% increased Attack Speed
- +10% chance to Suppress Spell Damage
- Adds 4 to 7 Cold Damage to Attacks
- 6% increased Attack Speed
- +88 to maximum Life
- +25% to Fire Resistance
- 25% increased Projectile Speed
- 17% increased Projectile Damage
 Gale Dash Boots
- Regenerate 0.2% of Life per second per Endurance Charge
- +13% to Fire Resistance
- +8% chance to Suppress Spell Damage
- 94% increased Armour and Evasion
- +95 to maximum Life
- +39% to Cold Resistance
- +44% to Lightning Resistance
- 25% increased Movement Speed
Hyrri's Truth Amulet
- Allocates Sovereignty
- +22 to Dexterity
- Grants Level 30 Precision Skill
- +47 to Dexterity
- +44% to Global Critical Strike Multiplier
- Bow Attacks have Culling Strike
- Precision has 100% increased Mana Reservation Efficiency
The Taming Ring 1
- +10% to all Elemental Resistances
- +29% to all Elemental Resistances
- 10% chance to Freeze, Shock and Ignite
- 38% increased Elemental Damage with Hits and Ailments for each type of Elemental Ailment on Enemy
The Taming Ring 2
- +10% to all Elemental Resistances
- +23% to all Elemental Resistances
- 10% chance to Freeze, Shock and Ignite
- 37% increased Elemental Damage with Hits and Ailments for each type of Elemental Ailment on Enemy
Headhunter Belt
- +25 to maximum Life
- +64 to Strength
- +63 to Dexterity
- +57 to maximum Life
- 24% increased Damage with Hits against Rare monsters
- When you Kill a Rare monster, you gain its Modifiers for 60 seconds
 Fulgent Joy Jewel
- Adds 4 Passive Skills
- 1 Added Passive Skill is a Jewel Socket
- Added Small Passive Skills grant: 10% increased Projectile Damage
- Added Small Passive Skills also grant: +3 to Intelligence
- Added Small Passive Skills also grant: +5 to Strength
- 1 Added Passive Skill is Repeater
- 1 Added Passive Skill is Streamlined
 Vivid Bliss Jewel
- +17% to Critical Strike Multiplier with Lightning Skills
- 6% increased maximum Life
- Attacks have 5% chance to cause Bleeding
- 12% increased Bleeding Duration
 Honour Cut Jewel
- Adds 8 Passive Skills
- 2 Added Passive Skills are Jewel Sockets
- Added Small Passive Skills grant: 12% increased Damage with Bows Added Small Passive Skills grant: 12% increased Damage Over Time with Bow Skills
- Added Small Passive Skills also grant: 2% increased Attack Speed
- 1 Added Passive Skill is Arcing Shot
- 1 Added Passive Skill is Broadside
- 1 Added Passive Skill is Martial Prowess
 Dragon Vessel Jewel
- 8% increased Attack Speed with Daggers
- +13% to Critical Strike Multiplier with Elemental Skills
- 7% increased maximum Life
- Attacks have 5% chance to cause Bleeding
- 13% increased Bleeding Duration
Thread of Hope Jewel
- Only affects Passives in Massive Ring
- Passive Skills in Radius can be Allocated without being connected to your tree
- -12% to all Elemental Resistances
- Passage
 Brutal Restraint Jewel
- Denoted service of 6403 dekhara in the akhara of Nasima
- Passives in radius are Conquered by the Maraketh
- Historic
 Unnatural Instinct Jewel
- Allocated Small Passive Skills in Radius grant nothing
- Grants all bonuses of Unallocated Small Passive Skills in Radius

- 19% chance to gain a Flask Charge when you deal a Critical Strike
- Grants Immunity to Bleeding for 12 seconds if used while Bleeding
- Grants Immunity to Corrupted Blood for 12 seconds if used while affected by Corrupted Blood
- 25% chance to gain a Flask Charge when you deal a Critical Strike
- 52% increased Armour during Effect
- 20% chance to gain a Flask Charge when you deal a Critical Strike
- 45% reduced Effect of Curses on you during Effect
- 25% chance to gain a Flask Charge when you deal a Critical Strike
- 36% increased Critical Strike Chance during Effect

- 28% chance to gain a Flask Charge when you deal a Critical Strike
- 8% increased Movement Speed during Effect
All gem links (7 groups)
- Manaforged Arrows L20
- Storm Rain L20
- Blood Rage L20
- Puncture L20
- Sniper's Mark 20/20
- Frenzy 20/20
- Manaforged Arrows 20/20
- Power Charge On Critical 11/20
- Cast On Critical Strike 20/20
- Tornado L20
- Trinity 20/20
- Mirage Archer 20/20
- Returning Projectiles 20/20
- Inspiration 20/20
- Elemental Damage with Attacks 20/20
- Elemental Hit of the Spectrum 20/20
- Flame Dash L11
- Blink Arrow L20
-
 Automation L14
-
 Vaal Haste L20
 - Purity of Elements 14/20
- Flesh and Stone 20/20
-
 Enlighten 3/15
- Precision L30
How this stage plays (mechanics, defences)
At full scale: ~1.9M DPS ladder, 26k EHP median, five charge types stacked. The bow is Doom Reach (rare Spine Bow) with 200–345 fire, 103–161 cold, 36–635 lightning, 15% attack speed, 27% crit chance, 2 additional arrows — a near-perfect tri-element craft that feeds Trinity Support + Elemental Damage with Attacks Support + Inspiration Support at full resonance. The body armour moves to Daresso's Defiance, which socket-hosts Mirage Archer + Inspiration Support + Invert the Rules + Elemental Damage with Attacks Support + Increased Critical Damage. Invert the Rules is the 3.28 Exceptional Support gem that flips one conditional penalty into a bonus — on bow attacks it routinely outperforms Returning Projectiles at this tier (it's on 66% of ladder aspirational builds vs Returning Projectiles at 12%).
The Taming is double-stacked again (48% + 48% increased elemental damage per ailment type), and because Elemental Hit of the Spectrum guarantees all three ailments apply, both rings run at maximum value every hit — ignite + shock + chill. Yoke of Suffering adds another 10% per ailment plus the shock enabler. Headhunter copies rare-monster modifiers for 60 seconds, which in map clear effectively doubles or triples damage during rare-dense layouts. Lethal Pride (13165 warriors under Akoya) in the Karui cluster converts nearby passives into crit and attack-speed conqueror nodes. Watcher's Eye contributes Purity of Elements chaos resist + Grace movement speed. Tree picks up Focal Point as the fourth ascendancy (Sniper's Mark-empowerment multiplier), Perfectionist, Blood Siphon, and a Maelstrom Shine large cluster with Arcing Shot + Broadside + Martial Prowess for stacked projectile/attack-speed scaling.
Suppression is back to 100% via layered rolls on Onslaught Grip gloves (+18%), Spirit Slippers boots (+13%), and tree suppress nodes. 19.2k EHP, 4.4k life, 18% physical damage reduction, and permanent Onslaught from Daresso's Defiance's "You gain Onslaught for 5 seconds per Endurance Charge when Hit" + "100% increased Effect of Onslaught on you" turn every incoming hit into a free attack-speed and move-speed burst. Chaos resist sits at 47% with further room to push. Purity of Elements is still the primary ailment-immunity layer, and Vaal Grace + Vaal Haste provide panic-button windows for pinnacle phase transitions. 14k evasion is modest for the tier but adequate alongside suppress + Onslaught mitigation. No Acrobatics — the investment goes into offensive cluster jewels and Headhunter instead.
The Deadeye power fantasy: a single shot arcs across the screen, each arrow fires all three elements, every enemy takes the full The Taming + Yoke of Suffering multiplier, and Headhunter stolen rare mods layer on top for rolling map-clear chaos. Blink Arrow traversal, Frenzy on Frenzy charges generation, and Gathering Winds stack-refresh make forward motion constant. Pinnacle bosses (Shaper, Maven, Sirus, Uber Exarch/Eater) fall to a handful of shots because Trinity Support resonance is permanently maxed on every hit — the whole reason to run the Spectrum transfigured variant over vanilla Elemental Hit. Focal Point + Sniper's Mark + Endless Munitions make single-target and clear use the exact same buttons.
Passive tree (132 points)
The desktop app shows this tier's full tree on an interactive canvas.