
Leveling L1–68
- Take Holy Flame Totem from Hillock, then plant totems and let them fight while you move.The build can't self-cast its real skill until you have overcapped fire res and a life pool. Totems carry you through the campaign for free.
- Swap to Elemental Hit with Trinity once you hit maps and have a claw.
- Grab a Tabula Rasa for the early 6-link, then move to a real chest once your rings come online.
- Rush Brutal Fervour in your first two labs. It is the leech that makes the build tanky.
 Frost Blades
  Onslaught Support
  Ancestral Call Support
  Shield Charge
 Buy Frost Blades from Nessa after killing Hillock. Frost Blades is a strong leveling skill on any 1H weapon and gives you a feel for projectile-attack scaling. Onslaught Support from the Brutus quest reward. Shield Charge (quest reward after Medicine Chest) is your main mobility tool until Flame Dash unlocks in Act 3.
Frost Blades Ancestral Call Support  Elemental Damage with Attacks Support Onslaught Support Shield Charge
  Herald of Ash
  Cast when Damage Taken
  Steelskin
 Pick up Herald of Ash from Yeena (Herald of Ice is also available — swap in once your 4-link can host it). Add Elemental Damage with Attacks Support once you have a 4-link. Slot a low-level Cast when Damage Taken + Steelskin for panic defense. Take "Way of the Poacher" bandit reward (kill all, +2 passives) — passives matter more than the bandit power for this build.
Frost Blades Ancestral Call Support Elemental Damage with Attacks Support  Multistrike Support
  Flame Dash
  Hatred
  Herald of Ice
  Ancestral Protector Cast when Damage Taken Steelskin
 Multistrike Support unlocks at L38 from Clarissa — slot it in for a huge DPS bump. Grab Hatred from the Library quest reward; run it as your main aura (replaces Herald of Ash for mana room). Flame Dash from the Library quest becomes your travel skill. Ancestral Protector totem provides a strong attack speed buff for boss fights. Lab 1 here: Bane of Legends.
Frost Blades  Trinity Support Elemental Damage with Attacks Support Multistrike Support
  Combat Focus Support Flame Dash Hatred Herald of Ice Herald of Ash
  Vaal Ancestral Warchief Cast when Damage Taken Steelskin
  Sniper's Mark
 Trinity Support drops from Lilly Roth in Act 6 — this is the transition gem. Combat Focus Support is also from Lilly (it forces Elemental Hit to roll only one of fire/cold/lightning, hugely increasing average DPS). Dual heralds (Herald of Ash + Herald of Ice) fit now that you have more mana reservation headroom. Vaal Ancestral Warchief replaces the regular totem for bossing. Sniper's Mark from Lilly is a good self-cast single-target curse. Lab 2 in Act 6 area: Endless Hunger.
 Elemental Hit Trinity Support Elemental Damage with Attacks Support Multistrike Support Combat Focus Support
  Inspiration Support Flame Dash Hatred
  Precision Herald of Ice Herald of Ash Vaal Ancestral Warchief Cast when Damage Taken Steelskin Sniper's Mark
 Swap to Elemental Hit once you have a 5-link, Trinity Support, and two Combat Focus Support gems (one for cold, one for lightning — leave fire as the rolled element). Keep Precision at a low level for accuracy without eating too much mana. Damage will feel weak for one or two zones, then come roaring back as Trinity Support charges build up. Lab 3 in Act 9: Headsman.
Elemental Hit Trinity Support Elemental Damage with Attacks Support Multistrike Support Combat Focus Support Inspiration Support  Leap Slam Hatred Precision Herald of Ice Herald of Ash Vaal Ancestral Warchief Cast when Damage Taken Steelskin
  Vaal Haste Sniper's Mark
 Run Uber Lab as soon as you hit L68 to grab Brutal Fervour — this is the single biggest quality-of-life spike for the build and is when the early-mapping tier of the guide picks up. Until you have it, you'll feel squishy in red maps; after you take it, the build clicks into the smooth-leech mapper it's known for. Leap Slam replaces Flame Dash once you have enough attack speed on your weapon to make it feel good.
How leveling works
Elemental Hit is an attack skill that converts your weapon damage to a random element on each hit, rolling once per attack. It scales with attack speed, weapon DPS, projectiles, and elemental damage with attacks. As a Slayer, you lean on Overleech, ailment immunity from Brutal Fervour, and the ascendancy's innate area + leech to make a smooth mapper. The build doesn't come online until you have Trinity Support and a decent claw or bow with elemental damage on it (typically around the time you finish the campaign), so for the leveling phase itself you swap between melee skills that are happy on cheap weapons.
The recommended path is Frost Blades or Molten Strike for Acts 1–4, then transition into Elemental Hit around Act 5–6 once you can hit ~level 12 on the gem and have picked up Trinity Support and Combat Focus Support gems (or later in the campaign in Mirage league: from Lilly Roth in Act 6). The Slayer ascendancy points you'll grab in the Labs are: Bane of Legends → Endless Hunger → Headsman → Brutal Fervour. Brutal Fervour is the build-defining ascendancy: it makes you immune to bleed, ailments, and stun under Overleech, and is what unlocks the smooth mapping experience the endgame guide is built around.
Rare jewellery with life and resists, a 5-link as soon as you can craft one, and a Tabula Rasa if you find one will carry you through the campaign without any specific gear targets. Save your currency for the endgame transition — don't sink it into leveling uniques.
Gear while leveling
- · Weapon: any 1H elemental claw or sword while leveling — vendor recipes for elemental weapons (magic weapon + topaz/sapphire/ruby ring + Blacksmith's Whetstone) keep you topped up cheaply through the acts.
- · Body armour: rush a Tabula Rasa if you can find/buy one — a guaranteed 6-link is worth more than any leveling rare. If not, a 4-link evasion chest with life and resists.
- · Helmet/gloves/boots: prioritise life and resists over everything. You want to enter maps capped on all three elemental resists.
- · Rings/amulet: life + resists, with attribute fix-ups as needed. A pair of cheap unique rings like Le Heup of All cover stat requirements during the campaign.
- · Belt: Heavy Belt or Leather Belt with life and resists. No need for unique belts during leveling.
- · Flasks: a life flask with bleed-removal, a quicksilver, a granite + iron skin or stibnite, and a diamond flask once you can buy one. Keep a quicksilver up at all times.
Weapon progression
Use vendor-recipe elemental 1H weapons (magic 1H + topaz/sapphire/ruby + Whetstone → guaranteed elemental damage roll) through Acts 1–6. Around the Elemental Hit transition you want a claw or one-hand sword with a "added cold/fire/lightning damage" prefix and ideally attack speed. The endgame target weapon is a rare claw with three or more "added X damage to attacks" mods (the build's signature is rolling these on a fast claw base like Imperial Claw or Gemini Claw), but this is far above leveling priorities — get to maps with anything, then start farming for the upgrade.
Tree to aim for (by level 100)
Watch out for
- ! Don't take Combat Focus Support before you have Trinity Support — without Trinity Support you actively want Elemental Hit to roll all three elements (more average damage), and Combat Focus Support locks you into one element. The two gems work as a pair.
- ! Brutal Fervour requires you to be Leeching to give bleed/ailment/stun immunity. If you stop attacking in a tough fight, leech runs out and your immunities drop. Always keep the auto-attack flowing.
- ! Elemental Hit's damage roll happens once per attack, not per projectile, so projectile count helps with clear but not with single-target damage. Rares should still die to your front-loaded hit, not to the side projectiles.
- ! The Taming (a campaign-tier unique ring) is one of the build's permanent slot fillers — if you find one cheap, slot it as soon as you have all three "of-Shaping" elemental damage taken modifiers covered.
Early Mapping L70–84
- Get all three The Unseen Hue rings socketed so every hit inflicts Brittle, Scorch, and Sap at once.Elemental Hit rolls one element per swing, but the three rings guarantee all three ailments stay on the enemy. That is what feeds Trinity Support and, later, The Taming.
- Craft a rare claw with three embedded supports plus "Socketed Skills deal 40% more Attack Damage".The embedded supports act as a free 4-link, so the claw is a damage multiplier before you socket a single gem into your main link.
- Run The Squire in the shield slot to buff your main-hand link."Socketed Support Gems can also Support Skills from your Main Hand" turns the shield into a second support bank for Elemental Hit.
- Take Bane of Legends as your fourth ascendancy for kill-explosions and permanent Onslaught.


 Elemental HitTrinity
 Ruthless
Full gear (29 items)
 Pandemonium Barb Weapon 1
- Quality does not increase Physical Damage
- 1% increased Attack Speed per 8% Quality
- Grants 46 Life per Enemy Hit
- Socketed Gems are Supported by Level 20 Increased Critical Strikes
- Socketed Gems are Supported by Level 20 Faster Attacks
- Socketed Gems are supported by Level 20 Elemental Damage with Attacks
- Socketed Skills deal 40% more Attack Damage
- 21% increased Attack Speed
- 28% increased Critical Strike Chance
- 36% increased Elemental Damage with Attack Skills
- Hits can't be Evaded (crafted)
The Squire Weapon 2
- 4% Chance to Block Spell Damage
- +5% Chance to Block
- Has 3 Sockets
- All Sockets are White
- +8% to Quality of Socketed Support Gems
- Socketed Support Gems can also Support Skills from your Main Hand
- 101% increased Armour and Evasion
- +5% Chance to Block
 Buzzing Spiraled Foil of the Apt Weapon 1 Swap
- +25% to Global Critical Strike Multiplier
- 32% reduced Attribute Requirements
- Adds 2 to 28 Lightning Damage
 Fleet Golden Buckler of Precision Weapon 2 Swap
- 6% increased Movement Speed
- +164 to Accuracy Rating
- +69 to Evasion Rating
The Gull Helmet
- Socketed Skill Gems get a 90% Cost & Reservation Multiplier
- Trigger Level 1 Create Lesser Shrine when you Kill an Enemy
- 120% increased Evasion and Energy Shield
- +36 to maximum Energy Shield
- +67 to maximum Life
- +40% to Cold Resistance
- 75% increased Effect of Shrine Buffs on you
- 50% increased Duration of Shrine Effects on you
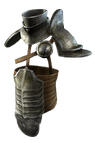 Havoc Salvation Body Armour
- Melee Hits have 11% chance to Fortify
- +2% to maximum Fire Resistance
- +22% chance to Suppress Spell Damage
- +372 to Armour
- +331 to Evasion Rating
- 108% increased Armour and Evasion
- +181 to maximum Life
- +47% to Cold Resistance
- +35% to Lightning Resistance (crafted)
 Admiral's Arrogance Gloves
- 9% increased Attack Speed
- 105% increased Armour
- 18% chance that if you would gain Rage on Hit, you instead gain up to your maximum Rage
- +3 to Level of all Melee Skill Gems
 Behemoth Spur Boots
- 31% chance to Avoid Elemental Ailments
- 5% increased Action Speed
- +14% chance to Suppress Spell Damage
- +93 to Evasion Rating
- +125 to maximum Life
- +48% to Lightning Resistance
- +32% to Chaos Resistance
- 20% increased Movement Speed (crafted)
- 12% chance to gain Onslaught for 4 seconds on Kill (crafted)
 Sol Idol Amulet
- Allocates Sione's Ambition
- -1 Prefix Modifier allowed
- -2 Suffix Modifiers allowed
- Implicit Modifiers Cannot Be Changed
- 100% increased Explicit Modifier magnitudes
- +90% to Global Critical Strike Multiplier
- +2 to Level of all Cold Skill Gems
- 86% increased Damage while Leeching (crafted)
The Unseen Hue Ring 1
- 25% increased Elemental Damage
- +28% to Fire Resistance
- +24% to Cold Resistance
- +30% to Lightning Resistance
- 12% increased Attack and Cast Speed
- 15% increased Effect of Non-Damaging Ailments
- Hits with Prismatic Skills always inflict Brittle
The Unseen Hue Ring 2
- 25% increased Elemental Damage
- +14% to Fire Resistance
- +31% to Cold Resistance
- +33% to Lightning Resistance
- 11% increased Attack and Cast Speed
- 10% increased Effect of Non-Damaging Ailments
- Hits with Prismatic Skills always Scorch
Screams of the Desiccated Belt
- +40 to maximum Life
- You have Replenishing Shrine Buff while affected by no Flasks
- You have Resonating Shrine Buff while affected by no Flasks
- +32 to Intelligence
- +32% to Chaos Resistance
 Gale Shard Jewel
- Adds 12 Passive Skills
- 2 Added Passive Skills are Jewel Sockets
- Added Small Passive Skills grant: 12% increased Attack Damage while holding a Shield
- Added Small Passive Skills also grant: 3% increased Attack and Cast Speed with Cold Skills
- Added Small Passive Skills also grant: 3% increased Attack and Cast Speed with Lightning Skills
- Added Small Passive Skills also grant: +10 to Maximum Life
- Added Small Passive Skills have 35% increased Effect
 Armageddon Hope Jewel
- +2% to maximum Fire Resistance
- 6% increased Attack Speed with One Handed Melee Weapons
- +13% to Melee Critical Strike Multiplier
- +17% to Critical Strike Multiplier with Lightning Skills
Ancestral Vision Jewel
- Corrupted Blood cannot be inflicted on you
- +7 to Dexterity
- Modifiers to Chance to Suppress Spell Damage also apply to Chance to Avoid Elemental Ailments at 50% of their Value
 Watcher's Eye Jewel
- 6% increased maximum Energy Shield
- 5% increased maximum Life
- 6% increased maximum Mana
- 20% of Cold and Lightning Damage taken as Fire Damage while affected by Purity of Fire
- 10% increased Recovery rate of Life and Energy Shield while affected by Malevolence
Phoenix Shard Jewel
- Adds 8 Passive Skills
- 2 Added Passive Skills are Jewel Sockets
- Added Small Passive Skills grant: 12% increased Attack Damage while holding a Shield
- Added Small Passive Skills also grant: +3 to Strength
- 1 Added Passive Skill is Feed the Fury
- 1 Added Passive Skill is Martial Prowess
- 1 Added Passive Skill is Prodigious Defence
Oblivion Stone Jewel
- +2% to maximum Fire Resistance
- +3% Chance to Block Attack Damage while holding a Shield
- +18% to Critical Strike Multiplier with Fire Skills
- +10% to Fire and Lightning Resistances
Behemoth Ruin Jewel
- +2% to maximum Fire Resistance
- +16% to Critical Strike Multiplier with One Handed Melee Weapons
- +17% to Critical Strike Multiplier with Lightning Skills
- +12% to Cold and Lightning Resistances
Soul Bliss Jewel
- +2% to maximum Fire Resistance
- 5% increased Attack Speed with One Handed Melee Weapons
- +11% to Global Critical Strike Multiplier
- +15% to Critical Strike Multiplier with One Handed Melee Weapons
Armageddon Desire Jewel
- Adds 8 Passive Skills
- 2 Added Passive Skills are Jewel Sockets
- Added Small Passive Skills grant: 12% increased Attack Damage while holding a Shield
- Added Small Passive Skills also grant: +3% to Cold Resistance
- 1 Added Passive Skill is Fuel the Fight
- 1 Added Passive Skill is Martial Prowess
- 1 Added Passive Skill is Prodigious Defence
 Lethal Pride Jewel
- Commanded leadership over 13176 warriors under Rakiata
- Passives in radius are Conquered by the Karui
- Historic
 The Light of Meaning Jewel
- Passive Skills in Radius also grant +4% to Chaos Resistance
Loath Hope Jewel
- +2% to maximum Fire Resistance
- 4% increased Attack Speed with One Handed Melee Weapons
- +16% to Critical Strike Multiplier with Cold Skills
- +10% to all Elemental Resistances

- 21% increased effect
- Melee Weapon Damage Penetrates 26% Elemental Resistances

- 66% reduced Amount Recovered
- Instant Recovery
- Grants Immunity to Bleeding for 16 seconds if used while Bleeding
- Grants Immunity to Corrupted Blood for 16 seconds if used while affected by Corrupted Blood
- 66% reduced Amount Recovered
- Instant Recovery
- Removes Curses on use

- 19% reduced Charges per use
- 72% reduced Amount Recovered
- Instant Recovery
- 2 Enemy Writhing Worms escape the Flask when used
- Writhing Worms are destroyed when Hit
- 16% reduced Charges per use
- 71% reduced Amount Recovered
- Instant Recovery
- 2 Enemy Writhing Worms escape the Flask when used
- Writhing Worms are destroyed when Hit
All gem links (12 groups)
-
 Flesh and Stone L21
 -
 Purity of Fire 21/20
 -
 Enlighten 3/3
 -
 Arctic Armour 21/20
- Elemental Hit L19
- Elemental Hit L19
- Elemental Hit L19
- Elemental Hit L19
- Elemental Hit L19
- Elemental Hit L19
-
 Empower 4/10
 - Multistrike 21/20
-
 Greater Ancestral Call 4/20
-
 Blood Rage 20/20
 - Precision L1
-
 Cast when Damage Taken 20/20
-
 Lifetap L20
 -
 Assassin's Mark 19/20
 -
 Mark On Hit 20/20
 -
 Faster Attacks 20/20
 -
 Whirling Blades 21/20
-
 Blood and Sand L7
-
 Hydrosphere 2/23
 -
 Frostblink L1
 -
 Frost Wall 1/20
 -
 Berserk 21/20
- Trinity 21/20
- Ruthless 21/20
- Elemental Hit 20/20
-
 Create Lesser Shrine L1
How this stage plays (mechanics, defences)
Elemental Hit Slayer at this tier already runs the build's signature engine: every swing is a prismatic hit that rolls one of three elements, and a trio of unique interactions makes the skill absurd. The main hand is a rare Imperial Claw (Honour Slicer) crafted with three embedded Level 20 supports — Increased Critical Strikes, Faster Attacks, and Elemental Damage with Attacks — plus "Socketed Skills deal 40% more Attack Damage." That claw alone is a 4-link's worth of support before any gem is socketed. The main Elemental Hit links through Endurance Charge on Melee Stun + Lifetap, and The Squire shield carries Greater Multistrike + Trinity + Greater Ancestral Call — the shield's "Socketed Support Gems can also Support Skills from your Main Hand" line effectively turns it into an off-hand 3-link that buffs the claw.
Damage stacks compound viciously. Three The Unseen Hue rings lock Brittle, Scorch, and Sap on every prismatic hit — the build inflicts all three elemental ailments simultaneously without needing any separate ailment-application gem. Trinity converts that into a massive "more elemental" multiplier because Elemental Hit naturally cycles fire, cold, and lightning each swing so all three resonances stay active. Screams of the Desiccated belt + The Gull helmet team up to grant a permanent Massive Shrine Buff while not flasking, and an Enriched Prismatic Tincture adds another 160% increased Elemental Damage with Melee Weapons and 30% elemental penetration on top. The tree is a Duelist crit ladder — Savagery, Claws of the Hawk, Impact, Blood Drinker — with a Lethal Pride timeless jewel in the Karui cluster and Forces of Nature for the elemental conversion multiplier. This L84 reference is unusually well-geared for its tier, so DPS reads higher than a typical early-mapping build.
Defence here is already the full Slayer stack, just unfinished. 100% spell suppress is on from Masterful Form plus layered suppress rolls on Phoenix Shell, Brimstone Fist gloves, and Ghoul Hoof boots. Brutal Fervour gives the Slayer's signature infinite leech while damaging — once a pack starts dying, life refills instantly. Ancestral Vision converts the 100% suppress chance into 50% elemental ailment avoidance, which protects against self-shock from reflect. Block sits at a modest 30% — the shield slot is spent on The Squire, not a block stacker — but 5.7k life, 57k EHP, and a full +7 endurance charges from Endurance Charge on Melee Stun absorb physical hits. Chaos resist is comfortably capped via Screams of the Desiccated's +36% chaos roll.
Fast and forgiving. Whirling Blades (linked with Faster Attacks + Momentum in the body armour) covers map traversal, and 13.25 attacks per second with Greater Multistrike means the screen is already flooded with ailment icons. The Gull's Shrine procs on kill and the Massive Shrine Buff from Screams of the Desiccated stack into a constant hype-mode for pack clear. Single-target is handled by stacking ailments, not by a dedicated boss setup — Brutal Fervour leech lets you stand in telegraphs that would kill a glass cannon. Bosses die faster than a L84 character has any right to, purely from the triple-support claw and Trinity's resonance multiplier.
Passive tree (134 points)
The desktop app shows this tier's full tree on an interactive canvas.
Endgame L85–94
The big shift at endgame is ring composition and the 6-link location. The third The Unseen Hue slot is replaced with The Taming, and the main 6-link moves from the shield-assisted claw into a rare body armour (Chimeric Suit). The Squire is swapped for a rare Vaal Buckler focused on attack block + suppress, and Bane of Legends is finally picked up as the fourth ascendancy.
- Replace the third The Unseen Hue with The Taming.The Taming gives 46% increased elemental damage per ailment type on the enemy. Because you already inflict all three ailments, this is a ~138% multiplier baked into every hit — the single biggest damage jump in the build.
- Move the 6-link into a rare body armour and run Ruthless + Inspiration in it.Elemental Hit swings slowly and hits hard, so every-third-hit triple damage from Ruthless lands well. Inspiration adds pure elemental multiplier and keeps mana costs low.
- Buy a rare claw with elemental penetration and attack speed (Redeemer influence).Penetration is a flat damage multiplier against every target, and it frees the claw sockets now that the 6-link lives in the chest.
- Set up the Assassin's Mark + Mark On Hit loop to keep Frenzy charges capped via Mark the Prey.


 Elemental HitElemental Damage with AttacksMultistrikeTrinityRuthlessInspiration
Full gear (18 items)
Mortem Morsu Weapon 1
- Grants 20 Life per Enemy Hit
- 94% increased Physical Damage
- 20% increased Attack Speed
- 25% increased Critical Strike Chance
- +40% to Global Critical Strike Multiplier
- 20% of Physical Damage Converted to Chaos Damage
- 25% reduced Enemy Stun Threshold with this Weapon
- 60% chance to Poison on Hit
 Maelstrom Tower Weapon 2
- 70% increased Chance to Block
- 86% increased Armour and Evasion
- +115 to maximum Life
- +16% to all Elemental Resistances
- 32% chance to Avoid Elemental Ailments
- 11% increased Attack Speed (crafted)
 Burning Antique Rapier of Stinging Weapon 1 Swap
- +25% to Global Critical Strike Multiplier
- Adds 20 to 36 Fire Damage
- 16% increased Critical Strike Chance
Wildslash Weapon 2 Swap
- Grants 7 Life per Enemy Hit
- +15 to Strength
- +15 to Dexterity
- Adds 3 to 19 Physical Damage
- 12% increased Attack Speed
- 20% increased Damage with Movement Skills
- 15% increased Attack Speed with Movement Skills
- 15% reduced Global Accuracy Rating
 Rapture Crown Helmet
- 6% of Physical Damage from Hits taken as Lightning Damage
- 20% reduced Mana Cost of Attacks
- +13% chance to Suppress Spell Damage
- +49 to Intelligence
- +23 to Evasion Rating
- +134 to maximum Life
- 14% increased Rarity of Items found
- +35% to Fire Resistance
Woe Curtain Body Armour
- Melee Hits have 7% chance to Fortify
- Gain an Endurance Charge every 15 seconds
- +294 to Armour
- +296 to Evasion Rating
- 99% increased Armour and Evasion
- Regenerate 62.9 Life per second
- +35% to Chaos Resistance
- +20% to Cold and Lightning Resistances (crafted)
 Viper Talons Gloves
- +5% chance to Suppress Spell Damage
- Non-Vaal Strike Skills target 1 additional nearby Enemy
- +12% chance to Suppress Spell Damage
- Adds 7 to 12 Fire Damage to Attacks
- 12% increased Attack Speed
- 56% increased Evasion Rating
- +43% to Cold Resistance
- 39% increased Damage while Leeching (crafted)
Loath Slippers Boots
- 16% chance to Avoid Elemental Ailments
- Drops Sapped Ground while moving, lasting 2 seconds
- +12% chance to Suppress Spell Damage
- +112 to maximum Life
- +39% to Fire Resistance
- +41% to Lightning Resistance
- 18% increased Movement Speed (crafted)
- 12% chance to gain Onslaught for 4 seconds on Kill (crafted)
 Dire Choker Amulet
- +15 to all Attributes
- Adds 3 to 5 Physical Damage to Attacks
- +127 to Accuracy Rating
- +30% to Global Critical Strike Multiplier
- 66% increased Mana Regeneration Rate
- +1 to Level of all Lightning Skill Gems
- +53 to maximum Life (crafted)
The Unseen Hue Ring 1
- 25% increased Elemental Damage
- +14% to Fire Resistance
- +27% to Cold Resistance
- +28% to Lightning Resistance
- 7% increased Attack and Cast Speed
- 11% increased Effect of Non-Damaging Ailments
- Hits with Prismatic Skills always Sap
The Taming Ring 2
- +10% to all Elemental Resistances
- +27% to all Elemental Resistances
- 10% chance to Freeze, Shock and Ignite
- 34% increased Elemental Damage with Hits and Ailments for each type of Elemental Ailment on Enemy
 Brimstone Thread Belt
- 24% increased Stun Duration on Enemies
- +49 to Strength
- +137 to maximum Life
- +43% to Fire Resistance
- +24% to Chaos Resistance
- 30% increased Elemental Damage with Attack Skills (crafted)
Ancestral Vision Jewel
- Damage Penetrates 1% Fire Resistance
- +5 to Dexterity
- Modifiers to Chance to Suppress Spell Damage also apply to Chance to Avoid Elemental Ailments at 50% of their Value

- 66% reduced Amount Recovered
- Instant Recovery
- Grants Immunity to Bleeding for 7 seconds if used while Bleeding
- Grants Immunity to Corrupted Blood for 7 seconds if used while affected by Corrupted Blood

- 35% increased Charge Recovery
- 52% increased Critical Strike Chance during Effect

- 24% reduced Charges per use
- 52% reduced Effect of Curses on you during Effect
- 22% reduced Mana Burn rate
- Melee Weapon Damage Penetrates 10% Elemental Resistances

- 24% reduced Charges per use
- 11% increased Movement Speed during Effect
All gem links (8 groups)
- Faster Attacks L20
- Whirling Blades L20
- Lifetap L20
- Elemental Damage with Attacks L20
- Multistrike 20/20
- Elemental Hit 20/16
- Trinity L20
- Ruthless L20
- Inspiration L20
-
 Enduring Cry L19
 -
 Automation L20
- Assassin's Mark L20
- Mark On Hit L20
- Lifetap L1
- Faster Attacks L20
- Elemental Hit L20
- Elemental Hit 20/8
-
 Urgent Orders L20
- Flesh and Stone L20
- Blood Rage L20
-
 Grace L20
 - Blood and Sand L5
- Frostblink L1
-
 Bonechill L20
How this stage plays (mechanics, defences)
The claw is now a rare Imperial Claw (Storm Skewer) with Redeemer influence — 16% elemental penetration, additional 7% cold penetration, 30% attack speed, 37% crit chance. It only has 3 sockets (no embedded supports), because the 6-link has migrated into Chimeric Suit: Elemental Hit + Multistrike + Elemental Damage with Attacks + Trinity + Ruthless + Inspiration. Ruthless replaces a flat-damage gem because every 3rd hit dealing triple damage plays perfectly with the already-slow-but-hard Elemental Hit swing, and Inspiration layers pure elemental multiplier on top.
The key damage pivot is The Taming in ring 2. Its line "46% increased Elemental Damage with Hits and Ailments for each type of Elemental Ailment on Enemy" stacks with the Brittle already guaranteed by The Unseen Hue, and the build self-inflicts Scorch and Shock through Elemental Hit's prismatic rolls — giving a compounding ~138% increased elemental damage baked into every hit. Mark the Prey on the tree generates Frenzy charges on marked-target kill, sustained by the Mark On Hit + Assassin's Mark setup in the claw. The tree picks up One With Nature and Weapon Artistry — both claw-specific multipliers — and drops Infused. Ascendancy now runs the full Brutal Fervour / Masterful Form / Impact / Bane of Legends suite.
100% suppress still holds via Masterful Form, and block climbs to 50% from the rare Vaal Buckler's 71% increased block chance + suppress rolls. Evasion doubles to 26k from the Chimeric Suit + Grace aura running in the helmet setup. Brutal Fervour leech is still the core sustain layer, and Ancestral Vision still converts suppress into ailment avoidance. EHP 44k is actually lower than the over-geared early-mapping reference (that character had both a The Squire and extra armour rolls) but the active defence is stronger: better block, better evasion, more consistent flask uptime via Divine Life + Silver + Diamond + Jade. 4.9k life with 40% phys DR and 7 endurance charges on demand.
Slower per-hit (9.3 attacks per second) but vastly heavier. Ruthless's every-3rd-hit triple damage turns boss fights into stutter-step burst windows; Inspiration keeps mana costs down so sustained combat is tension-free. Whirling Blades now runs in a dedicated helmet link (Momentum + Faster Attacks), and Frenzy charges refresh constantly via Mark the Prey. Bane of Legends adds permanent Onslaught and a kill-explosion that chains across packs on map clear. The build plays as the classic Slayer power-fantasy: walk forward, everything dies, leech covers the consequences.
Passive tree (126 points)
The desktop app shows this tier's full tree on an interactive canvas.
Aspirational L95–100
This L100 reference plays a pricier crit variant than the endgame character: a main-hand Paradoxica for double damage, Dawnbreaker in the off-hand, and a Mageblood running four permanent magic flasks. It reaches the same triple-ailment identity through a pair of Combat Focus jewels rather than the ring stack, which frees the jewellery for raw damage and defence.
- Slot two Combat Focus jewels so Elemental Hit stops rolling a random element and instead cycles all three in order.With both jewels, every element is guaranteed to come up in sequence, which keeps all three ailments up without needing the full The Unseen Hue ring stack — freeing your rings for damage and resistances.
- Move to a Paradoxica main hand for its double-damage line.Double damage is a flat multiplier on top of the ailment stack and penetration, and it is the cleanest way to push into pinnacle-boss damage.
- Run a Mageblood with four utility flasks for permanent uptime.Constant Ruby, Silver, Gold, and tincture uptime is a large chunk of both the damage and the movement feel at this budget.
- Layer a Watcher's Eye with Precision attack speed and Grace evade chance, and a Lethal Pride in the Karui cluster.


 Elemental Hit
 Close CombatGreater Ancestral Call
 Greater MultistrikeEmpower
 Increased Critical Damage
Full gear (30 items)
Paradoxica Weapon 1
- Quality does not increase Physical Damage
- 1% increased Attack Speed per 8% Quality
- +25% to Global Critical Strike Multiplier
- +25 to Dexterity and Intelligence
- 22% increased Attack Speed
- Attacks with this Weapon Penetrate 16% Elemental Resistances
- Attacks with this Weapon deal Double Damage
Dawnbreaker Weapon 2
- +20 to maximum Life
- 176% increased Armour
- +25% Chance to Block
- -1% Chance to Block Attack Damage for every 200 Fire Damage taken from Hits Recently
- 20% of Cold Damage taken as Fire Damage
- 19% of Lightning Damage taken as Fire Damage
- 20% of Physical Damage taken as Fire Damage
- Scorch Enemies in Close Range when you Block
 Glinting Eye Gouger of the Philosopher Weapon 1 Swap
- Has 2 White Sockets
- Grants 50 Life per Enemy Hit
- +29 to Intelligence
- Adds 1 to 3 Physical Damage
 Redblade Banner Weapon 2 Swap
- +24 to maximum Life
- 80% increased Armour
- +59 to maximum Life
- 20% increased Taunt Duration
- +5% Chance to Block
- 50% increased Warcry Cooldown Recovery Rate
- Warcries have infinite Power
 Dragon Cowl Helmet
- 11% increased Mana Reservation Efficiency of Skills
- 12% of Fire Damage taken Recouped as Life
- Has 1 Abyssal Socket
- 33% increased Armour
- +138 to maximum Life
- +48% to Fire Resistance
- +35% to Chaos Resistance
- 14% increased Stun and Block Recovery
- +1 to Level of Socketed AoE Gems (crafted)
- 10% increased Area of Effect (crafted)
 Foulborn Skin of the Lords Body Armour
- Sockets cannot be modified
- +2 to Level of Socketed Gems
- You can only Socket Corrupted Gems in this item
- Avatar of Fire
- 50% increased Elemental and Chaos Resistances
 Pandemonium Fist Gloves
- Inflict Fire Exposure on Hit, applying -12% to Fire Resistance
- Non-Vaal Strike Skills target 2 additional nearby Enemies
- +46% to Cold Resistance
- Has 1 Abyssal Socket
- +45 to Armour
- +152 to maximum Life
- +47% to Fire Resistance
- 43% increased Damage while Leeching (crafted)
 Phoenix Spur Boots
- Regenerate 0.2% of Life per second per Endurance Charge
- 5% increased Action Speed
- Has 1 Abyssal Socket
- 98% increased Armour
- +122 to maximum Life
- +47% to Fire Resistance
- +34% to Chaos Resistance
- 20% increased Movement Speed (crafted)
- 11% chance to gain Onslaught for 4 seconds on Kill (crafted)
 Leadership's Price Amulet
- Allocates Sione's Ambition
- +11 to all Attributes
- +3% to maximum Fire Resistance
- +2% to maximum Cold Resistance
- +3% to maximum Lightning Resistance
- You have Scorching Conflux, Brittle Conflux and Sapping Conflux while your two highest Attributes are equal
- Cannot Ignite, Chill, Freeze or Shock
 Enmity's Embrace Ring 1
- 8% increased maximum Life
- +49 to Strength
- 12% increased Fire Damage
- 65% reduced Fire Resistance
- Take 300 Fire Damage when you Use a Skill
- Damage Penetrates Fire Resistance equal to your Overcapped Fire Resistance, up to a maximum of 200%
 Brimstone Band Ring 2
- -2 Prefix Modifiers allowed
- +1 Suffix Modifier allowed
- Implicit Modifiers Cannot Be Changed
- 50% increased Suffix Modifier magnitudes
- +42% to Global Critical Strike Multiplier
- +93 to Intelligence
- +110 to maximum Life
- +74% to Lightning Resistance
- +25% to Cold and Chaos Resistances (crafted)
Mageblood Belt
- +34 to Strength
- +40 to Dexterity
- +23% to Fire Resistance
- +19% to Cold Resistance
- Magic Utility Flasks cannot be Used
- Leftmost 4 Magic Utility Flasks constantly apply their Flask Effects to you
- Magic Utility Flask Effects cannot be removed
Behemoth Essence Jewel
- Adds 8 Passive Skills
- 2 Added Passive Skills are Jewel Sockets
- Added Small Passive Skills grant: 12% increased Attack Damage while holding a Shield
- Added Small Passive Skills also grant: +5% to Lightning Resistance
- 1 Added Passive Skill is Gladiator's Fortitude
- 1 Added Passive Skill is Martial Prowess
- 1 Added Passive Skill is Prodigious Defence
 Dusk Spark Jewel
- 6% increased Armour
- +17% to Critical Strike Multiplier with Fire Skills
- 7% increased maximum Life
- +10% to all Elemental Resistances
- +8% to Chaos Resistance
Glyph Spark Jewel
- +17% to Critical Strike Multiplier with Fire Skills
- 6% increased maximum Life
- +8% to Chaos Resistance
- +10% to Fire and Lightning Resistances
Watcher's Eye Jewel
- 6% increased maximum Energy Shield
- 5% increased maximum Life
- 5% increased maximum Mana
- 49% increased Attack Damage while affected by Precision
- 18% of Cold and Lightning Damage taken as Fire Damage while affected by Purity of Fire
- Unaffected by Frostbite while affected by Purity of Ice
Combat Focus Jewel
- Damage Penetrates 1% Fire Resistance
- 13% increased Elemental Damage
- With 40 total Strength and Intelligence in Radius, Prismatic Skills deal 50% less Cold Damage
- With 40 total Strength and Intelligence in Radius, Prismatic Skills cannot choose Cold
Oblivion Wound Jewel
- Adds 8 Passive Skills
- 2 Added Passive Skills are Jewel Sockets
- Added Small Passive Skills grant: 12% increased Attack Damage while holding a Shield
- Added Small Passive Skills also grant: +4 to Dexterity
- 1 Added Passive Skill is Calamitous
- 1 Added Passive Skill is Fuel the Fight
- 1 Added Passive Skill is Martial Prowess
Maelstrom Sliver Jewel
- +17% to Critical Strike Multiplier with Fire Skills
- +12% to Critical Strike Multiplier with Elemental Skills
- 7% increased maximum Life
- +10% to all Elemental Resistances
 Stormshroud Jewel
- +15% to Lightning Resistance
- Modifiers to Chance to Avoid being Shocked apply to all Elemental Ailments
Brood Creed Jewel
- 4% increased Burning Damage
- +18% to Critical Strike Multiplier with Cold Skills
- 7% increased maximum Life
- +9% to all Elemental Resistances
- +12% to Cold and Lightning Resistances
Bramble Joy Jewel
- Adds 12 Passive Skills
- 2 Added Passive Skills are Jewel Sockets
- Added Small Passive Skills grant: 12% increased Attack Damage while holding a Shield
- Added Small Passive Skills also grant: 3% increased Attack and Cast Speed with Lightning Skills
- Added Small Passive Skills also grant: 3% increased Attack and Cast Speed with Elemental Skills
- Added Small Passive Skills also grant: +10 to Maximum Life
- Added Small Passive Skills have 35% increased Effect
 Thread of Hope Jewel
- Only affects Passives in Very Large Ring
- Passive Skills in Radius can be Allocated without being connected to your tree
- -12% to all Elemental Resistances
- Passage
Combat Focus Jewel
- Corrupted Blood cannot be inflicted on you
- 10% increased Elemental Damage
- With 40 total Dexterity and Strength in Radius, Prismatic Skills deal 50% less Lightning Damage
- With 40 total Dexterity and Strength in Radius, Prismatic Skills cannot choose Lightning
Lethal Pride Jewel
- Commanded leadership over 11477 warriors under Rakiata
- Passives in radius are Conquered by the Karui
- Historic

- 27% reduced Duration
- 25% increased effect
- 20% additional Elemental Resistances during Effect

- 24% reduced Duration
- 25% increased effect
- 52% of Damage from your Hits cannot be Reflected during Effect (crafted)

- 31% reduced Duration
- 25% increased effect
- 54% increased Critical Strike Chance during Effect
- 35% increased effect
- 61% increased Mana Burn rate
- 42% increased Melee Weapon Attack Speed
- 30% reduced Duration
- 25% increased effect
- 14% increased Movement Speed during Effect
All gem links (12 groups)
-
 Minion Pact L2
 - Minion Pact L2
-
 Cooldown Recovery L2
- Precision L20
- Lifetap L20
- Shield Charge L20
- Lifetap L2
- Frostblink 2/20
- Arctic Armour L21
- Enlighten L4
- Purity of Fire 20/20
- Enlighten L4
-
 Tempest Shield L21
 - Flesh and Stone L21
- Elemental Hit 20/20
- Close Combat 21/20
- Greater Ancestral Call 4/23
- Greater Multistrike 3/18
- Empower L4
- Increased Critical Damage 20/23
- Minion Pact L2
- Minion Pact L2
- Minion Pact L2
- Mark On Hit 20/20
- Assassin's Mark 20/20
- Blood Rage 20/20
How this stage plays (mechanics, defences)
At full power: 2.1M DPS, 91% suppress, 60% physical damage reduction, 67% crit chance, triple-ailment on every hit. Golem Fang (a rare Shaper-influence Noble Claw) is the damage multiplier vehicle — its three embedded supports are Increased Critical Strikes + Elemental Damage with Attacks + "Socketed Skills deal 40% more Attack Damage," and the 3 actual sockets host Trinity + Elemental Hit + Multistrike. The Squire's three supports then propagate back to the main hand, giving Elemental Hit an effective 9-support setup.
The Unseen Hue (Brittle) + The Taming together produce the ailment-stacking identity — Elemental Hit rolls one of three elements and the rings ensure all three ailment types remain on enemies, giving The Taming's per-ailment multiplier its full ~138% value on every hit. Ancestral Vision converts the near-full suppress into 45% elemental ailment avoidance, plugging the reflect gap. The tree adds Intuition and Weapon Artistry for raw crit/claw scaling, a Lethal Pride timeless jewel (15575 warriors under Akoya) in the Karui cluster replaces more passives with conquered nodes, and a Fulgent Glisten large cluster adds +18% increased attack speed via small-passive scaling. Watcher's Eye contributes Precision attack speed + Grace evade chance. The main hand's Mark the Prey + Assassin's Mark loop sustains Frenzy charges as before.
EHP hits 55k with every layer at its natural ceiling. 91% suppress + 29.8k evasion + 60% phys DR + 7 endurance charges + Brutal Fervour leech produces a character that only dies to uncounterable one-shots. Boots (Empyrean League, Harpyskin) drop Sapped Ground while moving — damage taken debuff stacked with the build's own Sap. Flasks include a Cinderswallow Urn (life on kill + 15% more damage against ignited enemies, which the build always inflicts via Scorch → Ignite conversion) alongside standard Jade + Diamond + Divine Life + Prismatic Tincture. Chaos resist caps cleanly at 75% (with 65 remaining), no longer a compromise. Block drops to 32% (The Squire isn't a block shield) but 91% suppress makes that irrelevant — the Vaal Buckler fallback from endgame isn't needed.
The apex Slayer feel: unstoppable forward motion. Whirling Blades leaps into any rare pack, Multistrike + Greater Ancestral Call clears a wide arc, and Bane of Legends triggers kill-explosion chains across entire screens. Pinnacle bosses — Shaper, Sirus, Eater/Exarch — fall in seconds because the Trinity + The Taming + Ruthless multiplier stack hits a ceiling that the tier's ~2M DPS sheet number significantly understates (DPS against brittled and scorched targets is effectively double the sheet). Frenzy charges stay capped via Mark the Prey, mana is a non-issue thanks to leech, and flask uptime on the utility set is essentially permanent during sustained combat.
Passive tree (134 points)
The desktop app shows this tier's full tree on an interactive canvas.