
Leveling L1–68
- Act 1: run Molten StrikeBerserker is Marauder, starts Str, levels naturally as a 2H melee. Buy Molten Strike from Nessa after Hillock — its projectile shotgun is the best 2H AoE cleaner in the early acts. Leap Slam from the Medicine Chest as travel. Ancestral Call Support from Brutus. Ruthless Support for boss damage spikes.
- Act 2: run Molten StrikePick up Herald of Ash from Yeena — scales physical hits into burn damage, which pairs perfectly with Molten Strike's already-fire-converting projectiles. Melee Physical Damage Support in the 4-link. Blood Rage (quest reward) is your first taste of frenzy charges on kill — the mechanic the whole build rotates around. Slot Cast when Damage Taken + Steelskin for panic defense. Take "Kill all" bandits for +2 passives.
- Act 3: run Molten StrikeMultistrike Support unlocks at L38 from Clarissa — this is the single biggest DPS multiplier for any non-channeled melee attack, and you will keep it on Flicker Strike forever once the swap happens. Grab Anger from the Library quest as your main fire-scaling aura (foreshadowing the Oro's Sacrifice pivot). Ancestral Protector totem for bosses. Lab 1 in Act 3: Crave the Slaughter — rage on hit kicks the build's defensive loop into motion.
- Act 5–6: run Molten StrikeKeep farming Molten Strike through Kitava. If you can afford Oro's Sacrifice at the Act 6 hub, equip it now — the 60% physical-to-fire conversion + ignite on hit gives you the frenzy charges sustain framework early. Fire Penetration Support at L31 is a huge damage boost for Molten Strike as a fire-conversion skill. Lab 2 in Act 6: Blitz — this is the build-defining ascendancy for Flicker Strike's attack speed scaling, take it before doing the swap.
- Act 7 (L42+): run Flicker StrikeGem hits L42, time to swap. Buy Flicker Strike from the Act 6 vendor (Lilly Roth). The critical prereq is a frenzy charges source — Oro's Sacrifice (ignite-on-hit) is the Berserker signature, Terminus Est (on-kill) is the cheaper alternative, and The Red Trail boots layer on top for taking-damage sustain. Without ONE of these, Flicker Strike stutters and feels awful — do NOT swap until you have the charge source equipped. Keep Blood Rage up as backup on-kill sustain and for the attack speed. Lab 3 in Act 9: Aspect of Carnage — the 40% more damage dealt is the single biggest multiplier in the build.
- Act 9–10: run Flicker StrikeOnce Aspect of Carnage is online, your damage roughly doubles — but so does incoming damage. This is when life on hit, leech, and flask uptime go from nice-to-have to life-or-death. Cap 75% resist on all three elements before maps — no exceptions. Add Hatred if mana reservation allows; it scales physical into cold, which then benefits from Oro's Sacrifice's conversion framework. Keep Blood Rage up at all times.
 Molten Strike
  Ancestral Call Support
  Ruthless Support
  Leap Slam
 Berserker is Marauder, starts Str, levels naturally as a 2H melee. Buy Molten Strike from Nessa after Hillock — its projectile shotgun is the best 2H AoE cleaner in the early acts. Leap Slam from the Medicine Chest as travel. Ancestral Call Support from Brutus. Ruthless Support for boss damage spikes.
Molten Strike Ancestral Call Support  Melee Physical Damage Support Ruthless Support Leap Slam
  Herald of Ash
  Cast when Damage Taken
  Steelskin
  Blood Rage
 Pick up Herald of Ash from Yeena — scales physical hits into burn damage, which pairs perfectly with Molten Strike's already-fire-converting projectiles. Melee Physical Damage Support in the 4-link. Blood Rage (quest reward) is your first taste of frenzy charges on kill — the mechanic the whole build rotates around. Slot Cast when Damage Taken + Steelskin for panic defense. Take "Kill all" bandits for +2 passives.
Molten Strike Ancestral Call Support Melee Physical Damage Support  Multistrike Support Leap Slam
  Anger Herald of Ash
  Ancestral Protector Blood Rage Cast when Damage Taken Steelskin
 Multistrike Support unlocks at L38 from Clarissa — this is the single biggest DPS multiplier for any non-channeled melee attack, and you will keep it on Flicker Strike forever once the swap happens. Grab Anger from the Library quest as your main fire-scaling aura (foreshadowing the Oro's Sacrifice pivot). Ancestral Protector totem for bosses. Lab 1 in Act 3: Crave the Slaughter — rage on hit kicks the build's defensive loop into motion.
Molten Strike Ancestral Call Support Melee Physical Damage Support Multistrike Support  Fire Penetration Support Leap Slam Anger Herald of Ash
  Vaal Ancestral Warchief Blood Rage Cast when Damage Taken Steelskin
 Keep farming Molten Strike through Kitava. If you can afford Oro's Sacrifice at the Act 6 hub, equip it now — the 60% physical-to-fire conversion + ignite on hit gives you the frenzy charges sustain framework early. Fire Penetration Support at L31 is a huge damage boost for Molten Strike as a fire-conversion skill. Lab 2 in Act 6: Blitz — this is the build-defining ascendancy for Flicker Strike's attack speed scaling, take it before doing the swap.
 Flicker Strike Multistrike Support Melee Physical Damage Support Fire Penetration Support Ancestral Call Support Leap Slam Anger Herald of Ash Vaal Ancestral Warchief Blood Rage Cast when Damage Taken Steelskin
 Gem hits L42, time to swap. Buy Flicker Strike from the Act 6 vendor (Lilly Roth). The critical prereq is a frenzy charges source — Oro's Sacrifice (ignite-on-hit) is the Berserker signature, Terminus Est (on-kill) is the cheaper alternative, and The Red Trail boots layer on top for taking-damage sustain. Without ONE of these, Flicker Strike stutters and feels awful — do NOT swap until you have the charge source equipped. Keep Blood Rage up as backup on-kill sustain and for the attack speed. Lab 3 in Act 9: Aspect of Carnage — the 40% more damage dealt is the single biggest multiplier in the build.
Flicker Strike Multistrike Support Melee Physical Damage Support Fire Penetration Support Ancestral Call Support Leap Slam Anger  Hatred Herald of Ash Vaal Ancestral Warchief Blood Rage Cast when Damage Taken Steelskin
 Once Aspect of Carnage is online, your damage roughly doubles — but so does incoming damage. This is when life on hit, leech, and flask uptime go from nice-to-have to life-or-death. Cap 75% resist on all three elements before maps — no exceptions. Add Hatred if mana reservation allows; it scales physical into cold, which then benefits from Oro's Sacrifice's conversion framework. Keep Blood Rage up at all times.
Flicker Strike Multistrike Support Melee Physical Damage Support Fire Penetration Support Ancestral Call Support  Combustion Support Leap Slam Anger Hatred Herald of Ash Vaal Ancestral Warchief Blood Rage Cast when Damage Taken Steelskin
 Uber Lab at L68 for War Bringer — warcries now exert your Flicker Strike attacks and grant life/mana regen. Set up Enduring Cry or Seismic Cry on a short-cooldown rotation for boss fights. Combustion Support as the 6-link addition for fire-conversion builds — it adds ignite damage plus reduces enemy fire resist on ignite, stacking with Fire Penetration Support. Long-term weapon: upgrade from Oro's Sacrifice to a rare 2H sword with attack speed + physical damage + added fire, or stay on Oro's Sacrifice all the way into red maps — the free frenzy charges sustain is worth a lot of raw DPS. Exceptional Support gems in 3.28 include strong flicker-compatible replacements — check poedb.tw for the current list.
How leveling works
Flicker Strike on a Berserker is the classic "double damage, double death" flicker build — you lean into Aspect of Carnage (40% more damage dealt, 10% more damage taken) and sustain the incoming damage through massive leech, life on hit, and rage-stacking recovery. The Berserker ascendancy is the single most damaging choice for Flicker Strike: Blitz gives per-hit attack speed stacks, Crave the Slaughter generates rage on every hit, War Bringer exerts attacks via warcries, and Aspect of Carnage is the headline multiplier that makes the entire build shine.
Flicker Strike itself unlocks as a gem at L42 and REQUIRES a reliable frenzy charges source to be playable — the skill consumes a charge on each cast and its cooldown is only bypassed while you have one to spend. Without sustain, the skill stutters every two casts and feels terrible. The standard leveling plan is Molten Strike or Frost Blades through Acts 1–6, pivot to Flicker Strike around Act 7 once you have equipped either Terminus Est (2H sword that grants a charge on every kill) or Oro's Sacrifice (2H sword that grants frenzy charges on ignite, which happens on every hit with its fire conversion). Oro's Sacrifice is the signature Berserker flicker weapon — it converts 60% physical to fire, carries ignite-on-hit, and turns the ignite application into guaranteed charge sustain.
The Berserker ascendancy chain you are grabbing is Crave the Slaughter (rage generation on hit), Blitz (attack speed per hit — the single most important Flicker Strike node), Aspect of Carnage (the damage multiplier), and War Bringer (warcry exertion + life/mana regen). Aspect of Carnage is the biggest damage tier in the game for any ascendancy, bar none — it also makes you extremely squishy, which is why Berserker flicker needs leech + life-on-hit sustain as non-negotiable defensive layers.
Critical gem-compatibility note: Flicker Strike is NOT channeled, so Multistrike Support works perfectly and is mandatory — unlike Cyclone builds. Main link is Flicker Strike + Multistrike Support + Melee Physical Damage Support + Combustion Support (fire) or Brutality Support (pure phys) + Ancestral Call Support or Damage on Full Life Support. Save currency for Oro's Sacrifice (a budget unique) and The Red Trail boots for redundant charge sustain — those two uniques unlock the build on any budget.
Gear while leveling
- · Weapon: Oro's Sacrifice is the Berserker flicker signature — 60% physical-to-fire conversion + ignite on hit gives you free frenzy charges sustain through its ignite uptime. Available at L67, cheap early league. Before that, use vendor-recipe 2H swords or axes (magic 2H + Rustic Sash + Blacksmith's Whetstone).
- · Body armour: a Tabula Rasa for campaign is ideal — guaranteed 6-link. Endgame is a rare 6-link armour chest with life, resists, and ES. Belly of the Beast is a strong mid-tier life-focused armour chest.
- · Helmet/gloves/boots: life + resists + attack speed where possible. Enter maps capped at 75% resist on all three elements. Goldrim covers elemental resist gaps cheaply during acts. The Red Trail boots grant frenzy charges on taking damage — redundant charge sustain that stacks with Oro's Sacrifice's ignite trigger.
- · Rings/amulet: life + resists + attack speed + attribute fix-ups. Xoph's Blood amulet converts 25% physical to fire and grants Avatar of Fire — a strong late-game pickup for the Oro's Sacrifice path.
- · Belt: a Leather or Heavy Belt with life and resists during leveling. Endgame swaps to a Stygian Vise with an abyss jewel, Headhunter (aspirational), or The Magnate for the strength bonus.
- · Flasks: a life flask with "of Staunching" (bleed removal — MANDATORY for any flicker build), a quicksilver, a granite or basalt, a silver flask for attack speed, and a diamond flask if you run crit. Atziri's Promise for chaos conversion is a cheap damage flask.
- · Jewels: 1-2 rare jewels or abyss jewels with life, attack speed, and either fire damage or added damage to attacks while holding a 2H weapon.
Weapon progression
Use vendor-recipe 2H swords or axes through Acts 1–6 while running Molten Strike. At L67, swap to Oro's Sacrifice — this is the Berserker flicker signature weapon. The 60% physical-to-fire conversion plus ignite-on-hit guarantees frenzy charges sustain through its ignite chance, which means Flicker Strike spam never runs out of charges. It is typically a few chaos at league start and does not scale out until well into red maps. Terminus Est is the alternative for pure-physical builds — cheaper and simpler, but gives up the fire-conversion synergy with Aspect of Carnage's damage scaling. Long-term endgame is either a rare 2H sword with attack speed + physical damage + added fire damage, or Starforge for pure-phys sequences. Get to maps first with any 2H, then commit to Oro's Sacrifice as the mid-tier transition piece.
Tree to aim for (by level 90)
Watch out for
- ! Do NOT swap to Flicker Strike before you have a reliable frenzy charges source equipped. Without Oro's Sacrifice, Terminus Est, or The Red Trail, the skill stutters after two casts and feels unplayable. Stay on Molten Strike or Frost Blades until the charge source is in your inventory.
- ! Aspect of Carnage gives 40% more damage dealt AND 10% more damage taken — the more-damage-taken side is NOT reduced by resistances or armour, it is a flat multiplier on incoming damage. You will die to hits you previously survived if you do not stack leech, life on hit, and max life to compensate. This is the signature "double damage, double death" of Berserker flicker — it is a feature, not a bug, but it demands discipline.
- ! Flicker Strike is notorious for bleed deaths — you teleport into packs faster than you can clear the ailment. Always carry a life flask with "of Staunching" (removes bleed), and never leave town without a bleed-immune flask equipped.
- ! The skill teleports you to a random enemy in range, not always the one you are aiming at. This is Flicker Strike's signature feel — do not try to fight it. Scale attack speed and frenzy charges to raise the hit rate, and accept that positioning is reactive.
- ! Blitz's per-hit attack speed stacks decay quickly if you stop attacking. Against bosses with invulnerability phases, teleport to adds or totems to keep the stacks up — standing still kills the build's damage ramp.
- ! Acrobatics is a trap on Berserker — you are stacking life/leech for sustain, and Acrobatics's armour/ES penalty kills your physical mitigation. Never take it.
- ! 3.28 introduces Exceptional Support gems — several of them scale melee attack speed and ailment-scaling better than the standard supports. Check poedb.tw for the current list before committing endgame currency to a 6-link gem layout, particularly the Exceptional replacements for Combustion Support and Fire Penetration Support.
Early Mapping L70–84
- Transition from the rare crit Foil to Paradoxica as soon as budget allows — "Attacks with this Weapon deal Double Damage" is the single biggest DPS jump in the tier
- Target a Watcher's Eye with Precision crit multi and Pride impale duration for a layered damage + phys-reduction bump
- Anoint or craft toward Iron Will on the tree — it's 56% adoption at endgame for a reason once Strength scaling starts mattering


 Flicker Strike
 Invert the Rules
 Elemental Damage with AttacksMultistrike
 Ice Bite
 Close Combat
Full gear (24 items)
 Miracle Thirst Weapon 1
- +25% to Global Critical Strike Multiplier
- Adds 118 to 206 Fire Damage
- Adds 73 to 125 Cold Damage
- Adds 10 to 171 Lightning Damage
- 24% increased Critical Strike Chance
- +622 to Accuracy Rating
- 20% increased Attack Speed (crafted)
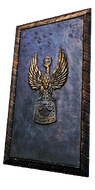 Miracle Rook Weapon 2
- +29 to maximum Life
- 61% increased Chance to Block
- You take 55% reduced Extra Damage from Critical Strikes
- 100% increased Armour
- +2% to all maximum Resistances
- 5% additional Physical Damage Reduction
- +61 to maximum Life (crafted)
Innsbury Edge Weapon 1 Swap
- +330 to Accuracy Rating
- 120% increased Physical Damage
- 21% increased Attack Speed
- 0.2% of Chaos Damage Leeched as Life
- 25% of Physical Damage Converted to Chaos Damage
- Attacks with this Weapon Maim on hit
 Yew Spirit Shield Weapon 2 Swap
- 8% increased Spell Damage
 Brood Salvation Helmet
- 7% increased Mana Reservation Efficiency of Skills
- +1% to maximum Lightning Resistance
- +103 to maximum Life
- +45% to Fire Resistance
- +34% to Chaos Resistance
- +28 to Intelligence (crafted)
Replica Farrul's Fur Body Armour
- 108% increased Armour and Evasion
- +89 to maximum Life
- +2.00 seconds to Cat's Agility Duration
- Aspect of the Cat has no Reservation
- Gain up to your maximum number of Frenzy and Endurance Charges when you gain Cat's Agility
- You have Onslaught while you have Cat's Agility
 Empyrean Fingers Gloves
- 20% increased Melee Damage
- Grants Level 20 Aspect of the Cat Skill
- +13% to Chaos Damage over Time Multiplier
- 28% increased Armour
- +25% to Chaos Resistance
- +1 to Maximum Frenzy Charges
- 13% increased Stun and Block Recovery
- Non-Vaal Strike Skills target 1 additional nearby Enemy
Darkray Vectors Boots
- 43% increased Armour and Evasion
- 10% increased Evasion Rating per Frenzy Charge
- +38% to Lightning Resistance
- 5% increased Movement Speed per Frenzy Charge
- +1 to Maximum Frenzy Charges
- 40% reduced Frenzy Charge Duration
- 25% reduced Light Radius
 Dread Gorget Amulet
- Allocates Frenetic
- +24 to Dexterity and Intelligence
- Grants Level 20 Aspect of the Cat Skill
- Adds 24 to 42 Fire Damage to Attacks
- +29% to Global Critical Strike Multiplier
- +94 to maximum Life
- +73 to maximum Mana
- +18% to all Elemental Resistances
 Beast Hold Ring 1
- +23% to Chaos Resistance
- +14 to all Attributes
- +102 to maximum Life
- +33% to Fire Resistance
- 35% increased Elemental Damage with Attack Skills
- Adds 28 to 47 Fire Damage against Ignited Enemies
- +24% to Cold Resistance (crafted)
 Honour Turn Ring 2
- 12% increased Rarity of Items found
- +46 to Intelligence
- +113 to maximum Life
- 36% increased Mana Regeneration Rate
- Gain 13 Life per Enemy Hit with Attacks
- 42% increased Elemental Damage with Attack Skills
- +19% to Lightning and Chaos Resistances
Mageblood Belt
- +35 to Strength
- +30 to Dexterity
- +23% to Fire Resistance
- +24% to Cold Resistance
- Magic Utility Flasks cannot be Used
- Leftmost 4 Magic Utility Flasks constantly apply their Flask Effects to you
- Magic Utility Flask Effects cannot be removed
 Dragon Heart Jewel
- Adds 8 Passive Skills
- 2 Added Passive Skills are Jewel Sockets
- Added Small Passive Skills grant: 12% increased Attack Damage while holding a Shield
- Added Small Passive Skills also grant: 4% increased Mana Regeneration Rate
- 1 Added Passive Skill is Feed the Fury
- 1 Added Passive Skill is Martial Prowess
- 1 Added Passive Skill is Precise Retaliation
Stormshroud Jewel
- +10% to Lightning Resistance
- Modifiers to Chance to Avoid being Shocked apply to all Elemental Ailments
 Soul Solace Jewel
- 13% increased Attack Damage while holding a Shield
- +14% to Melee Critical Strike Multiplier
- 5% increased maximum Life
- 0.29% of Physical Attack Damage Leeched as Life
 Bramble Cut Jewel
- Adds 5 Passive Skills
- 1 Added Passive Skill is a Jewel Socket
- Added Small Passive Skills grant: 15% increased Critical Strike Chance
- Added Small Passive Skills also grant: +2% to all Elemental Resistances
- Added Small Passive Skills also grant: +5 to Strength
- 1 Added Passive Skill is Precise Retaliation
- 1 Added Passive Skill is Pressure Points
Foe Desire Jewel
- 10% increased Damage
- 5% increased Attack Speed
- 6% increased maximum Life
- 6% increased Flask Effect Duration
 Intuitive Leap Jewel
- Passive Skills in Radius can be Allocated without being connected to your tree
- Passage
 Watcher's Eye Jewel
- 5% increased maximum Energy Shield
- 5% increased maximum Life
- 4% increased maximum Mana
- 57% increased Attack Damage while affected by Precision
- Gain 29 Life per Enemy Hit while affected by Vitality

- 24% reduced Amount Recovered
- Instant Recovery when on Low Life
- Grants Immunity to Bleeding for 13 seconds if used while Bleeding
- Grants Immunity to Corrupted Blood for 13 seconds if used while affected by Corrupted Blood

- 37% reduced Duration
- 25% increased effect
- 52% chance to Avoid being Shocked during Effect

- 35% reduced Duration
- 25% increased effect
- 52% reduced Effect of Curses on you during Effect

- 23% reduced Duration
- 25% increased effect
- 52% increased Critical Strike Chance during Effect

- 28% reduced Duration
- 25% increased effect
- 58% increased Armour during Effect
All gem links (11 groups)
-
 Automation 20/20
 -
 Vitality L2
-
 Less Duration L17
- Flicker Strike 20/20
- Invert the Rules 2/20
- Elemental Damage with Attacks 19/20
- Multistrike L18
- Ice Bite 21/20
- Close Combat L19
-
 Faster Attacks L19
 - Leap Slam L20
-
 Flesh and Stone L19
-
 Rage Vortex of Berserking 20/20
 -
 Life Gain on Hit 19/20
 -
 Rage 19/20
 -
 Culling Strike 19/20
-
 Enlighten 2/20
- Enlighten 2/20
-
 Tempest Shield L20
 -
 Determination L19
 -
 Herald of Ice 19/20
-
 Mark On Hit L18
 -
 Assassin's Mark 19/20
-
 Precision L2
-
 Aspect of the Cat L20
- Aspect of the Cat L20
How this stage plays (mechanics, defences)
Early mapping runs a pure-physical Flicker Strike engine with a rare Fancy Foil in the main hand — 20% attack speed, +25% global crit multi, and triple elemental adds — feeding a body-armour 6-link of Flicker Strike + Multistrike Support + Elemental Damage with Attacks + Close Combat Support + Ice Bite Support + Invert the Rules. Replica Farrul's Fur is the central chassis piece: "Aspect of the Cat has no Reservation" and "Gain up to your maximum number of Frenzy and Endurance Charges when you gain Cat's Agility" means every kill that triggers Cat's Agility refills the full charge bank, and charges power both Flicker Strike's consumption and the movement speed per frenzy charge scaling on Darkray Vectors.
The Berserker ascendancy starts paying immediately. Crave the Slaughter grants increased attack speed per rage and lifts the rage cap, Ancestral Fury adds attack speed and damage per rage, Rite of Ruin lets you exceed the cap through kills (fed by the Rage + Rage Vortex of Berserking + Life Gain on Hit Support link in the helmet), and Aspect of Carnage closes the ascendancy as a permanent 40% more damage / 10% more damage taken multiplier. Tree notables stack sword / crit / life — Savagery, Fatal Blade, Warrior's Blood, Ancestral Fury, Dismembering — and Versatile Combatant is already allocated for spell-from-attack-block conversion against the Miracle Rook shield's 61% increased block chance. A Watcher's Eye with 57% attack damage while affected by Precision plus The Light of Meaning cover the jewel damage scaling. Sheet DPS reads 3.3M at L80 — comfortably above the tier median of 826k.
The defensive stack at this tier is armour + block + endurance charges + Mageblood flasks. 19.9k armour and 4 endurance charges push physical damage reduction to 85%, 68% attack block / 58% spell block from Miracle Rook and Versatile Combatant is already high, and EHP 43k on the reference is massively above the tier median of 7.5k because Mageblood permanently applies four utility flasks (Bismuth for resist overcap, Granite for armour, Diamond for crit, Quicksilver for movement). Chaos resist lands at +41% with +34% chaos on the rare helmet and rolls on belt/gloves/rings.
Molten Shell on Automation in the gloves covers spike hits, Determination in the boots scales the armour pool, and Herald of Ice adds on-kill shatter. The build has no spell suppression, so elemental spell hits land raw — a known Berserker hole this tier doesn't try to patch, offset by the armour + block stack underneath. Pantheon is Arakaali + Shakari for DoT mitigation and chaos hits.
Classic Flicker Strike tempo with permanent rage fuel. You Leap Slam into a pack, prime charges with Blood Rage + Rage Vortex of Berserking, then Flicker Strike chain-teleports through everything while Aspect of Carnage's flat damage multiplier vapourises packs. Replica Farrul's Fur's kill-refill keeps the charge bank full, 10.44 attacks per second plus Multistrike Support's triple-hit repeat pumps out hits faster than the camera can render, and Tribal Fury-equivalent cleave comes from the gloves' Non-Vaal Strike Skills target 1 additional nearby Enemy roll. Boss single-target uses the Assassin's Mark + Mark On Hit helmet link for on-hit crit and power-charge procs plus Culling Strike Support on the rage-vortex loop for low-HP finishes.
Passive tree (129 points)
The desktop app shows this tier's full tree on an interactive canvas.
Endgame L85–94
- The endgame reference takes a sharp turn — the weapon pivots from a rare Foil to an Energy Blade Two Handed (adding 112 to 2244 Lightning Damage for the cost of max mana), Crown of the Inward Eye arrives in the helmet to triple-stack life/mana/ES, and Foulborn Ghostwrithe replaces Replica Farrul's Fur for the +50% chaos res + 40% of max life as ES hybrid pool. Resolute Technique enters the tree (43% tier adoption) since the two-handed Energy Blade build no longer runs a crit rare weapon — lightning scaling with guaranteed hits is the new damage model.
- Rotate to the meta Paradoxica + Replica Farrul's Fur shell — it's the dominant pattern (Paradoxica 48%, Farrul's 41%) for a reason, and the DPS ceiling is higher than the Energy Blade two-hander
- Pick up Forbidden Flame + Forbidden Flesh allocating Tukohama, War's Herald — 67% adoption in the tier, ascendancy point out-of-class via the reference's exact pairing
- Upgrade to Crown of Eyes (57% adoption) for the "Increases and Reductions to Spell Damage also apply to Attacks at 150%" line — converts Iron Will spell scaling into enormous attack damage multipliers


 Flicker StrikeMultistrike
 VolatilityElemental Damage with AttacksRuthlessClose Combat
Full gear (22 items)
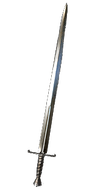 Vortex Stinger Weapon 1 Swap
- +400 to Accuracy Rating
- Adds 2 to 5 Physical Damage
- Adds 77 to 122 Cold Damage
- Adds 8 to 112 Lightning Damage
- 6% increased Attack Speed
- +28% to Global Critical Strike Multiplier
- +145 to Accuracy Rating
Crown of the Inward Eye Helmet
- 333% increased Armour and Energy Shield
- 21% increased maximum Life, Mana and Global Energy Shield
- Transfiguration of Soul
- Transfiguration of Body
- Transfiguration of Mind
Foulborn Ghostwrithe Body Armour
- +119 to maximum Energy Shield
- +80 to maximum Life
- +50% to Chaos Resistance
- Your Maximum Energy Shield is Equal to 40% of Your Maximum Life
 Dragon Caress Gloves
- Inflict Lightning Exposure on Hit, applying -11% to Lightning Resistance
- Non-Vaal Strike Skills target 1 additional nearby Enemy
- Adds 6 to 10 Physical Damage to Attacks
- 35% increased Armour
- +106 to maximum Life
- +35% to Fire Resistance
- +41% to Lightning Resistance
- 14% increased Stun and Block Recovery
- +25 to Dexterity and Intelligence (crafted)
 Sol Tread Boots
- 5% increased Cooldown Recovery Rate
- +7% to Chaos Resistance
- +22% to Chaos Resistance
- +60 to Armour
- +102 to maximum Life
- +39% to Fire Resistance
- +47% to Lightning Resistance
- 20% increased Movement Speed (crafted)
- 8% chance to gain Onslaught for 4 seconds on Kill (crafted)
Foulborn Voice of the Storm Amulet
- Allocates Arcing Blows
- +30 to Intelligence
- +13 to all Attributes
- 50% increased Lightning Damage
- Lightning Damage with Non-Critical Strikes is Lucky
- +3% to maximum Lightning Resistance
 Blight Finger Ring 1
- 5% increased maximum Life
- +48 to Intelligence
- Adds 8 to 18 Fire Damage to Attacks
- +33 to maximum Mana
- +33% to Cold Resistance
- +21% to Chaos Resistance
- +51 to maximum Life (crafted)
Maelstrom Whorl Ring 2
- 7% increased maximum Life
- +56 to Dexterity
- Adds 1 to 2 Physical Damage to Attacks
- Adds 22 to 32 Fire Damage to Attacks
- +14% to all Elemental Resistances
- +15% to Chaos Resistance
- +55 to maximum Life (crafted)
 Rune Lock Belt
- Allocates Divine Fervour
- Can be Anointed
- +26 to maximum Energy Shield
- +117 to maximum Life
- +30% to Fire Resistance
- +39% to Cold Resistance
- Reflects 4 Physical Damage to Melee Attackers
- +13% to Cold and Chaos Resistances (crafted)
Behemoth Vessel Jewel
- 14% increased Damage with Swords
- 7% increased maximum Life
- +15% to Cold Resistance
- 7% increased Ignite Duration on Enemies
- 4% chance to Ignite
The Light of Meaning Jewel
- Passive Skills in Radius also grant 6% increased Lightning Damage
Glorious Vanity Jewel
- Bathed in the blood of 5973 sacrificed in the name of Ahuana
- Passives in radius are Conquered by the Vaal
- Historic
 Forbidden Flame Jewel
- Allocates Tukohama, War's Herald if you have the matching modifier on Forbidden Flesh
 Forbidden Flesh Jewel
- Allocates Tukohama, War's Herald if you have the matching modifier on Forbidden Flame
Rapture Wound Jewel
- 16% increased Damage with Swords
- 7% increased maximum Life
- 10% increased Area Damage
- 25% reduced Effect of Curses on you
Luminous Prism Jewel
- Adds 8 Passive Skills
- 2 Added Passive Skills are Jewel Sockets
- Added Small Passive Skills grant: Axe Attacks deal 12% increased Damage with Hits and Ailments Added Small Passive Skills grant: Sword Attacks deal 12% increased Damage with Hits and Ailments
- Added Small Passive Skills also grant: +3% to Lightning Resistance
- 1 Added Passive Skill is Drive the Destruction
- 1 Added Passive Skill is Fuel the Fight
- 1 Added Passive Skill is Martial Prowess
- 109% more Recovery if used while on Low Life
- Grants Immunity to Bleeding for 15 seconds if used while Bleeding
- Grants Immunity to Corrupted Blood for 15 seconds if used while affected by Corrupted Blood

- 32% increased Duration
- 46% increased Armour during Effect
- 23% increased Duration
- 10% increased Movement Speed during Effect

- 22% increased Duration
- 48% reduced Effect of Curses on you during Effect

- 35% increased effect
- 61% increased Mana Burn rate
- Melee Weapon Damage Penetrates 22% Elemental Resistances
All gem links (8 groups)
-
 Purity of Elements L19
 - Flesh and Stone L20
- Blood Rage L20
- Flicker Strike L19
- Flicker Strike L19
- Flicker Strike L19
- Flicker Strike L19
- Multistrike L20
- Volatility L20
- Elemental Damage with Attacks 19/20
- Ruthless L20
- Close Combat 19/20
- Flicker Strike 20/20
-
 Momentum L19
 - Faster Attacks L20
- Leap Slam L20
-
 Lifetap L20
- Mark On Hit 19/20
-
 Poacher's Mark 20/20
 - Lifetap L19
-
 Berserk 19/20
-
 Energy Blade 20/20
- Lifetap L19
-
 Frostblink L9
 -
 Enduring Cry 19/20
How this stage plays (mechanics, defences)
Sheet DPS sits at 6.7M on the reference (against a tier median of 10M, so this particular character is a p50-ish build despite the Energy Blade pivot being genuinely atypical for the broader tier). The 6-link migrates into Foulborn Ghostwrithe: Flicker Strike + Multistrike Support + Volatility Support + Elemental Damage with Attacks + Ruthless Support + Close Combat Support. Volatility Support (87% adoption in the tier) is the key support swap from early mapping — its wider damage range multiplies cleanly with crit-free Resolute Technique hits. The tier's dominant pattern is actually the rare Paradoxica + Replica Farrul's Fur crit-foil setup (48% Paradoxica pick rate, 41% Replica Farrul's), and this reference is the off-meta Energy Blade expression of the same ascendancy.
Crown of the Inward Eye's Transfiguration lines convert mana + ES + life into scaling damage via Iron Will-style multiplicative stacking, and Foulborn Voice of the Storm amulet adds +3% max lightning res on top of "Lightning Damage with Non-Critical Strikes is Lucky" — exactly what a Resolute-Technique crit-less lightning attack wants. Flesh and Stone + Purity of Elements + Blood Rage run off the weapon as the aura set, and Poacher's Mark + Mark On Hit Support in the gloves applies the curse on every teleport-hit for -18% evasion + attack-dodge-bypass against bosses. The ascendancy keeps Crave the Slaughter / Ancestral Fury / Rite of Ruin / Aspect of Carnage, and the tree picks up Tribal Fury for the strike-extra-target and Battle Trance for the warcry interaction.
EHP 35k, right at the tier median of 39k. The defensive math is hybrid life/ES now: 6.7k life + 2.7k ES through Foulborn Ghostwrithe's 40% life as ES conversion, 8.7k armour with 5 endurance charges driving 63% physical damage reduction, and all four elemental resists capped with decent overcap (+29% fire, +18% cold, +9% lightning). Chaos resist jumps to +68% thanks to Foulborn Ghostwrithe's +50% line plus chaos rolls on gloves, boots, ring, and belt.
Purity of Elements is the tier's most-picked aura at 79% adoption, and it's here too — ailment immunity plus resist floor. The build runs no spell suppression (standard for the ascendancy) and no block on the two-handed setup, so the defensive plan is armour + endurance + chaos overcap + Purity of Elements. Pantheon is Lunaris + Garukhan for chain-reduction and movement.
8.51 attacks per second, 100% hit chance via Resolute Technique, and Energy Blade's flat lightning adds means every Flicker Strike hit deposits the full 112-2244 lightning range per swing. Multistrike Support's triple repeat plus Ruthless Support's every-third-hit more multiplier means the rhythm is a 9-hit burst per click, cascading through whatever the cursor aimed at. Replica Farrul's Fur isn't here any more (this build dropped it for Foulborn Ghostwrithe's defensive pool), so frenzy charges now sustain through Blood Rage on-kill and Enduring Cry + Poacher's Mark for bossing. The three extra Flicker Strike gems in the weapon-swap slots are insurance copies — scaled by the swap gear's +gem rolls for higher-level flicker on demand. Feel is slightly less frantic than the aspirational Paradoxica build because Resolute-Technique two-handed Energy Blade cares about positioning, not crit roulette.
Passive tree (125 points)
The desktop app shows this tier's full tree on an interactive canvas.
Aspirational L95–100
- The aspirational build abandons the Energy Blade experiment and commits to the dominant meta: Paradoxica main hand (94% adoption), Rathpith Globe off-hand, Crown of Eyes helmet (92%), The Iron Fortress chest, Replica Alberon's Warpath boots (92%), Kalandra's Touch ring (to mirror a high-value rare), Eyes of the Greatwolf amulet, and Foulborn Mageblood belt. Iron Will becomes the keystone identity, Precise Technique replaces Resolute Technique, and Strength stacking to 2079 becomes the core damage lever.


 Smite of Divine Judgement
 Void Manipulation
 FortifyVolatility
 Endurance Charge on Melee StunMultistrike
Full gear (27 items)
Paradoxica Weapon 1
- Quality does not increase Physical Damage
- Grants 1% increased Accuracy per 2% Quality
- +25% to Global Critical Strike Multiplier
- +27 to Dexterity and Intelligence
- 19% increased Attack Speed
- Attacks with this Weapon Penetrate 15% Chaos Resistance
- Attacks with this Weapon deal Double Damage
Rathpith Globe Weapon 2
- 11% Chance to Block Spell Damage
- 147% increased Energy Shield
- 10% increased maximum Life
- Sacrifice 10% of your Life when you Use or Trigger a Spell Skill
- 5% increased Spell Critical Strike Chance per 100 Player Maximum Life
- 5% increased Spell Damage per 100 Player Maximum Life
Crown of Eyes Helmet
- Socketed Skill Gems get a 90% Cost & Reservation Multiplier
- +322 to Accuracy Rating
- 128% increased Energy Shield
- -30% to Fire Resistance
- 0.51% of Attack Damage Leeched as Life
- 0.39% of Attack Damage Leeched as Mana
- Increases and Reductions to Spell Damage also apply to Attacks at 150% of their value
The Iron Fortress Body Armour
- Quality does not increase Defences
- Grants +1 to Strength per 2% Quality
- +1% Chance to Block Attack Damage per 50 Strength
- Chance to Block Spell Damage is Unlucky
- +108 to Strength
- 81% increased Armour
- 10% reduced Movement Speed
- Strength's Damage Bonus instead grants 3% increased Melee Physical Damage per 10 Strength
 Phoenix Hold Gloves
- 3% increased Damage per 100 Strength
- Non-Vaal Strike Skills target 1 additional nearby Enemy
- +55 to Strength
- 9% increased Attack Speed
- +93 to maximum Life
- +18 to maximum Mana
- +30% to Chaos Resistance
- 15% increased Melee Damage (crafted)
- +0.1 metres to Melee Strike Range (crafted)
Replica Alberon's Warpath Boots
- 17% increased Strength
- +207 to Armour
- +15% to Chaos Resistance
- 25% increased Movement Speed
- Cannot deal non-Chaos Damage
- Adds 1 to 80 Chaos Damage to Attacks per 80 Strength
 Eyes of the Greatwolf Amulet
- Allocates Force of Darkness
- 32% increased Attributes
- 44% increased Chaos Damage
- Implicit Modifier magnitudes are doubled
 Doom Turn Ring 1
- -1 Prefix Modifier allowed
- +1 Suffix Modifier allowed
- Implicit Modifiers Cannot Be Changed
- 25% increased Suffix Modifier magnitudes
- +76 to Strength
- +60 to Intelligence
- +85 to maximum Life
- +17% to all Elemental Resistances
- +38% to Chaos Resistance
- Non-Channelling Skills have -7 to Total Mana Cost (crafted)
 Kalandra's Touch Ring 2
- Reflects opposite Ring
Foulborn Mageblood Belt
- +42 to Strength
- +58 to Dexterity
- +16% to Fire Resistance
- +21% to Cold Resistance
- Magic Utility Flasks cannot be Used
- Magic Utility Flask Effects cannot be removed
- Rightmost 4 Magic Utility Flasks constantly apply their Flask Effects to you
 Split Personality Jewel
- This Jewel's Socket has 25% increased effect per Allocated Passive Skill between it and your Class' starting location
- +5 to Strength
- +5 to maximum Life
Watcher's Eye Jewel
- 5% increased maximum Energy Shield
- 6% increased maximum Life
- 4% increased maximum Mana
- 11% increased Cast Speed while affected by Zealotry
- +37% to Chaos Resistance while affected by Purity of Elements
- Damage Penetrates 11% Lightning Resistance while affected by Wrath
Pandemonium Spark Jewel
- +8 to Strength and Intelligence
- 7% increased Attack Speed with Swords
- 6% increased maximum Life
- 11% increased Area Damage
Ghoul Prism Jewel
- Corrupted Blood cannot be inflicted on you
- +8 to all Attributes
- 7% increased Attack Speed with Swords
- 13% increased Damage with Two Handed Weapons
 Emperor's Might Jewel
- 5% increased Strength
- 10% increased Damage
- 3% increased Character Size
 Inertia Jewel
- +17 to Strength
- Dexterity from Passives in Radius is Transformed to Strength
 Emperor's Mastery Jewel
- 6% increased Attributes
- 4% increased maximum Life
- 3% increased Character Size
- 5% increased Global Defences
Split Personality Jewel
- This Jewel's Socket has 25% increased effect per Allocated Passive Skill between it and your Class' starting location
- +5 to Strength
- +5 to maximum Life
Chimeric Glisten Jewel
- Adds 8 Passive Skills
- 2 Added Passive Skills are Jewel Sockets
- Added Small Passive Skills grant: 12% increased Attack Damage while holding a Shield
- Added Small Passive Skills also grant: Regenerate 0.15% of Life per Second
- 1 Added Passive Skill is Fuel the Fight
- 1 Added Passive Skill is Martial Prowess
- 1 Added Passive Skill is Strike Leader
 The Balance of Terror Jewel
- +13% to all Elemental Resistances
- Gain 37% of Physical Damage as a Random Element if you've cast Elemental Weakness in the past 10 seconds
- Inflict Withered for 2 seconds on Hit if you've cast Despair in the past 10 seconds
 Lethal Pride Jewel
- Commanded leadership over 13719 warriors under Akoya
- Passives in radius are Conquered by the Karui
- Historic
Eagle Shine Jewel
- Adds 8 Passive Skills
- 2 Added Passive Skills are Jewel Sockets
- Added Small Passive Skills grant: 12% increased Attack Damage while holding a Shield
- Added Small Passive Skills also grant: 2% increased Attack Speed
- 1 Added Passive Skill is Fuel the Fight
- 1 Added Passive Skill is Martial Prowess
- 1 Added Passive Skill is Strike Leader

- 66% reduced Amount Recovered
- Instant Recovery
- Grants Immunity to Bleeding for 12 seconds if used while Bleeding
- Grants Immunity to Corrupted Blood for 12 seconds if used while affected by Corrupted Blood

- 38% reduced Duration
- 25% increased effect
- 47% increased Armour during Effect
- 23% reduced Duration
- 25% increased effect
- Regenerate 3% of Life per second during Effect (crafted)
- 32% reduced Duration
- 25% increased effect
- 59% reduced Effect of Curses on you during Effect
- 38% reduced Duration
- 25% increased effect
- 20% additional Elemental Resistances during Effect
All gem links (6 groups)
-
 Cast when Damage Taken L20
 -
 Inspiration 20/20
 -
 Efficacy L20
- Enduring Cry 20/20
-
 Urgent Orders L20
 - Blood Rage 20/2
- Purity of Elements 20/20
- Flesh and Stone L20
- Enlighten 3/20
-
 Arctic Armour L20
- Lifetap L20
- Frostblink L20
-
 Despair L20
- Smite of Divine Judgement 20/20
- Void Manipulation 20/20
- Fortify L20
- Volatility 20/19
- Endurance Charge on Melee Stun L20
- Multistrike 20/20
- Faster Attacks L20
- Momentum L20
- Lifetap L20
- Leap Slam L20
How this stage plays (mechanics, defences)
The whole archetype flips to Strength-stacking chaos conversion. Replica Alberon's Warpath's "Cannot deal non-Chaos Damage" + "Adds 1 to 80 Chaos Damage to Attacks per 80 Strength" means at 2079 Strength the boots alone add roughly 25 to 2080 chaos damage per hit, and Paradoxica's "Attacks with this Weapon deal Double Damage" plus +15% chaos penetration doubles the final output against a 75% chaos resist cap (versus the ~90% elemental cap on pinnacle bosses). The Iron Fortress's "+1% Chance to Block Attack Damage per 50 Strength" and "Strength's Damage Bonus instead grants 3% increased Melee Physical Damage per 10 Strength" turn every Strength point into both offence and defence. Crown of Eyes's "Increases and Reductions to Spell Damage also apply to Attacks at 150% of their value" is the sneaky multiplier — Iron Will converts Strength into spell damage, which then amplifies attacks at 150% of each 1% spell increase. Sheet DPS reads 4.6M on this reference (below the tier median of 78M — the reference character shown is mid-build; tier p75 is 127M).
The 6-link still lives in the chest but swaps to Smite of Divine Judgement + Void Manipulation Support + Fortify Support + Volatility Support + Endurance Charge on Melee Stun Support + Multistrike Support for the reference — the tier's dominant setup pairs Greater Multistrike (95% adoption) with Volatility (96%), Close Combat (97%), Void Manipulation (92%), and Increased Critical Damage Support (89%). Eyes of the Greatwolf doubles its own implicit magnitudes for 32% attributes + 44% chaos damage. Kalandra's Touch mirrors the Doom Turn suffix-magnitude-maxed rare for a doubled crit multi / life / res ring. Cluster jewels scale Strength + attack damage through Strike Leader, Martial Prowess, Fuel the Fight, and Split Personality + Emperor's Might + Inertia add Strength-conversion scaling. Lethal Pride under Akoya in the Karui cluster conquers a sword/strength wheel (93% adoption). The Balance of Terror cobalt jewel adds conditional gain phys as random element plus withered on hit.
EHP 93k on the reference, against a tier median of 224k — the aspirational build is built to tank. 90% physical damage reduction via 26.3k armour, 7 endurance charges, and Unflinching-equivalent defensive notables (Unflinching, Unstoppable, Juggernaut picked up on the tree even though it's not the actual ascendancy). The Iron Fortress grants +41% block chance at 2079 Strength — paired with Versatile Combatant that's 65% attack block / 8% spell block, and Rathpith Globe layers another 11% spell block. All four elemental resists sit at 75-81% with +23% chaos overcap, and Arctic Armour + Purity of Elements (83% tier adoption) run as the aura defensive pair.
The flask setup uses Foulborn Mageblood to permanently apply four utility flasks — Basalt for physical taunt/armour, Sulphur for regen consecrated ground, Silver for curse-effect reduction, Granite for resist overcap. Pantheon is Lunaris + Ryslatha for chain-reduction and low-life regen. The one hole is spell suppression — absent at every tier, so any non-blocked spell hit lands raw.
The apex Flicker Strike Berserker experience — 5.4 attacks per second with Paradoxica's double damage per swing makes each hit deposit both a base phys roll and its chaos-conversion payload via Replica Alberon's Warpath. Aspect of Carnage's permanent 40% more damage multiplier is always live, Crave the Slaughter keeps rage and attack speed capped, and Rite of Ruin lets the build stay over the rage threshold through kill chains. Feel on maps is the archetypal flicker blur — teleport through a pack, chaos conversion shreds everything regardless of elemental res, Aspect of Carnage's 10% more damage taken tax is covered by 90% PDR + 65% block. Pinnacle bosses fall to the Smite of Divine Judgement 6-link on the reference, with the dominant-meta crit-Paradoxica flicker reserved as the actual primary skill link on most aspirational characters. Kalandra's Touch mirroring the Doom Turn rare ring is the build's pure-luxury power spike.
Passive tree (132 points)
The desktop app shows this tier's full tree on an interactive canvas.