
Leveling L1–68
- Act 1: run Molten StrikeBuy Molten Strike from Nessa after killing Hillock — it is the best melee AoE cleaner in the early acts and works on any 1H or 2H weapon. Leap Slam (quest reward from Brutus) is your travel skill from the start and stays in the build. Pick up Ancestral Call Support from Brutus for multi-target coverage. A low-level Cast when Damage Taken + Steelskin setup goes in as soon as both gems are available.
- Act 2: run Molten StrikeAdd Herald of Ash from Yeena for a flat-damage overkill shotgun effect that pairs perfectly with Molten Strike. Melee Physical Damage Support from the Weaver quest into your 4-link. Take the "Oak" bandit reward (+1% phys, +20 life) if you'd rather have the life now; otherwise kill all for +2 passives — both are defensible here.
- Act 3: run SunderSwap to Sunder from Clarissa as your mainhand skill — its shockwaves clear faster than Molten Strike and carry you through Act 3–4 on any decent 2H. Grab Hatred from the Library quest reward and run it as your main aura (it replaces Herald of Ash only if mana gets tight — keep both running if you can). Blood Rage is the critical pickup from Clarissa: it generates Frenzy charges on kill, which is the mechanic the whole build will rely on once Flicker Strike comes online. Fortify Support goes on the main link for fortify uptime. Add Ancestral Protector for boss attack-speed. Lab 1 here: Painforged.
- Act 5–6 (L42+): run Flicker StrikeAt L42, buy Flicker Strike from Lilly Roth in Act 6 and slot it into your best link. Multistrike Support (unlocked at L38) is the single biggest DPS multiplier for any melee attack — this is your first mandatory Flicker Strike support. Frenzy charges come from Blood Rage killing things; pick up Terminus Est (any two-hand sword that grants a charge on crit, usually cheap early-league) or The Red Trail boots for redundant charge generation so Flicker stays fed when you aren't actively killing. Keep Sunder or Molten Strike in a swap link for hard rares that do not die to the Flicker flurry. Lab 2 around Act 6–7: Versatile Combatant.
- Act 7–10: run Flicker StrikeAdd Pride at the Act 8 gem reward — it is the endgame main aura and dramatically scales physical damage in close range. Reservation starts to matter here: if you cannot fit Pride + Hatred + Herald of Ash yet, drop Herald of Ash first. Vaal Ancestral Warchief replaces the regular totem for bossing. Lab 3 in Act 9: Violent Retaliation — now your blocks start dealing counter-damage against bleeding enemies, which Gratuitous Violence will pay off in maps.
- Maps L68+: run Flicker StrikeRun Uber Lab as soon as you hit L68 to lock in Gratuitous Violence — every bleed you apply now explodes on death, which combined with Violent Retaliation and Painforged is where the Gladiator identity fully clicks. Transition off Terminus Est to shield + 1H once you can craft or buy a decent rare pair — you want the block cap from the shield to make Versatile Combatant and the counter-damage notables pay off. Keep Leap Slam in even at endgame: Flicker Strike can't target empty ground, and Leap Slam is how you position into the next pack.
 Molten Strike
  Ancestral Call Support
  Leap Slam
 Buy Molten Strike from Nessa after killing Hillock — it is the best melee AoE cleaner in the early acts and works on any 1H or 2H weapon. Leap Slam (quest reward from Brutus) is your travel skill from the start and stays in the build. Pick up Ancestral Call Support from Brutus for multi-target coverage. A low-level Cast when Damage Taken + Steelskin setup goes in as soon as both gems are available.
Molten Strike Ancestral Call Support  Melee Physical Damage Support Leap Slam
  Herald of Ash
  Cast when Damage Taken
  Steelskin
 Add Herald of Ash from Yeena for a flat-damage overkill shotgun effect that pairs perfectly with Molten Strike. Melee Physical Damage Support from the Weaver quest into your 4-link. Take the "Oak" bandit reward (+1% phys, +20 life) if you'd rather have the life now; otherwise kill all for +2 passives — both are defensible here.
 Sunder Melee Physical Damage Support
  Fortify Support Ancestral Call Support Leap Slam
  Hatred Herald of Ash
  Ancestral Protector
  Blood Rage Cast when Damage Taken Steelskin
 Swap to Sunder from Clarissa as your mainhand skill — its shockwaves clear faster than Molten Strike and carry you through Act 3–4 on any decent 2H. Grab Hatred from the Library quest reward and run it as your main aura (it replaces Herald of Ash only if mana gets tight — keep both running if you can). Blood Rage is the critical pickup from Clarissa: it generates Frenzy charges on kill, which is the mechanic the whole build will rely on once Flicker Strike comes online. Fortify Support goes on the main link for fortify uptime. Add Ancestral Protector for boss attack-speed. Lab 1 here: Painforged.
 Flicker Strike
  Multistrike Support Melee Physical Damage Support Ancestral Call Support Fortify Support Leap Slam Hatred Herald of Ash Blood Rage
  Vaal Ancestral Warchief Cast when Damage Taken Steelskin
 At L42, buy Flicker Strike from Lilly Roth in Act 6 and slot it into your best link. Multistrike Support (unlocked at L38) is the single biggest DPS multiplier for any melee attack — this is your first mandatory Flicker Strike support. Frenzy charges come from Blood Rage killing things; pick up Terminus Est (any two-hand sword that grants a charge on crit, usually cheap early-league) or The Red Trail boots for redundant charge generation so Flicker stays fed when you aren't actively killing. Keep Sunder or Molten Strike in a swap link for hard rares that do not die to the Flicker flurry. Lab 2 around Act 6–7: Versatile Combatant.
Flicker Strike Multistrike Support Melee Physical Damage Support Ancestral Call Support Fortify Support Leap Slam Hatred  Pride Herald of Ash Blood Rage Vaal Ancestral Warchief Cast when Damage Taken Steelskin
 Add Pride at the Act 8 gem reward — it is the endgame main aura and dramatically scales physical damage in close range. Reservation starts to matter here: if you cannot fit Pride + Hatred + Herald of Ash yet, drop Herald of Ash first. Vaal Ancestral Warchief replaces the regular totem for bossing. Lab 3 in Act 9: Violent Retaliation — now your blocks start dealing counter-damage against bleeding enemies, which Gratuitous Violence will pay off in maps.
Flicker Strike Multistrike Support Melee Physical Damage Support Ancestral Call Support Fortify Support Leap Slam Hatred Pride Herald of Ash Blood Rage Vaal Ancestral Warchief Cast when Damage Taken Steelskin Run Uber Lab as soon as you hit L68 to lock in Gratuitous Violence — every bleed you apply now explodes on death, which combined with Violent Retaliation and Painforged is where the Gladiator identity fully clicks. Transition off Terminus Est to shield + 1H once you can craft or buy a decent rare pair — you want the block cap from the shield to make Versatile Combatant and the counter-damage notables pay off. Keep Leap Slam in even at endgame: Flicker Strike can't target empty ground, and Leap Slam is how you position into the next pack.
How leveling works
Flicker Strike is a melee attack that teleports you to a target and hits with a fast, repeating animation. It consumes a Frenzy charges on use, so the whole build is built around generating charges faster than Flicker Strike can burn them. As a Gladiator, you layer that frantic offence on top of a heavy block wall: Versatile Combatant converts half your attack block into spell block, Painforged gives extra attack speed on block, and Gratuitous Violence + Violent Retaliation turn every connected block and bleed into counter-pressure. The identity is a defensive wall that punches back.
Flicker Strike itself unlocks as a gem at L42, so the leveling plan is the same as any other Flicker build: lean on Molten Strike or Sunder from Act 1 through Act 4, then pivot to Flicker Strike once you've picked up the gem and can sustain charges reliably. Charge sustain is the gate — without it, Flicker feels terrible. Two common sustain uniques carry you through the mid-campaign: Terminus Est (a two-handed sword that grants a Frenzy charge on crit) or The Red Trail (boots that grant a charge on taking a bleed hit). Either works; Terminus Est is strictly easier to find and doesn't fight the Gladiator's shield slot, so it's the more common leveling pick even though the endgame build runs shield + 1H.
Gladiator ascendancy order is Painforged → Versatile Combatant → Violent Retaliation → Gratuitous Violence. Painforged first because attack speed on block snowballs the whole build; Versatile Combatant second for the spell block wall; the bleed pair comes online once you have cap block to make bleed application reliable. Save serious currency for the endgame shield + 1H transition — leveling on whatever 2H or 1H rare you can vendor-recipe is fine.
Gear while leveling
- · Weapon: any 2H sword, axe, or mace with high pDPS while leveling — vendor-recipe rares (magic weapon + Blacksmith's Whetstone + Rustic Sash) keep you topped up cheaply. Swap to Terminus Est once you hit its level requirement for free charge sustain through mid-campaign.
- · Body armour: a Tabula Rasa if you can afford one — guaranteed 6-link beats any leveling rare. Otherwise a 4-link armour-evasion chest with life and resists.
- · Helmet/gloves/boots: life and resists over everything. Goldrim helmet covers huge resist gaps through Act 3 or so. Haemophilia gloves are a thematic pickup later (they make bleed corpses explode) but not required for leveling.
- · Rings/amulet: life + resists, attribute fix-ups as needed. Dex is the main stat fight since Gladiator starts Str/Dex but Flicker support gems (particularly Multistrike Support) have dex requirements.
- · Belt: Heavy Belt or Leather Belt with life and resists; no unique belt needed during leveling.
- · Boots: Wanderlust (L1) or any 20%+ movement boots. Swap to The Red Trail if you chose that charge-sustain path, otherwise rare boots with movement + life + resists.
- · Flasks: a life flask with bleed-removal (mandatory — you cast Blood Rage on yourself), a quicksilver, a granite or stibnite, and a diamond flask once you can afford one.
Weapon progression
Use vendor-recipe rare 2H weapons (swords, axes, or maces) through Acts 1–4. At L42+, switch to Terminus Est if you can afford one — the 2H sword grants a Frenzy charges on every crit, which solves charge sustain for the whole mid-campaign and keeps Flicker Strike fed without relying on kills. If Terminus Est is out of budget, use any high-pDPS 2H you can find and lean on Blood Rage + The Red Trail for sustain instead. The endgame target is a rare 1H sword or axe paired with a high-block shield — the shield is non-negotiable for a true Gladiator endgame because it unlocks the block-stacking identity — but you stay on the 2H through the campaign for the higher base DPS. Plan the swap for L68+ when you can shop for a rare shield with 75% resist coverage.
Tree to aim for (by level 90)
Watch out for
- ! Flicker Strike consumes a Frenzy charges on use — if you run out of charges mid-pack, the skill refuses to cast. Always have redundant charge generation: Blood Rage + one charge-sustain unique (Terminus Est or The Red Trail) is the minimum. A single source is not enough once you scale attack speed.
- ! Do NOT take Acrobatics — it halves your block and spell block, which are the entire Gladiator identity. This is the most common tree-misstep for new Gladiator players coming from evasion builds.
- ! Blood Rage deals bleed-like degen to YOU. Always carry a life flask with the bleed-removal suffix (Staunching) or you will die to your own buff the first time you get low on life regen.
- ! Flicker Strike teleports based on enemy targeting — if you are in empty space with no enemies nearby it does nothing. Keep Leap Slam in your bar permanently as a manual-positioning fallback for empty rooms and boss arena repositioning.
- ! The gear pivot from 2H (Terminus Est) to shield + 1H is a sharp DPS dip for one evening of play while you rebuild links on the new weapon. Plan the transition with a link-ready 1H in stash so you can swap atomically rather than in pieces.
Early Mapping L70–84
- Pick up Gratuitous Violence and Versatile Combatant as the priority ascendancy path — spell block from attack block is the defensive backbone
- Buy a crit one-hander with attack speed + phys + crit multi to unlock the Flicker Strike 6-link that defines the endgame tier
- Equip Darkray Vectors for the +1 maximum Frenzy Charge + movement speed per charge interaction once Blood Rage is sustaining charges


 Lacerate of Butchering
 General's Cry
 AutoexertionMelee Physical Damage
 Brutality
 Pulverise
Full gear (20 items)
Foulborn Uul-Netol's Kiss Weapon 1
- 25% chance to Maim on Hit
- 262% increased Physical Damage
- 15% reduced Attack Speed
- Curse Enemies with Vulnerability on Hit
- Exerted Attacks Knock Enemies Back on Hit
- 500% increased Warcry Cooldown Recovery Rate
The Formless Flame Helmet
- 82% increased Armour
- -30% to Fire Resistance
- -196 Fire Damage taken from Hits
- Armour is increased by Overcapped Fire Resistance
The Fourth Vow Body Armour
- 177% increased Armour and Energy Shield
- +27% to Chaos Resistance
- Regenerate 3% of Life per second
- Armour also applies to Chaos Damage taken from Hits
- Physical Damage taken bypasses Energy Shield
 Brimstone Grip Gloves
- Adds 12 to 22 Fire Damage to Attacks
- +36 to Armour
- +128 to maximum Life
- +48% to Fire Resistance
- +48% to Cold Resistance
- +40% to Lightning Resistance
 Onslaught Span Boots
- Regenerate 0.2% of Life per second per Endurance Charge
- 4% increased Action Speed
- +83 to maximum Life
- +48% to Fire Resistance
- +48% to Cold Resistance
- +25% to Chaos Resistance
- 25% increased Movement Speed
- 19% increased Armour and Energy Shield (crafted)
- +13 to maximum Life (crafted)
Marylene's Fallacy Amulet
- +30 to Intelligence
- +87 to Accuracy Rating
- +282% to Global Critical Strike Multiplier
- +100 to Evasion Rating
- 11% increased Light Radius
- 48% less Critical Strike Chance
- Critical Strikes have Culling Strike
 Maelstrom Hold Ring 1
- +22% to Chaos Resistance
- Adds 7 to 11 Physical Damage to Attacks
- +23 to maximum Energy Shield
- +100 to maximum Life
- +35% to Cold Resistance
- +44% to Lightning Resistance
- 15% increased Fire Damage (crafted)
- 15% increased Lightning Damage (crafted)
Empyrean Hold Ring 2
- +26% to Chaos Resistance
- +45 to Strength
- +44 to maximum Energy Shield
- +89 to maximum Life
- +58 to maximum Mana
- +52% to Fire Resistance
- +54% to Lightning Resistance
Screams of the Desiccated Belt
- +32 to maximum Life
- You have Diamond Shrine Buff while affected by no Flasks
- +28 to Intelligence
- +43% to Chaos Resistance
 Honour Star Jewel
- Adds 4 Passive Skills
- 1 Added Passive Skill is a Jewel Socket
- Added Small Passive Skills grant: Exerted Attacks deal 20% increased Damage
- Added Small Passive Skills also grant: +2% to Cold Resistance
- Added Small Passive Skills also grant: +3% to Fire Resistance
- 1 Added Passive Skill is Mob Mentality
- 1 Added Passive Skill is Warning Call
 Soul Eye Jewel
- 4% increased Attack Speed
- +16% to Critical Strike Multiplier with Two Handed Melee Weapons
- 7% increased maximum Life
 Ancestral Vision Jewel
- +5 to Dexterity
- Modifiers to Chance to Suppress Spell Damage also apply to Chance to Avoid Elemental Ailments at 50% of their Value
Soul Prism Jewel
- +18% to Critical Strike Multiplier with Two Handed Melee Weapons
- 5% increased maximum Life
- +9% to all Elemental Resistances
- 12% increased Area Damage
 Glorious Vanity Jewel
- Bathed in the blood of 4468 sacrificed in the name of Xibaqua
- Passives in radius are Conquered by the Vaal
- Historic
 Vivid Heart Jewel
- Adds 2 Passive Skills
- Added Small Passive Skills grant: 15% increased Armour
- Added Small Passive Skills also grant: +4 to All Attributes
- Added Small Passive Skills also grant: +11% to Lightning Resistance
- Added Small Passive Skills also grant: +8 to Maximum Mana
- 1 Added Passive Skill is Uncompromising

- 18% reduced Charges per use
- 73% reduced Amount Recovered
- Instant Recovery
- 2 Enemy Writhing Worms escape the Flask when used
- Writhing Worms are destroyed when Hit
- 17% reduced Charges per use
- 69% reduced Amount Recovered
- Instant Recovery
- 2 Enemy Writhing Worms escape the Flask when used
- Writhing Worms are destroyed when Hit
- 18% reduced Charges per use
- 73% reduced Amount Recovered
- Instant Recovery
- 2 Enemy Writhing Worms escape the Flask when used
- Writhing Worms are destroyed when Hit
- 16% reduced Charges per use
- 74% reduced Amount Recovered
- Instant Recovery
- 2 Enemy Writhing Worms escape the Flask when used
- Writhing Worms are destroyed when Hit
- 18% reduced Charges per use
- 74% reduced Amount Recovered
- Instant Recovery
- 2 Enemy Writhing Worms escape the Flask when used
- Writhing Worms are destroyed when Hit
All gem links (7 groups)
- Lacerate of Butchering 20/20
- General's Cry 20/18
- Autoexertion L20
- Melee Physical Damage L20
- Brutality L20
- Pulverise L20
- Pride L20
-
 Determination L20
 -
 Flesh and Stone L20
 -
 Enlighten L3
-
 Defiance Banner L20
 -
 War Banner L20
 -
 Lifetap L20
 -
 Dread Banner L20
-
 Cast when Damage Taken L10
 - Lifetap L20
-
 Blood and Sand L6
-
 Cyclone L20
 -
 Cast while Channelling L1
 -
 Infused Channelling L20
 -
 Desecrate L1
 -
 Maim L20
 - Lifetap L20
-
 Vulnerability L1
How this stage plays (mechanics, defences)
Early mapping is the awkward stretch before Flicker Strike is fully online — Frenzy charges aren't sustaining themselves yet, so most L80–84 Gladiators are still playing a transitional setup while they finish the ascendancy and buy the first real crit sword. The L82 reference character captures this bluntly: the 6-link in the body armour runs Cyclone of Tumult + Infused Channelling + Damage on Full Life + Pulverise + Close Combat as a holdover clear skill, with The Grey Wind axe providing permanent Fire Exposure and maximum Rage. Blood and Sand + Tempest Shield sit in the off-hand for the stance swap, and the build is parked on Blood Magic + Unwavering Stance instead of the Versatile Combatant setup that dominates the rest of the tier.
The tier-wide pattern is far more uniform than this one outlier. Across 178 builds, Azadi Crest shows up on 97% of characters, Multistrike Support and Close Combat both sit at 93%, Fortify Support at 70%, and Brutality Support at 66% — that's the real Flicker Strike 6-link forming up. Precision (88%) and Pride (76%) are the standard aura pair. Frenzy charges at this stage come from Blood Rage once picked up, supplemented by the Darkray Vectors boots (47%) that add a maximum charge and convert charge count into movement speed.
Versatile Combatant is the tier-defining keystone at 95% adoption — it converts block chance into equal spell block, which is exactly why Azadi Crest's +9% Chance to Block is universal in the slot. The L82 reference already shows the shape: 49% attack block and 60% spell block on a Rathpith Globe shield, 77/76/76 elemental resists, and 10.8k life from stacking pure life rolls through a life-conversion body armour (The Apostate). EHP 12.4k is modest because the tier sits below p25, but the median early-mapping player already reaches 17.8k EHP.
Transitional and clunky. The build you want to play — point, click, teleport across the screen — doesn't exist yet at this stage. Most early-mapping Gladiators channel a placeholder Cyclone or leap-slam setup while they farm the Abyssus + Azadi Crest + crit one-hander combo that unlocks at endgame. Frenzy charges generation is manual (kill something with Blood Rage active), so the screen-clearing loop hasn't started yet. Frostblink covers gaps and Blood and Sand toggles between AoE and single-target stances.
Passive tree (122 points)
The desktop app shows this tier's full tree on an interactive canvas.
Endgame L85–94
- The build finally becomes Flicker Strike. The 6-link migrates into Replica Farrul's Fur, Versatile Combatant is allocated as the keystone, and Frenzy charges are now permanently maxed because Aspect of the Cat's Agility buff from Farrul's Fur refills all charges on activation.
- Target a Watcher's Eye with Pride impale duration + Precision crit multi for the aspirational damage tier
- Upgrade to Abyssus for the +115% melee crit multi + 40–60 added physical damage once block can absorb the 43% increased physical damage taken downside
- Anoint Azadi Crest or a rare cluster jewel notable once passive point budget tightens


 Flicker StrikeBrutalityFortify
 Greater Multistrike
 Close Combat
 Impale
Full gear (20 items)
 Behemoth Bane Weapon 1
- +25% to Global Critical Strike Multiplier
- 23% increased Attack Speed
- 71% increased Physical Damage
- +14% to Damage over Time Multiplier
- Adds 20 to 44 Physical Damage
- 2.82% of Physical Attack Damage Leeched as Life
- +158 to Accuracy Rating
- 127% increased Physical Damage (crafted)
Azadi Crest Weapon 2
- You take 21% reduced Extra Damage from Critical Strikes
- +24 to maximum Life
- +10% Chance to Block
- 1% chance to avoid Projectiles
- Your Lucky or Unlucky effects use the best or worst from three rolls instead of two
 Dire Cowl Helmet
- 8% increased Mana Reservation Efficiency of Skills
- 22% reduced Mana Cost of Attacks
- +595 to Accuracy Rating
- +55 to Intelligence
- 64% increased Evasion Rating
- +110 to maximum Life
- 9% increased Mana Reservation Efficiency of Skills
- +1 to Level of Socketed Melee Gems (crafted)
- +0.2 metres to Melee Strike Range (crafted)
Replica Farrul's Fur Body Armour
- 124% increased Armour and Evasion
- +82 to maximum Life
- +2.00 seconds to Cat's Agility Duration
- Aspect of the Cat has no Reservation
- Gain up to your maximum number of Frenzy and Endurance Charges when you gain Cat's Agility
- You have Onslaught while you have Cat's Agility
 Dusk Clutches Gloves
- 41% increased Evasion Rating from Equipped Helmet and Boots
- 8% increased Attack Speed
- 16% increased Attack Speed
- Grants Level 20 Aspect of the Cat Skill
- 135% increased Armour and Evasion
- +90 to maximum Life
- +26% to Chaos Resistance
- 14% increased Stun and Block Recovery
 Carrion Spur Boots
- While a Unique Enemy is in your Presence, 30% chance to Avoid Elemental Ailments
- 4% increased Damage per Endurance Charge
- 30% increased Movement Speed
- +96 to maximum Life
- +30% to Fire Resistance
- +44% to Cold Resistance
- 34% chance to Avoid Elemental Ailments
- 73% increased Evasion Rating (crafted)
 Cataclysm Choker Amulet
- Allocates Frenetic
- +24 to Dexterity and Intelligence
- +39 to all Attributes
- +34% to Global Critical Strike Multiplier
- +39 to maximum Energy Shield
- 24% increased Rarity of Items found
- +45% to Cold Resistance
- +53 to maximum Life (crafted)
Skull Nail Ring 1
- +22% to Chaos Resistance
- Adds 6 to 10 Physical Damage to Attacks
- Adds 1 to 27 Lightning Damage to Attacks
- +16% to all Elemental Resistances
- +28% to Fire Resistance
- +42% to Lightning Resistance
- Non-Channelling Skills have -7 to Total Mana Cost (crafted)
Gloom Eye Ring 2
- +21% to Chaos Resistance
- +101 to maximum Life
- +35 to maximum Mana
- 22% increased Mana Regeneration Rate
- +29% to Fire Resistance
- +48% to Lightning Resistance
- Non-Channelling Skills have -6 to Total Mana Cost (crafted)
 Vortex Lash Belt
- Allocates Whispers of Doom
- Can be Anointed
- +78 to maximum Life
- +403 to Armour
- +35% to Fire Resistance
- +41% to Cold Resistance
- +41% to Lightning Resistance
- 12% increased Damage (crafted)
 Blight Desire Jewel
- Adds 8 Passive Skills
- 2 Added Passive Skills are Jewel Sockets
- Added Small Passive Skills grant: 12% increased Attack Damage while holding a Shield
- Added Small Passive Skills also grant: +3% to Chaos Resistance
- 1 Added Passive Skill is Fuel the Fight
- 1 Added Passive Skill is Martial Prowess
- 1 Added Passive Skill is Strike Leader
Watcher's Eye Jewel
- 4% increased maximum Energy Shield
- 6% increased maximum Life
- 4% increased maximum Mana
- 53% increased Attack Damage while affected by Precision
- Regenerate 1.82% of Energy Shield per Second while affected by Discipline
 Blight Glimmer Jewel
- 15% increased Global Physical Damage
- 7% increased maximum Life
- 0.2% of Physical Attack Damage Leeched as Mana
- 14% increased Freeze Duration on Enemies
- 5% chance to Freeze
 The Light of Meaning Jewel
- Passive Skills in Radius also grant 6% increased Physical Damage
 Intuitive Leap Jewel
- Passive Skills in Radius can be Allocated without being connected to your tree
- Passage

- 66% reduced Amount Recovered
- Instant Recovery
- Grants Immunity to Bleeding for 15 seconds if used while Bleeding
- Grants Immunity to Corrupted Blood for 15 seconds if used while affected by Corrupted Blood
- Knocks Back Enemies in an Area when you use a Flask
- 75% chance to cause Enemies to Flee on use
- Adds Knockback to Melee Attacks during Effect
- 10% more Melee Physical Damage during effect

- 19% chance to gain a Flask Charge when you deal a Critical Strike
- 43% increased Armour during Effect
- 3% increased Charges per use
- Grants Level 21 Vulnerability Curse Aura during Effect

- Gain 2 Charges when you are Hit by an Enemy
- 26% increased Critical Strike Chance during Effect
All gem links (10 groups)
- Lifetap L20
-
 Assassin's Mark L19
 -
 Mark On Hit L19
-
 Faster Attacks L20
 -
 Enhance 3/23
 -
 Shield Charge L14
 - Blood Rage L19
- Maim 20/20
-
 Vaal Double Strike L20
 -
 Precision 20/20
-
 Herald of Purity 20/20
- Brutality 20/20
- Fortify L20
- Greater Multistrike 3/13
- Flicker Strike 21/20
- Close Combat 20/23
- Impale 21/20
-
 More Duration L19
 -
 Automation L19
-
 Swift Affliction 20/20
 - Pride L12
- Flesh and Stone L17
-
 Less Duration L19
-
 Summon Spectral Tiger L20
-
 Aspect of the Cat L20
-
 Unknown Gem L1
How this stage plays (mechanics, defences)
The 6-link in Replica Farrul's Fur is Flicker Strike + Multistrike Support + Melee Physical Damage Support + Fortify Support + Close Combat + Brutality Support — the canonical physical-conversion Flicker setup, with Brutality's "no elemental or chaos damage" restriction traded for its massive more multiplier. The weapon is a rare Jewelled Foil (Brimstone Impaler) with 121% increased Physical Damage, 26% increased Attack Speed, and +25% Global Critical Strike Multiplier. Pride and Flesh and Stone run from the gloves for phys-taken debuff + maim on nearby enemies, and Precision handles the accuracy 1731 breakpoint against hit chance 81%.
Frenzy charges sustain is the build's defining mechanical trick. Replica Farrul's Fur grants "Aspect of the Cat has no Reservation" and "Gain up to your maximum number of Frenzy and Endurance Charges when you gain Cat's Agility" — paired with Automation + More Duration in the helmet and Aspect of the Cat injected via the Grants Level 20 Aspect of the Cat Skill roll on the Unset Ring, charges stay permanently capped without a Blood Rage spam loop. The build also carries 6 frenzy + 4 endurance charges live with +1 to Minimum Frenzy Charges from the weapon-swap Spiny Round Shield as insurance. The tree runs Savagery, Fatal Blade, Tribal Fury (strike skills target one extra enemy), and picks up Gratuitous Violence for the Gladiator bleed-explosion signature even though the build is Brutality-gated against ailments from attacks (the bleed from the direct-hit application still procs the explode). Mark On Hit + Assassin's Mark on the shield socket apply the curse automatically for added crit multi.
This is where Gladiator's identity pays off. Versatile Combatant converts 65% attack block directly into 65% spell block, and the ascendancy notable Determined Survivor stacks additional block chance + recovery on top. Spell suppression hits 96% with 43% effect from helmet + gloves + boots rolls, and Determined Survivor's life-on-block interaction keeps the life pool refilled during sustained combat. Physical damage reduction 53% from armour 6587 + 4 endurance charges rounds out the mitigation stack. EHP 51.9k at life 3.7k looks thin on paper but the active block + suppress layers carry the real defensive load — this is a block-centric build, not a life-stacker. Chaos resist at -29 is the standing compromise.
10.88 attacks per second of Flicker Strike is frantic — every hit is a teleport, the camera barely keeps up, and Tribal Fury's extra strike target doubles the per-cast pack coverage. Frenzy charges never drop, so the teleport cooldown refreshes constantly. Leap Slam + Faster Attacks Support in the gloves covers traversal between packs. Vaal Double Strike from the boots is the single-target burst for rares and bosses. On-kill explosions from Gratuitous Violence chain through packs as bleeds pop, and Herald of Purity's spectral warriors drift behind the player tanking projectiles. Leap into a screen, let Flicker Strike tick, watch the pack dissolve.
Passive tree (128 points)
The desktop app shows this tier's full tree on an interactive canvas.
Aspirational L95–100
- The aspirational build pushes block to the ceiling — 96% attack block and 96% spell block — and swaps Replica Farrul's Fur for Bronn's Lithe to exploit "+5 to Level of Socketed Movement Gems" directly on Flicker Strike. Iron Reflexes and Unwavering Stance join Versatile Combatant as the third-keystone expansion.


 Flicker StrikeBrutalityMelee Physical DamageFortifyMultistrikeClose Combat
Full gear (19 items)
Spirit Saw Weapon 1
- +25% to Global Critical Strike Multiplier
- 124% increased Physical Damage
- 22% chance to Impale Enemies on Hit with Attacks
- +11 to Strength
- Adds 43 to 74 Fire Damage
- 30% increased Attack Speed
- 33% increased Critical Strike Chance
- Adds 16 to 29 Physical Damage (crafted)
Azadi Crest Weapon 2
- 6% increased Movement Speed
- +99 to maximum Life
- +9% Chance to Block
- 8% chance to avoid Projectiles
- Your Lucky or Unlucky effects use the best or worst from three rolls instead of two
Fancy Foil Weapon 1 Swap
- +25% to Global Critical Strike Multiplier
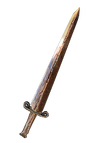 Ancient Sword Weapon 2 Swap
- +165 to Accuracy Rating
Abyssus Helmet
- +21 to all Attributes
- Adds 40 to 60 Physical Damage to Attacks
- +123% to Melee Critical Strike Multiplier
- 102% increased Armour
- 48% increased Physical Damage taken
Bronn's Lithe Body Armour
- +5 to Level of Socketed Movement Gems
- 10% increased Attack Speed
- 100% increased Damage with Movement Skills
- 209% increased Evasion Rating
- 10% increased Movement Speed
 Pandemonium Caress Gloves
- Hits have 30% chance to ignore Enemy Physical Damage Reduction
- Non-Vaal Strike Skills target 1 additional nearby Enemy
- Adds 9 to 17 Cold Damage to Attacks
- 18% increased Attack Speed
- +313 to Accuracy Rating
- 83% increased Evasion Rating
- +124 to maximum Life
- Regenerate 63.3 Life per second
Foulborn Darkray Vectors Boots
- 68% increased Armour and Evasion
- +29% to Lightning Resistance
- 5% increased Movement Speed per Frenzy Charge
- +1 to Maximum Frenzy Charges
- 40% reduced Frenzy Charge Duration
- 25% reduced Light Radius
- 8% increased Accuracy Rating per Frenzy Charge
 Gloom Pendant Amulet
- Allocates Razor's Edge
- +16 to all Attributes
- +27 to Intelligence
- 31% increased Armour
- 18% increased Evasion Rating
- +92 to maximum Life
- +18% to all Elemental Resistances
- +13% to Lightning and Chaos Resistances (crafted)
 Tempest Grasp Ring 1
- +16% to Cold and Lightning Resistances
- Adds 3 to 6 Physical Damage to Attacks
- +110 to maximum Life
- +52 to maximum Mana
- +45% to Fire Resistance
- +31% to Chaos Resistance
- +12% to all Elemental Resistances (crafted)
Plague Knot Ring 2
- +23% to Chaos Resistance
- Adds 6 to 10 Physical Damage to Attacks
- +113 to maximum Life
- +68 to maximum Mana
- +33% to Fire Resistance
- +46% to Cold Resistance
- +15% to Lightning and Chaos Resistances (crafted)
Ryslatha's Coil Belt
- 21% increased Rarity of Items found
- +29 to Strength
- 40% more Maximum Physical Attack Damage
- 36% less Minimum Physical Attack Damage
- Adds 1 to 15 Physical Damage to Attacks
- +93 to maximum Life
- Gain 50 Life when you Stun an Enemy
Behemoth Flame Jewel
- Corrupted Blood cannot be inflicted on you
- 4% increased Attack Speed while holding a Shield
- 7% increased maximum Life
- 5% chance to Impale Enemies on Hit with Attacks
Intuitive Leap Jewel
- Passive Skills in Radius can be Allocated without being connected to your tree
- Passage
- Knocks Back Enemies in an Area when you use a Flask
- 75% chance to cause Enemies to Flee on use
- Adds Knockback to Melee Attacks during Effect
- 10% more Melee Physical Damage during effect
- 33% chance to gain a Flask Charge when you deal a Critical Strike
- 60% increased Evasion Rating during Effect
- 33% chance to gain a Flask Charge when you deal a Critical Strike
- 58% increased Armour during Effect

- 33% chance to gain a Flask Charge when you deal a Critical Strike
- 52% increased Critical Strike Chance during Effect

- 33% chance to gain a Flask Charge when you deal a Critical Strike
- Grants Immunity to Bleeding for 16 seconds if used while Bleeding
- Grants Immunity to Corrupted Blood for 16 seconds if used while affected by Corrupted Blood
All gem links (15 groups)
- Flicker Strike L20
- Flicker Strike L20
- Flicker Strike L20
- Enlighten L2
- Enhance L2
- Herald of Ash L20
- Flesh and Stone L20
- Pride L20
- Precision L21
- Blood Rage 20/20
- Brutality 20/20
- Melee Physical Damage 20/20
- Fortify L20
- Multistrike 20/20
- Close Combat 20/20
- Flicker Strike 20/20
-
 Double Strike 21/20
 - Close Combat 20/20
- Multistrike 20/20
- Brutality 20/20
- Cast when Damage Taken L5
- More Duration L20
-
 Vaal Molten Shell L21
- Vaal Double Strike L20
- Leap Slam L20
- Faster Attacks L20
- Mark On Hit L20
- Lifetap L20
- Assassin's Mark 12/20
- Summon Spectral Tiger L20
- Unknown Gem L1
How this stage plays (mechanics, defences)
Bronn's Lithe holds the 6-link: Flicker Strike (level 25 from the chest's +5 to Level of Socketed Movement Gems) + Greater Multistrike + Melee Physical Damage Support + Brutality Support + Close Combat + Impale Support, with the chest's 100% increased Damage with Movement Skills line doubling the baseline. The weapon is a rare Corsair Sword (Maelstrom Barb) with 225% increased Physical Damage, 21% attack speed, 15% chance to Trigger Level 1 Blood Rage on Kill, and 27% crit chance. Abyssus supplies +115% melee crit multi and 40–60 added physical damage, pushing the hit ceiling up. Sheet DPS reads 22.4M at 11.75 attacks per second.
Frenzy charges now sustain through three independent sources: the weapon's Blood Rage-on-kill trigger, Darkray Vectors's +1 Maximum Frenzy Charges (with 40% reduced Frenzy Charge Duration as the tradeoff — irrelevant because the trigger refreshes constantly), and a standalone Blood Rage gem in the gloves. 7 frenzy + 4 endurance charges are live at all times. Pride + Flesh and Stone + Precision run from the helmet, which also sockets Swift Affliction Support + Less Duration Support to accelerate Flesh and Stone's maim duration cycling. Mark On Hit + Assassin's Mark on the shield apply the curse on every teleport-hit. Tree picks up Aspect of the Lynx equivalents via Intuitive Leap jumps, a Watcher's Eye with Precision crit multi + Pride impale duration, and The Light of Meaning (63% of aspirational builds use it) for 6% increased Physical Damage on all radius passives.
96% attack block + 96% spell block is the headline number and it makes this build functionally unkillable in combat. Iron Reflexes converts the build's evasion pool into flat armour, producing armour 19.1k and 79% physical damage reduction at 4 endurance charges. Unwavering Stance removes stun as a failure mode entirely. Chaos resist 75% (from 75% overcap) plugs the endgame tier's chaos gap. EHP 513k is the combined number — life is still only 3.2k, but 96% block against both hit types means the 4% of incoming damage that lands gets absorbed by 79% PDR + over-capped resists. Molten Shell on Automation in the weapon socket handles the rare spike that slips through. Replica Witchfire Brew flask layers Vulnerability curse on demand for burst windows without sacrificing an aura slot.
The apex Flicker feel: you don't move, you cease to exist in one place and reappear in another. 11.75 attacks per second with Greater Multistrike means every click is three teleports, and Frenzy charges cap so aggressively that the cooldown is never the limiter — attack speed is. Gratuitous Violence bleed-pops cascade through packs, Herald of Purity sentinels clean up stragglers, and Tribal Fury adds the extra strike target for the rare times an enemy survives the initial teleport-chain. Pinnacle bosses die to Vaal Double Strike burst plus raw Flicker sustain; 96% block means you can stand on mechanics and trade. Movement between map packs uses Leap Slam + movement speed mod 2.04, but inside a pack the whole screen is a blur of bleed explosions.
Passive tree (128 points)
The desktop app shows this tier's full tree on an interactive canvas.