
Leveling L1–68
- Act 1: run Molten StrikeBuy Molten Strike from Nessa after killing Hillock. It is an excellent 2H leveling skill — hits hard in melee and lobs projectiles for clear. Leap Slam from Nessa as travel. Ancestral Call Support is the big multi-target boost you will keep until Multistrike Support unlocks.
- Act 2: run Molten StrikePick up Herald of Ash from Yeena — it scales with your physical hit, which is exactly what Molten Strike wants. Add Melee Physical Damage Support once you have a 4-link. Slot a low-level Cast when Damage Taken + Steelskin for panic defense. Blood Rage (quest reward) gives you a taste of Frenzy charges on kill and a big attack speed buff — keep it up. Take "Way of the Poacher" bandit reward (kill all, +2 passives) — passives matter more than bandit power for this build.
- Act 3: run Molten StrikeMultistrike Support unlocks at L38 from Clarissa — slot it in for a huge DPS bump and extra attack speed, both of which Flicker Strike will eventually need. Grab Hatred from the Library quest reward; run it as your main aura. Ancestral Protector totem provides a strong attack speed buff for boss fights. Lab 1 here: Bane of Legends.
- Act 5–6: run Molten StrikeKeep farming Molten Strike through Kitava. If you found a Terminus Est cheap on trade, equip it now — the on-kill Frenzy charges generation lets you start practising charge-aware play even before the Flicker Strike swap. Vaal Ancestral Warchief replaces the regular totem for bossing. Fortify Support on your travel skill smooths survivability. Lab 2 in Act 6 area: Endless Hunger.
- Act 7 (L42+): run Flicker StrikeGem hits L42, time to swap. Buy Flicker Strike from the Act 6 vendor (or the Act 3 library if you bookmarked it earlier). The critical prereq is a Frenzy charges source — Terminus Est (on-kill) is the cheapest and most reliable leveling option, and The Red Trail boots (on-taking-damage) layer on top of it for sustain through tough fights. Without one of these, Flicker Strike stutters after two casts and feels awful — do NOT swap until you have a charge source equipped. Keep Blood Rage up at all times for the on-kill charge backup and the attack speed. Lab 3 in Act 9: Headsman.
- Maps L68+: run Flicker StrikeRun Uber Lab as soon as you hit L68 to grab Brutal Fervour — this is the single biggest quality-of-life spike for the build and is when Flicker Strike clicks into the smooth leech-fuelled mapper it is known for. Overleech from Endless Hunger plus ailment immunity from Brutal Fervour means you teleport into packs without fearing stun or bleed mid-spam. Add Pride as a second aura once you have the mana reservation headroom — it scales physical hits hard, which Terminus Est benefits from directly. Upgrade to a 6-link chest when you can afford it; Haemophilia gloves are a cheap bleed-scaling pick if you want a transitional unique.
 Molten Strike
  Ancestral Call Support
  Ruthless Support
  Leap Slam
 Buy Molten Strike from Nessa after killing Hillock. It is an excellent 2H leveling skill — hits hard in melee and lobs projectiles for clear. Leap Slam from Nessa as travel. Ancestral Call Support is the big multi-target boost you will keep until Multistrike Support unlocks.
Molten Strike Ancestral Call Support  Melee Physical Damage Support Ruthless Support Leap Slam
  Herald of Ash
  Cast when Damage Taken
  Steelskin
  Blood Rage
 Pick up Herald of Ash from Yeena — it scales with your physical hit, which is exactly what Molten Strike wants. Add Melee Physical Damage Support once you have a 4-link. Slot a low-level Cast when Damage Taken + Steelskin for panic defense. Blood Rage (quest reward) gives you a taste of Frenzy charges on kill and a big attack speed buff — keep it up. Take "Way of the Poacher" bandit reward (kill all, +2 passives) — passives matter more than bandit power for this build.
Molten Strike Ancestral Call Support Melee Physical Damage Support  Multistrike Support Leap Slam
  Hatred Herald of Ash
  Ancestral Protector Blood Rage Cast when Damage Taken Steelskin
 Multistrike Support unlocks at L38 from Clarissa — slot it in for a huge DPS bump and extra attack speed, both of which Flicker Strike will eventually need. Grab Hatred from the Library quest reward; run it as your main aura. Ancestral Protector totem provides a strong attack speed buff for boss fights. Lab 1 here: Bane of Legends.
Molten Strike Ancestral Call Support Melee Physical Damage Support Multistrike Support  Fortify Support Leap Slam Hatred Herald of Ash
  Vaal Ancestral Warchief Blood Rage Cast when Damage Taken Steelskin
 Keep farming Molten Strike through Kitava. If you found a Terminus Est cheap on trade, equip it now — the on-kill Frenzy charges generation lets you start practising charge-aware play even before the Flicker Strike swap. Vaal Ancestral Warchief replaces the regular totem for bossing. Fortify Support on your travel skill smooths survivability. Lab 2 in Act 6 area: Endless Hunger.
 Flicker Strike Multistrike Support Melee Physical Damage Support Ancestral Call Support Leap Slam Hatred Herald of Ash Vaal Ancestral Warchief Blood Rage Cast when Damage Taken Steelskin
 Gem hits L42, time to swap. Buy Flicker Strike from the Act 6 vendor (or the Act 3 library if you bookmarked it earlier). The critical prereq is a Frenzy charges source — Terminus Est (on-kill) is the cheapest and most reliable leveling option, and The Red Trail boots (on-taking-damage) layer on top of it for sustain through tough fights. Without one of these, Flicker Strike stutters after two casts and feels awful — do NOT swap until you have a charge source equipped. Keep Blood Rage up at all times for the on-kill charge backup and the attack speed. Lab 3 in Act 9: Headsman.
Flicker Strike Multistrike Support Melee Physical Damage Support Ancestral Call Support Fortify Support Leap Slam Hatred  Pride Herald of Ash Vaal Ancestral Warchief Blood Rage Cast when Damage Taken Steelskin
 Run Uber Lab as soon as you hit L68 to grab Brutal Fervour — this is the single biggest quality-of-life spike for the build and is when Flicker Strike clicks into the smooth leech-fuelled mapper it is known for. Overleech from Endless Hunger plus ailment immunity from Brutal Fervour means you teleport into packs without fearing stun or bleed mid-spam. Add Pride as a second aura once you have the mana reservation headroom — it scales physical hits hard, which Terminus Est benefits from directly. Upgrade to a 6-link chest when you can afford it; Haemophilia gloves are a cheap bleed-scaling pick if you want a transitional unique.
How leveling works
Flicker Strike is a melee attack that teleports you to an enemy within range and hits it, consuming a Frenzy charges stack on each use. Its cooldown is bypassed while you have a charge to spend, which turns the skill into frantic spam when your charge generation keeps up. The entire build is a Frenzy charges sustain problem: you need an on-hit or on-kill source of charges that matches your attack speed, or the skill stutters. As a Slayer, you lean on the ascendancy trio of Endless Hunger for Overleech, Brutal Fervour for ailment immunity while leeching, and Headsman for area + culling strike, with Bane of Legends kicking it all off.
You do not use Flicker Strike while leveling. The gem itself unlocks at L42, and even then the build does not come online until you have a charge-sustain source sorted — typically Terminus Est (a two-handed sword that grants a Frenzy charges stack on kill) paired with The Red Trail boots for charge-on-taking-damage, or a transfigured Frenzy variant feeding charges into the main link. The recommended leveling path is Molten Strike or Frost Blades for Acts 1–6, transition into Flicker Strike around Act 7 once the gem is online and you have the charge source equipped.
The Slayer ascendancy points you grab in the Labs are: Bane of Legends → Endless Hunger → Headsman → Brutal Fervour. Brutal Fervour is the build-defining ascendancy — it makes you immune to bleed, ailments, and stun while under Overleech, which is what lets Flicker Strike spam into packs without getting stun-locked mid-teleport. Rare jewellery with life and resists, a 5-link as soon as you can craft one, and a Tabula Rasa if you find one will carry you through the campaign without any specific gear targets. Save currency for Terminus Est and The Red Trail — those are the transition uniques that unlock the build.
Gear while leveling
- · Weapon: any 2H sword, axe, or mace with flat physical damage while leveling — the vendor recipe (magic weapon + Rustic Sash + Blacksmith's Whetstone) is cheap and keeps you topped up. Trade for Terminus Est as soon as you hit its level requirement (L64) — it is the transition weapon that makes Flicker Strike work on a budget.
- · Body armour: rush a Tabula Rasa if you can find/buy one — a guaranteed 6-link is worth more than any leveling rare. Otherwise a 4-link armour/evasion chest with life and resists.
- · Helmet/gloves/boots: prioritise life and resists. Enter maps capped at 75% resist on all three elements. Wanderlust boots carry you cheaply through the early acts. Save boot slot currency for The Red Trail once you swap to Flicker Strike.
- · Rings/amulet: life + resists, with attribute fix-ups as needed. A cheap Goldrim helmet covers a big chunk of early resist needs if you cannot find rares.
- · Belt: Heavy Belt or Leather Belt with life and resists. No need for unique belts during leveling.
- · Flasks: a life flask with bleed-removal (bleed is lethal to melee), a quicksilver, a granite + iron skin or stibnite, and a diamond flask once you can buy one. Keep a quicksilver up at all times.
Weapon progression
Use vendor-recipe physical 2H weapons (magic 2H + Rustic Sash + Whetstone → guaranteed flat physical roll) through Acts 1–6 while running Molten Strike. The transition weapon is Terminus Est, a unique Ezomyte Blade available from L64 — it grants a Frenzy charges stack on kill and has strong attack speed, which is exactly what Flicker Strike needs to sustain its spam. A cheap Terminus Est runs a few chaos at league start and does not scale out until well into yellow maps. The endgame target is a rare 2H sword with multiple physical-damage prefixes + attack speed, but Terminus Est itself takes you deep into red maps without needing an upgrade.
Tree to aim for (by level 90)
Watch out for
- ! Do NOT swap to Flicker Strike before you have a reliable Frenzy charges source equipped. Without Terminus Est, The Red Trail, or a transfigured charge-feeder, the skill stutters every two casts and feels unplayably bad. Stay on Molten Strike or Frost Blades until the charge source is in your inventory.
- ! Brutal Fervour requires you to be leeching to give ailment immunity. Flicker Strike spam keeps leech topped up naturally, but if you stop attacking mid-fight your immunities drop and you will get stun-locked. Always keep the auto-attack flowing — even against a boss, teleport to adds if the boss has an invuln phase.
- ! Flicker Strike is notorious for bleed deaths — you teleport into packs faster than you can clear the ailment. Always carry a life flask with the "of Staunching" suffix (removes bleed), and prioritise Brutal Fervour for ailment immunity as your first Uber Lab goal at L68.
- ! The skill teleports you to a random enemy in range, not always the one you are aiming at. This is the skill's signature feel — do not try to fight it. Scale attack speed and Frenzy charges to raise the hit rate, and accept that positioning is reactive, not precise.
Early Mapping L70–84
- Pick up Brutal Fervour for Overleech + ailment immunity while leeching — the Slayer signature defensive layer
- Swap Voidforge for Paradoxica once you can afford one — double damage on every hit is massive for Flicker


 Flicker Strike
 Ice BiteMultistrike
 Close Combat
 Endurance Charge on Melee Stun
 Elemental Damage with Attacks
Full gear (24 items)
 Sorrow Fang Weapon 1
- +25% to Global Critical Strike Multiplier
- +44 to Dexterity
- Adds 96 to 173 Fire Damage
- Adds 104 to 188 Cold Damage
- Adds 14 to 206 Lightning Damage
- 23% increased Attack Speed
- +264 to Accuracy Rating
 Victory Rook Weapon 2
- 29% chance to Avoid Elemental Ailments
- 69% increased Chance to Block
- 11% Chance to Block Spell Damage
- +29 to Strength
- +105 to maximum Life
- +36% to Cold Resistance
Lavianga's Wisdom Weapon 1 Swap
- 10% reduced Enemy Stun Threshold
- 166% increased Physical Damage
- +70 to maximum Life
- +70 to maximum Mana
- 5% reduced Movement Speed
- 17% increased Area of Effect
- 15% increased Area Damage
The Monastery Bell Weapon 2 Swap
- 10% reduced Enemy Stun Threshold
- 75% increased Physical Damage
- Adds 9 to 14 Physical Damage
- 6% increased Attack Speed
- Chance to Block is Unlucky
- Count as Blocking Attack Damage from the first target Hit with each Shield Attack
 Wrath Glance Helmet
- 8% increased Mana Reservation Efficiency of Skills
- 19% reduced Mana Cost of Attacks
- 82% increased Evasion Rating
- +141 to maximum Life
- +44% to Fire Resistance
- +12% to Cold Resistance
- +27% to Lightning Resistance
- +145 to Evasion Rating (crafted)
Replica Farrul's Fur Body Armour
- 147% increased Armour and Evasion
- +90 to maximum Life
- +2.00 seconds to Cat's Agility Duration
- Aspect of the Cat has no Reservation
- Gain up to your maximum number of Frenzy and Endurance Charges when you gain Cat's Agility
- You have Onslaught while you have Cat's Agility
 Havoc Caress Gloves
- 15% of Physical Damage Converted to Cold Damage
- 22% increased Critical Strike Chance for Attacks
- Grants Level 20 Aspect of the Cat Skill
- Adds 4 to 10 Physical Damage to Attacks
- +52 to Evasion Rating
- +24 to maximum Energy Shield
- +101 to maximum Life
- +42% to Fire Resistance
- 8% increased Attack Speed (crafted)
Darkray Vectors Boots
- 70% increased Armour and Evasion
- 10% increased Evasion Rating per Frenzy Charge
- +30% to Lightning Resistance
- 5% increased Movement Speed per Frenzy Charge
- +1 to Maximum Frenzy Charges
- 40% reduced Frenzy Charge Duration
- 25% reduced Light Radius
Yoke of Suffering Amulet
- Allocates Frenetic
- +16 to all Attributes
- +20% to Fire Resistance
- +18% to Cold Resistance
- +37% to Lightning Resistance
- 30% reduced Duration of Ailments on Enemies
- 9% chance to Shock
- Enemies take 9% increased Damage for each type of Ailment you have inflicted on them
- Your Elemental Damage can Shock
 Demon Knot Ring 1
- +14% to Cold and Lightning Resistances
- +40 to Intelligence
- Adds 7 to 14 Physical Damage to Attacks
- +105 to maximum Life
- +38 to maximum Mana
- +11% to Fire Resistance
- +14% to Cold and Chaos Resistances (crafted)
 The Taming Ring 2
- Malevolence has 16% increased Aura Effect
- +28% to all Elemental Resistances
- 10% chance to Freeze, Shock and Ignite
- 38% increased Elemental Damage with Hits and Ailments for each type of Elemental Ailment on Enemy
 Chimeric Leash Belt
- Has 1 Abyssal Socket
- +11 to Strength
- +143 to maximum Life
- +18 to maximum Mana
- +35% to Chaos Resistance
- 23% increased Stun and Block Recovery
- 25% increased Elemental Damage with Attack Skills (crafted)
 Foe Wound Jewel
- Adds 8 Passive Skills
- 2 Added Passive Skills are Jewel Sockets
- Added Small Passive Skills grant: 12% increased Attack Damage while holding a Shield
- Added Small Passive Skills also grant: 4% increased Mana Regeneration Rate
- 1 Added Passive Skill is Fuel the Fight
- 1 Added Passive Skill is Prodigious Defence
- 1 Added Passive Skill is Smite the Weak
 Hypnotic Splinter Jewel
- +3% Chance to Block Spell Damage while holding a Shield
- 7% increased maximum Life
- Attacks have 5% chance to cause Bleeding
- 19% increased Damage with Poison
- 16% increased Bleeding Duration
 The Interrogation Jewel
- Adds Secrets of Suffering
 Chimeric Hope Jewel
- +6% to Fire Damage over Time Multiplier
- +16% to Critical Strike Multiplier with Two Handed Melee Weapons
- 14% increased Melee Critical Strike Chance
- 6% increased maximum Life
Entropy Ornament Jewel
- +3% Chance to Block Spell Damage while holding a Shield
- +14 to Intelligence
- 6% increased maximum Life
- 3% increased Attack and Cast Speed
Sol Wound Jewel
- Adds 8 Passive Skills
- 2 Added Passive Skills are Jewel Sockets
- Added Small Passive Skills grant: 12% increased Attack Damage while holding a Shield
- Added Small Passive Skills also grant: +3 to All Attributes
- 1 Added Passive Skill is Feed the Fury
- 1 Added Passive Skill is Prodigious Defence
- 1 Added Passive Skill is Smite the Weak
 Lethal Pride Jewel
- Commanded leadership over 16614 warriors under Kaom
- Passives in radius are Conquered by the Karui
- Historic

- 49% reduced Amount Recovered
- 135% increased Recovery rate
- 50% of Recovery applied Instantly
- Grants Immunity to Bleeding for 10 seconds if used while Bleeding
- Grants Immunity to Corrupted Blood for 10 seconds if used while affected by Corrupted Blood

- 23% chance to gain a Flask Charge when you deal a Critical Strike
- 48% increased Critical Strike Chance during Effect

- 34% chance to gain a Flask Charge when you deal a Critical Strike
- 56% increased Evasion Rating during Effect

- 31% chance to gain a Flask Charge when you deal a Critical Strike
- 55% increased Armour during Effect

- 26% of Fire and Lightning Damage from Hits taken as Cold Damage during Effect
- Gain 14% of Physical Damage as Extra Cold Damage during effect
- 30% chance to Avoid being Chilled during Effect
- 30% chance to Avoid being Frozen during Effect
All gem links (11 groups)
-
 Automation L20
-
 Summon Skitterbots L21
-
 Determination L17
- Determination L20
- Determination L17
- Determination L17
- Determination L17
- Determination L17
- Flicker Strike 21/20
- Ice Bite 20/20
- Multistrike 20/20
- Close Combat 21/20
- Endurance Charge on Melee Stun 20/23
- Elemental Damage with Attacks 20/20
-
 Precision L15
 -
 Tempest Shield L20
 -
 Herald of Ice L20
- Blood Rage L20
-
 Mark On Hit L20
 -
 Assassin's Mark L20
 -
 Lifetap L20
-
 Faster Attacks L19
 - Leap Slam L19
- Fortify 20/20
- Lifetap L20
-
 Cast on Death 20/5
 -
 Less Duration L20
 -
 Portal 2/14
 -
 Swift Affliction L20
-
 Aspect of the Cat L20
How this stage plays (mechanics, defences)
Flicker Strike lives or dies on Frenzy charges — every use consumes one, so the entire build is engineered around refilling them faster than Flicker Strike drains them. The early-mapping setup leans on Replica Farrul's Fur as the sustain engine: "Gain up to your maximum number of Frenzy and Endurance Charges when you gain Cat's Agility" triggers on kill via Aspect of the Cat, which the chest reserves for free. Every pack kill refunds the full charge bank. Darkray Vectors adds a max frenzy charge and scales evasion + movement per charge, and Blood Rage generates more on kill as a secondary feed. The main 6-link lives in the body armour: Flicker Strike + Multistrike Support + Melee Physical Damage Support + Elemental Damage with Attacks + Trinity + Bloodthirst.
The weapon is Voidforge — an Infernal Sword that converts all physical to a random element each hit ("Deal no Non-Elemental Damage," "Gain 597% of Weapon Physical Damage as Extra Damage of a random Element") — which pairs perfectly with Trinity's cycling elemental resonances. Ascendancy at this tier runs Masterful Form + Impact + Bane of Legends, and the tree grabs Savagery, Weapon Artistry, One With Nature, and Destroyer. A Lethal Pride under Rakiata in the Karui cluster and The Adorned amplify magic jewel effects. Sheet DPS reads 677k.
80% spell suppress via Masterful Form is the backbone, backed by 47% physical damage reduction and a full 8 endurance charges sustained by Endurance Charge on Melee Stun. Bane of Legends hasn't yet unlocked full Overleech — that arrives once Brutal Fervour replaces a filler ascendancy point — but Petrified Blood spreads hit damage over time so leech and regen can catch up. 5.6k life, 49k EHP, and Replica Farrul's Fur's permanent Onslaught via Cat's Agility keep clear tempo up.
Flesh and Stone in Blind stance blinds nearby enemies, Steelskin on Cast when Damage Taken eats a spike hit, and all four elemental resists sit at 75% with chaos capped via amulet and belt rolls. Brine King as major pantheon stops freeze/stun chains on a skill that cannot afford to be interrupted.
This is the fastest skill in the game, and even at this tier mapping is a blur. You leap into a pack with Leap Slam, land one hit to prime Frenzy charges, then Flicker Strike chain-teleports through the entire screen. Replica Farrul's Fur's kill-refill means charges never run dry on a map — the whole clear happens inside a single sustained flicker train. Multistrike Support fires three hits per chain, and Bane of Legends's culling strike corpse-explodes kill chains forward. Bosses break the loop slightly since there's nothing to kill for charge refill — Blood Rage plus Endurance Charge on Melee Stun bridges the gap. Camera barely catches up.
Passive tree (127 points)
The desktop app shows this tier's full tree on an interactive canvas.
Endgame L85–94
- The weapon pivots from Voidforge to Paradoxica ("Attacks with this Weapon deal Double Damage"), and the build commits to lightning-only via Doryani's Prototype + Dawnbreaker, turning the reference into a Wrath-of-God shock-stacking crit Flicker. Headsman is finally picked up as the ascendancy's cull-into-more-damage node.
- Target Forbidden Flame + Forbidden Flesh with the matching notable — 52% usage at this tier for a reason
- Acquire Yoke of Suffering (72% usage) — all elemental ailments deal 20% more damage each, huge for the lightning build
- Switch to Greater Multistrike once you hit a 6-link that can support it — the per-hit damage jump is substantial


 Flicker StrikeFortify
 TrinityClose CombatIce BiteMultistrike
Full gear (23 items)
 Horror Impaler Weapon 1
- Quality does not increase Physical Damage
- 1% increased Critical Strike Chance per 4% Quality
- +25% to Global Critical Strike Multiplier
- 32% reduced Attribute Requirements
- Adds 45 to 80 Fire Damage
- Adds 91 to 184 Cold Damage
- Adds 17 to 305 Lightning Damage
- 22% increased Attack Speed
- +22 to Strength and Intelligence (crafted)
- 24% increased Critical Strike Chance (crafted)
Svalinn Weapon 2
- +16 to maximum Life
- 14% Chance to Block Spell Damage
- +102 to Ward
- -10% to maximum Chance to Block Attack Damage
- -10% to maximum Chance to Block Spell Damage
- Chance to Block is Lucky
- Trigger a Socketed Elemental Spell on Block, with a 0.25 second Cooldown
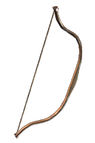 Short Bow Weapon 1 Swap
Maloney's Mechanism Weapon 2 Swap
- Has 1 Socket
- Has 2 Sockets
- Trigger a Socketed Bow Skill when you Attack with a Bow, with a 1 second Cooldown
- 11% increased Attack Speed
- +69 to maximum Life
- 5% chance to Blind Enemies on Hit with Attacks
 Eagle Cowl Helmet
- 7% increased Mana Reservation Efficiency of Skills
- 19% reduced Mana Cost of Attacks
- +505 to Accuracy Rating
- +144 to maximum Life
- +32% to Cold Resistance
- +28% to Chaos Resistance
- 21% increased Warcry Buff Effect
- +1 to Level of Socketed Melee Gems (crafted)
- +0.2 metres to Melee Strike Range (crafted)
Bronn's Lithe Body Armour
- +5 to Level of Socketed Movement Gems
- 10% increased Attack Speed
- 95% increased Damage with Movement Skills
- 247% increased Evasion Rating
- 10% increased Movement Speed
 Corpse Grip Gloves
- +45 to Accuracy Rating per Frenzy Charge
- Non-Vaal Strike Skills target 1 additional nearby Enemy
- Adds 3 to 34 Lightning Damage to Attacks
- +131 to Evasion Rating
- +129 to maximum Life
- +40% to Fire Resistance
- +44% to Cold Resistance
- +48% to Lightning Resistance
Foulborn Darkray Vectors Boots
- 53% increased Armour and Evasion
- +32% to Lightning Resistance
- 5% increased Movement Speed per Frenzy Charge
- +1 to Maximum Frenzy Charges
- 40% reduced Frenzy Charge Duration
- 25% reduced Light Radius
- 8% increased Accuracy Rating per Frenzy Charge
Marylene's Fallacy Amulet
- Allocates Tribal Fury
- +32 to Intelligence
- +100 to Accuracy Rating
- +239% to Global Critical Strike Multiplier
- +91 to Evasion Rating
- 11% increased Light Radius
- 40% less Critical Strike Chance
- Critical Strikes have Culling Strike
 Warrior's Legacy Ring 1
- +25% to Fire Resistance
- +42 to Strength
- 24% increased Melee Damage
- 30% chance to Avoid being Stunned
- 20% less Attack Speed
- Strike Skills also target the previous location they were used
The Taming Ring 2
- +10% to all Elemental Resistances
- +29% to all Elemental Resistances
- 10% chance to Freeze, Shock and Ignite
- 40% increased Elemental Damage with Hits and Ailments for each type of Elemental Ailment on Enemy
 Screams of the Desiccated Belt
- +40 to maximum Life
- You have Diamond Shrine Buff while affected by no Flasks
- +28 to Intelligence
- +38% to Chaos Resistance
Entropy Stinger Jewel
- Damage Penetrates 1% Cold Resistance
- 15% increased Damage with Swords
- +12% to Global Critical Strike Multiplier
- +16% to Critical Strike Multiplier with One Handed Melee Weapons
- 2% increased Attack and Cast Speed
The Interrogation Jewel
- Adds Secrets of Suffering
Cataclysm Glisten Jewel
- Adds 8 Passive Skills
- 2 Added Passive Skills are Jewel Sockets
- Added Small Passive Skills grant: 12% increased Attack Damage while holding a Shield
- Added Small Passive Skills also grant: +2% to Lightning Resistance
- 1 Added Passive Skill is Calamitous
- 1 Added Passive Skill is Devastator
- 1 Added Passive Skill is Martial Prowess
Luminous Ruin Jewel
- +8 to Strength and Dexterity
- 6% increased Attack Speed with Swords
- +11% to Global Critical Strike Multiplier
- +18% to Critical Strike Multiplier with One Handed Melee Weapons
Armageddon Bloom Jewel
- 16% increased Damage with Swords
- +15% to Critical Strike Multiplier with One Handed Melee Weapons
- +8% to all Elemental Resistances
- +10% to Fire and Cold Resistances
Viper Star Jewel
- 4% increased Attack Speed while holding a Shield
- +16% to Critical Strike Multiplier with One Handed Melee Weapons
- +13% to Fire Resistance
- +10% to Fire and Lightning Resistances

- 66% reduced Amount Recovered
- Instant Recovery
- Grants Immunity to Bleeding for 6 seconds if used while Bleeding
- Grants Immunity to Corrupted Blood for 6 seconds if used while affected by Corrupted Blood

- 21% reduced Mana Burn rate
- Melee Weapon Damage Penetrates 22% Elemental Resistances

- 66% reduced Amount Recovered
- Instant Recovery
- Grants Immunity to Ignite for 7 seconds if used while Ignited
- Removes all Burning when used
- 66% reduced Amount Recovered
- Instant Recovery
- Removes Curses on use
- 66% reduced Amount Recovered
- Instant Recovery
- Grants Immunity to Poison for 9 seconds if used while Poisoned
All gem links (11 groups)
- Flicker Strike L19
- Flicker Strike L19
- Flicker Strike L19
- Flicker Strike L19
- Flicker Strike L19
- Flicker Strike L19
- Assassin's Mark L14
- Blood Rage L20
- Mark On Hit L20
- Fortify 20/20
- Trinity 19/20
- Flicker Strike 20/20
- Close Combat 20/20
- Ice Bite 20/20
- Multistrike 20/20
- Flicker Strike L19
- Flicker Strike L19
- Flicker Strike L19
- Lifetap L20
- Leap Slam L2
- Faster Attacks 20/20
-
 Momentum 20/20
-
 Efficacy L13
 -
 Hydrosphere L1
 -
 Vaal Smite L20
 -
 More Duration 20/20
- Flicker Strike L19
-
 Flesh and Stone L19
- Summon Skitterbots L14
-
 Enduring Cry L16
 - Flicker Strike L19
- Flicker Strike L19
-
 Urgent Orders L20
-
 Unknown Gem L1
How this stage plays (mechanics, defences)
The endgame reference weaponises a mechanical oddity: Doryani's Prototype ("Deal no Non-Lightning Damage") plus Dawnbreaker in the off-hand ("20% of Cold Damage taken as Fire," "20% of Lightning Damage taken as Fire") while the body armour's line "Nearby Enemies have Lightning Resistance equal to yours" broadcasts the player's own -193% lightning resistance to every nearby enemy. Enemy lightning resist craters into deeply negative territory, and every Flicker Strike hit — now pure lightning — lands with massive resistance-pen damage amplification. The main 6-link lives in the chest: Flicker Strike + Multistrike Support + Added Lightning Damage + Increased Critical Damage Support + Volatility Support + Inspiration Support.
Frenzy sustain gets a second engine: Ralakesh's Impatience grants "Count as having maximum number of Frenzy Charges," so charges are permanently satisfied — Flicker Strike still consumes charges on use but the "count as" floor makes the consumption invisible to damage scaling. Forbidden Shako adds Innervate Support for on-shock lightning damage. A secondary Frenzy of Onslaught setup in the helmet handles boss-priming. Headsman adds culling-strike + 25% more damage against enemies you cull, and the tree now includes Vaal Pact (instant leech), Divine Flesh (transformed from Unwavering Stance, 50% ele-taken-as-chaos), and Versatile Combatant for spell block. Notables add Headsman, Fatal Blade, Dismembering, As The Mountain.
The defensive math flips entirely. Divine Flesh converts 50% of elemental damage taken into chaos, then chaos resist sits at 80% so those conversions get heavily mitigated, and Dawnbreaker converts a further chunk of cold/lightning/physical hits into fire — where resist IS positive at 84%. Armour climbs to 10k with Determination, 82% physical DR, and Brutal Fervour finally online for Overleech + ailment immunity. EHP 74k.
Block sits at 70% attack / 65% spell via Dawnbreaker + Versatile Combatant, adding a third mitigation layer on top of conversion + leech. Tempest Shield (now the dominant aura in the tier at 59% usage) scales block chance higher and adds reactive lightning damage to blocks.
Screens disappear. 12.3 attacks per second and 54% crit with 530% crit multi mean every Flicker Strike chain deletes everything the cursor points at, and Doryani's Prototype's shared-resistance aura means an entire room of enemies is effectively shredded at -193% lightning resist the moment you enter it. Replica Farrul's Fur still refills frenzies on kill, Ralakesh's Impatience guarantees the charge floor, and Brutal Fervour's Overleech means life regenerates through sustained damage. Boss fights shift to the Frenzy of Onslaught helmet setup for charge generation on a target that can't die for refills, but on anything smaller than pinnacle the Flicker Strike chain simply doesn't stop.
Passive tree (126 points)
The desktop app shows this tier's full tree on an interactive canvas.
Aspirational L95–100
- The aspirational reference drops Doryani's Prototype's gimmick and commits to Brutality Support — pure physical Flicker Strike in a rare Fleshripper with 143% increased physical damage. Defensively the build loses 50% of EHP compared to the tier median to push DPS; Brutal Fervour and stacked phys-reduction carry survival.

 Flicker StrikeElemental Damage with AttacksFortifyMultistrikeIce BiteClose Combat
Full gear (25 items)
The Saviour Weapon 1
- 6% increased Explicit Physical Modifier magnitudes
- 6% increased Explicit Speed Modifier magnitudes
- 40% increased Global Accuracy Rating
- Triggers Level 20 Reflection when Equipped
- 156% increased Physical Damage
- Adds 23 to 46 Physical Damage
- 12% increased Attack Speed
- 9% increased Critical Strike Chance
Dire Wing Weapon 2
- +16% to Lightning Resistance
- +1 to Maximum Frenzy Charges
- Item sells for much more to vendors
- 74% increased Chance to Block
- 14% Chance to Block Spell Damage
- You take 32% reduced Extra Damage from Critical Strikes
- +159 to maximum Life
- 30% chance to Avoid Elemental Ailments
- 5% chance to deal Double Damage (crafted)
 Battered Foil Weapon 1 Swap
- +25% to Global Critical Strike Multiplier
Elegant Foil Weapon 2 Swap
- +25% to Global Critical Strike Multiplier
 Doom Glance Helmet
- Damage Penetrates 6% Cold Resistance
- 24% reduced Mana Cost of Attacks
- +14% chance to Suppress Spell Damage
- Grants Level 30 Aspect of the Cat Skill
- +38 to Evasion Rating
- +169 to maximum Life
- 22% increased Rarity of Items found
- +32% to Chaos Resistance
Replica Farrul's Fur Body Armour
- 125% increased Armour and Evasion
- +97 to maximum Life
- +2.00 seconds to Cat's Agility Duration
- Aspect of the Cat has no Reservation
- Gain up to your maximum number of Frenzy and Endurance Charges when you gain Cat's Agility
- You have Onslaught while you have Cat's Agility
 Carrion Grip Gloves
- +51 to Strength
- 16% increased Attack Speed
- +113 to maximum Life
- +1 to Maximum Frenzy Charges
- Non-Vaal Strike Skills target 2 additional nearby Enemies
- 16% increased Global Critical Strike Chance (crafted)
- 22% increased Elemental Damage if you've dealt a Critical Strike Recently (crafted)
Foulborn Darkray Vectors Boots
- +9% chance to Suppress Spell Damage
- 41% increased Armour and Evasion
- +33% to Lightning Resistance
- 5% increased Movement Speed per Frenzy Charge
- +1 to Maximum Frenzy Charges
- 40% reduced Frenzy Charge Duration
- 25% reduced Light Radius
- 8% increased Accuracy Rating per Frenzy Charge
Yoke of Suffering Amulet
- Allocates Frenetic
- +16 to all Attributes
- +15% to Fire Resistance
- +14% to Cold Resistance
- +38% to Lightning Resistance
- 30% reduced Duration of Ailments on Enemies
- 10% chance to Shock
- Enemies take 10% increased Damage for each type of Ailment you have inflicted on them
- Your Elemental Damage can Shock
 Mind Grasp Ring 1
- +23% to Chaos Resistance
- 4 to 8 Added Cold Damage per Frenzy Charge
- +57 to Intelligence
- +112 to maximum Life
- +41% to Cold Resistance
- +29% to Chaos Resistance
- 27% increased Elemental Damage with Attack Skills (crafted)
Beast Whorl Ring 2
- +16% to Cold and Lightning Resistances
- +47 to Dexterity
- +133 to maximum Life
- +44% to Lightning Resistance
- 12% increased Elemental Damage with Attack Skills
- +20% to Fire and Chaos Resistances
- Adds 13 to 18 Fire Damage (crafted)
- Adds 14 to 19 Cold Damage (crafted)
Mageblood Belt
- +42 to Strength
- +52 to Dexterity
- +15% to Fire Resistance
- +24% to Cold Resistance
- Magic Utility Flasks cannot be Used
- Leftmost 4 Magic Utility Flasks constantly apply their Flask Effects to you
- Magic Utility Flask Effects cannot be removed
Plague Ruin Jewel
- Adds 8 Passive Skills
- 2 Added Passive Skills are Jewel Sockets
- Added Small Passive Skills grant: Axe Attacks deal 12% increased Damage with Hits and Ailments Added Small Passive Skills grant: Sword Attacks deal 12% increased Damage with Hits and Ailments
- Added Small Passive Skills also grant: +4% to Chaos Resistance
- 1 Added Passive Skill is Feed the Fury
- 1 Added Passive Skill is Fuel the Fight
- 1 Added Passive Skill is Martial Prowess
Dragon Shine Jewel
- +16 to Dexterity
- 16% increased Damage with Swords
- +13% to Melee Critical Strike Multiplier
- 7% increased maximum Life
Viper Bliss Jewel
- +18% to Critical Strike Multiplier with Two Handed Melee Weapons
- 14% increased Melee Critical Strike Chance
- 7% increased maximum Life
- 4% increased Attack and Cast Speed
 Ancestral Vision Jewel
- Damage Penetrates 1% Lightning Resistance
- +7 to Dexterity
- Modifiers to Chance to Suppress Spell Damage also apply to Chance to Avoid Elemental Ailments at 50% of their Value
Spirit Needle Jewel
- 15% increased Damage with Swords
- +9% to Global Critical Strike Multiplier
- +15% to Melee Critical Strike Multiplier
- 7% increased maximum Life
Honour Joy Jewel
- Adds 8 Passive Skills
- 2 Added Passive Skills are Jewel Sockets
- Added Small Passive Skills grant: 12% increased Attack Damage while holding a Shield
- Added Small Passive Skills also grant: +5% to Cold Resistance
- 1 Added Passive Skill is Feed the Fury
- 1 Added Passive Skill is Gladiator's Fortitude
- 1 Added Passive Skill is Martial Prowess
Lethal Pride Jewel
- Commanded leadership over 12111 warriors under Kaom
- Passives in radius are Conquered by the Karui
- Historic
 Watcher's Eye Jewel
- 6% increased maximum Energy Shield
- 6% increased maximum Life
- 5% increased maximum Mana
- 36% of Physical Damage Converted to Cold Damage while affected by Hatred
- Adds 61 to 99 Cold Damage while affected by Hatred
- 42% reduced Amount Recovered
- 135% increased Recovery rate
- 50% of Recovery applied Instantly
- Grants Immunity to Bleeding for 9 seconds if used while Bleeding
- Grants Immunity to Corrupted Blood for 9 seconds if used while affected by Corrupted Blood
- 24% reduced Duration
- 25% increased effect
- 53% Chance to Avoid being Stunned during Effect

- 29% reduced Duration
- 25% increased effect
- 61% reduced Effect of Curses on you during Effect

- 34% reduced Duration
- 25% increased effect
- 19% additional Elemental Resistances during Effect

- 38% reduced Duration
- 25% increased effect
- 51% increased Armour during Effect
All gem links (11 groups)
- Hatred L21
-
 Enlighten 3/2
 - Herald of Ice 20/20
- Precision L20
- Elemental Damage with Attacks 20/23
- Flicker Strike 20/20
- Fortify 20/20
- Multistrike 20/23
- Ice Bite 21/20
- Close Combat 20/20
- Leap Slam L20
-
 Rage L20
 - Faster Attacks 20/21
-
 Culling Strike 21/20
-
 Empower L2
-
 Cast when Damage Taken L20
- Blood Rage 20/20
- Swift Affliction L20
- Less Duration 20/23
-
 Flame Dash 2/20
- Assassin's Mark 20/20
- Lifetap L1
- Mark On Hit 20/20
-
 Reflection L20
- Aspect of the Cat L30
How this stage plays (mechanics, defences)
At apex: 6.5M DPS, 49.8% crit chance, 419% crit multi, 7 Frenzy charges permanent via Replica Farrul's Fur + Darkray Vectors's extra charge. The claw (Hate Etcher, a rare Fleshripper with "+1 to Level of Socketed Gems") holds the 6-link: Flicker Strike + Multistrike Support + Fortify Support + Endurance Charge on Melee Stun + Close Combat Support + Brutality Support. Brutality's "59% more physical damage" on the cost of dealing no non-physical works because the weapon is pure phys — no conversion, no elemental add-ons, just raw crit hits. Pride aura adds another "39% more physical damage" layered on top.
The Slayer ascendancy tree is fully realised: Headsman + Brutal Fervour + Masterful Form + Bane of Legends. Tree notables stack claw/axe multipliers — Savagery, Tribal Fury, Titanic Impacts, Harpooner, Forceful Skewering. Carnage Heart amulet adds 35% increased damage while leeching + 1.87% physical leech, which combined with Brutal Fervour's Overleech means the leech buff is always active during combat. A Watcher's Eye carries Determination phys-reduction + Precision blind-immunity + Pride impale-duration. Berserk layered with Lifetap Support adds on-demand burst, Blood Rage keeps Frenzy charges sustained even on bossfights where no kills refill the bank.
90% physical damage reduction hits the cap through 17.6k armour + Determination + 7 endurance charges + Fortify Support's 20% less damage taken. Brutal Fervour's Overleech + ailment immunity while leech-active is the Slayer signature — damage-taken-while-leeching is a non-event because leech keeps refilling life past the hit. All four elemental resists cap at 75% with 39% chaos overcap.
EHP sits at 28k — noticeably below the tier median of 185k, because this reference commits flask and jewel slots to damage (Lion's Roar for 10% more melee phys, Diamond Flask for crit). A Transcendent Spirit is picked for dex-scaled movement/accuracy rather than defence. Immortal Call on Lifetap Support and a Sulphur Flask with Consecrated Ground fill in reactive mitigation. Brine King + Tukohama pantheons block freeze and provide stationary regen.
This is the apex Flicker feel: unkillable forward momentum. You leap into a pack, one swing primes Frenzy charges, and then Flicker Strike teleports through the entire zone faster than the client can render corpses. Bane of Legends's permanent Onslaught plus the kill-explosion turns map clear into a continuous blur — the screen doesn't update, it strobes. Headsman's culling strike instantly removes low-HP rares, and Overleech means sustained combat refills life faster than anything can drain it. Bosses run a Berserk + Double Strike of Impaling priming combo to stack impales, then the Flicker train returns at 500% crit multi and closes the fight in seconds. Nothing else in the game moves this fast.
Passive tree (133 points)
The desktop app shows this tier's full tree on an interactive canvas.