
Leveling L1–68
- Act 1: run Caustic ArrowBuy Caustic Arrow from Nessa after Hillock — the canonical Scion leveling skill because Scion starts in the middle of the tree and can path toward any attack or caster cluster, so the weapon flexibility matters. Pierce Support from the Brutus reward widens the caustic lane. Dash (quest reward Medicine Chest) is your travel skill. Clarity at level 1 for mana sustain. A Quill Rain bow drops often and is a great early-game attack-speed base for any projectile leveler — grab one if you find it.
- Act 2: run Caustic ArrowPick up Herald of Ice from Yeena and Void Manipulation Support for the 4-link DoT multiplier. Slot a Cast when Damage Taken Support + Steelskin at L10 for panic defense. Take "Kill all bandits" for +2 passives — passive points beat every bandit power for Scion, who is already passive-point hungry due to the central tree start.
- Act 3: run Caustic ArrowFlame Dash from the Library replaces Dash. Sniper's Mark from Yeena is your single-target curse. Precision at low level for accuracy. Do Lab 1 at the end of Act 3 and take Path of the Deadeye — the extra projectile is what makes Kinetic Fusillade feel right once you swap later. Start pathing toward the Shadow and Ranger clusters on the tree (Scion can reach both cheaply from her start).
- Act 4–5: run Tornado ShotOptional bow bridge — swap to Tornado Shot once you find a decent rare bow (or craft one with added elemental damage via vendor recipe). It clears much faster than Caustic Arrow at L40+ and gets you used to the projectile-overlap playstyle Kinetic Fusillade shares. Greater Volley Support (3.28 Exceptional Support, replaces GMP) is the main clear scaler. Do Lab 2 in Act 5 and take Path of the Assassin — power charges on hit and crit multi are the single-target engine you'll need once Kinetic Fusillade is online.
- Act 6 — wand swap: run Kinetic FusilladeThe real transition. Lilly Roth sells Kinetic Fusillade. Swap to a rare wand (vendor-recipe magic wand + topaz/sapphire/ruby + Whetstone → guaranteed added elemental damage). Reserve Wrath from the Act 6 quest reward — your hits are now lightning-dominant via Added Lightning Damage Support, so Wrath roughly doubles the scaling. Pierce Support is mandatory — the rapid volley still fires individual projectiles that need to reach past trash. Inspiration Support for mana sustain + the crit buff. Expect one rough zone while the gem levels up.
- Act 7–9: run Kinetic FusilladeAdd Haste as a second damage aura once you have reservation headroom (cluster jewels help). Swap Sniper's Mark to Assassin's Mark for crit multi and more power charges once the wand has crit chance. Do Lab 3 in Act 9 — pick a second Path of the Deadeye node if you want more clear, or Path of the Juggernaut for the defensive buffer. Most Kinetic Fusillade Ascendants stay on projectile scaling for Lab 3 since the Assassin-side crit scaling is already locked in.
 Caustic Arrow
  Pierce Support
  Mirage Archer Support
  Dash
Dash  Clarity
 Buy Caustic Arrow from Nessa after Hillock — the canonical Scion leveling skill because Scion starts in the middle of the tree and can path toward any attack or caster cluster, so the weapon flexibility matters. Pierce Support from the Brutus reward widens the caustic lane. Dash (quest reward Medicine Chest) is your travel skill. Clarity at level 1 for mana sustain. A Quill Rain bow drops often and is a great early-game attack-speed base for any projectile leveler — grab one if you find it.
Caustic Arrow Pierce Support Mirage Archer Support  Void Manipulation Support Dash Clarity
  Herald of Ice
  Cast when Damage Taken Support + Steelskin
 Pick up Herald of Ice from Yeena and Void Manipulation Support for the 4-link DoT multiplier. Slot a Cast when Damage Taken Support + Steelskin at L10 for panic defense. Take "Kill all bandits" for +2 passives — passive points beat every bandit power for Scion, who is already passive-point hungry due to the central tree start.
Caustic Arrow Pierce Support Mirage Archer Support Void Manipulation Support  Vile Toxins Support
  Flame Dash Clarity
  Precision Herald of Ice Cast when Damage Taken Support + Steelskin
  Sniper's Mark
 Flame Dash from the Library replaces Dash. Sniper's Mark from Yeena is your single-target curse. Precision at low level for accuracy. Do Lab 1 at the end of Act 3 and take Path of the Deadeye — the extra projectile is what makes Kinetic Fusillade feel right once you swap later. Start pathing toward the Shadow and Ranger clusters on the tree (Scion can reach both cheaply from her start).
 Tornado Shot
  Greater Volley Support
  Barrage Support
  Elemental Damage with Attacks Support Mirage Archer Support Flame Dash Precision
  Haste Herald of Ice
  Herald of Thunder Cast when Damage Taken Support + Steelskin Sniper's Mark
 Optional bow bridge — swap to Tornado Shot once you find a decent rare bow (or craft one with added elemental damage via vendor recipe). It clears much faster than Caustic Arrow at L40+ and gets you used to the projectile-overlap playstyle Kinetic Fusillade shares. Greater Volley Support (3.28 Exceptional Support, replaces GMP) is the main clear scaler. Do Lab 2 in Act 5 and take Path of the Assassin — power charges on hit and crit multi are the single-target engine you'll need once Kinetic Fusillade is online.
 Kinetic Fusillade Greater Volley Support Pierce Support
  Added Lightning Damage Support
  Inspiration Support Flame Dash
  Wrath Precision Herald of Ice Herald of Thunder Cast when Damage Taken Support + Steelskin Sniper's Mark
 The real transition. Lilly Roth sells Kinetic Fusillade. Swap to a rare wand (vendor-recipe magic wand + topaz/sapphire/ruby + Whetstone → guaranteed added elemental damage). Reserve Wrath from the Act 6 quest reward — your hits are now lightning-dominant via Added Lightning Damage Support, so Wrath roughly doubles the scaling. Pierce Support is mandatory — the rapid volley still fires individual projectiles that need to reach past trash. Inspiration Support for mana sustain + the crit buff. Expect one rough zone while the gem levels up.
Kinetic Fusillade Greater Volley Support Pierce Support Added Lightning Damage Support Inspiration Support Elemental Damage with Attacks Support Flame Dash Wrath Precision Haste Herald of Ice Herald of Thunder Cast when Damage Taken Support + Steelskin  Assassin's Mark
 Add Haste as a second damage aura once you have reservation headroom (cluster jewels help). Swap Sniper's Mark to Assassin's Mark for crit multi and more power charges once the wand has crit chance. Do Lab 3 in Act 9 — pick a second Path of the Deadeye node if you want more clear, or Path of the Juggernaut for the defensive buffer. Most Kinetic Fusillade Ascendants stay on projectile scaling for Lab 3 since the Assassin-side crit scaling is already locked in.
Kinetic Fusillade Greater Volley Support Pierce Support Added Lightning Damage Support Inspiration Support Elemental Damage with Attacks Support  Lightning Penetration Support Flame Dash Wrath Precision Haste Herald of Ice Herald of Thunder Cast when Damage Taken Support + Steelskin
  Vaal Haste Assassin's Mark
 Run Uber Lab at L68 — the capstone Ascendant node choice depends on your run: take the Scion projectile/crit unique node for damage, or a combat-survival node if you're dying in red maps. Swap Elemental Damage with Attacks Support for Lightning Penetration Support once you have crit reliability — penetration scales better than generic elemental on a crit build. Start shopping cluster jewels: medium with "Pure Commander" / "Warmonger" projectile nodes for damage, small with reservation efficiency for aura budget. A separate single-target 4-link with Barrage Support is the bossing setup.
How leveling works
Kinetic Fusillade on an Ascendant is the "two half-ascendancies glued together" version of the build — instead of Deadeye's full projectile scaling or Warden's full attack speed + frenzy charges, you take half of each of two other ascendancies via the Ascendant's "Path of the …" nodes. The canonical pick for a Kinetic Fusillade wander is Path of the Deadeye (projectile damage, Far Shot-style range scaling, extra projectile) + Path of the Assassin (power charges, crit multi on crit, and crit chance multiplier) — Deadeye for the clear, Assassin for the single-target crit ceiling.
Kinetic Fusillade itself is a transfigured Kinetic Blast that fires a volley of fast projectile hits in rapid succession — think channel-like repeated small explosions over a short duration, as opposed to Kinetic Blast of Clustering's single tight clump. It scales on attack speed, projectile damage, and your wand's converted damage type. The Ascendant chassis leans hard on cluster jewels and rare gear to close the ascendancy-power gap (half of two is noticeably weaker than one full ascendancy), so expect the build to feel rougher through yellow maps than a full Deadeye variant before the cluster jewel economy kicks in.
Leveling is Caustic Arrow or Frost Blades through Acts 1–3 (Scion can use either — her starting area doesn't push you toward one weapon type), into Tornado Shot on a bow through Act 4–5 if you want a smoother bridge, then the wand + Kinetic Fusillade swap at Act 6. The ascendancy order is Path of the Deadeye first (Lab 1, for the extra projectile and projectile damage — this is what makes Kinetic Fusillade click) → Path of the Assassin (Lab 2, power charges + crit) → Path of the Deadeye second pick or Ranger combat-effectiveness nodes (Lab 3) → the Uber Lab capstone depending on your damage vs defense need.
The defensive chassis is life + evasion/ES hybrid + 75% resist cap, with cluster jewels providing both the notable density you lost vs a full ascendancy AND the defensive nodes (Surging Vitality, etc). Do not try to save currency by skipping cluster jewels — they are the entire reason Ascendant can compete with full-power ascendancies in the endgame. Budget for at least one medium cluster jewel with "projectile damage" and one small with "reservation efficiency" by early red maps.
No endgame unique is strictly required. Goldrim, Wanderlust, and a Tabula Rasa if one is cheap. Everything else should be a rare.
Gear while leveling
- · Wand: vendor-recipe magic wands (magic wand + topaz/sapphire/ruby ring + Blacksmith's Whetstone → guaranteed added elemental damage) through the Act 6 pivot. The endgame target is a rare crit wand (Profane Wand / Imbued Wand / Tornado Wand) with attack speed, flat added lightning damage to attacks, and crit chance.
- · Off-hand: a second wand for dual-wield attack speed is the endgame endpoint. During leveling, any rare shield with life and resists is fine.
- · Body armour: Tabula Rasa if cheap. Otherwise a 4-link evasion or hybrid evasion/ES chest with life and resists, eventually a 6-link rare.
- · Helmet: Goldrim through Act 5. Rare with life + three resists once available. Endgame helmet slot often hosts "Enchanted" Kinetic Fusillade-related lab enchants if you farm Uber Lab.
- · Gloves: life, resists, attack speed. Maligaro's Virtuosity at L21 is a cheap crit multi boost if found.
- · Boots: Wanderlust through early acts. Rare with movement speed + life + resists by Act 6.
- · Rings/amulet: life + resists with attribute patches. Le Heup of All covers stat requirements cheaply during the campaign. Atziri's Foible for budget mana/attributes on amulet.
- · Belt: Heavy Belt or Leather Belt with life and resists. No unique belt during leveling.
- · Cluster jewels (endgame): one medium cluster with projectile damage notables (Pure Commander, Warmonger), one small with reservation efficiency notables — these close the ascendancy gap vs a full Deadeye or Assassin.
- · Flasks: life flask with bleed removal, mana flask (mandatory before Inspiration Support), quicksilver with "of Adrenaline", granite + iron skin, and a diamond flask once affordable.
Weapon progression
Acts 1–5 use any bow or magic wand with added elemental damage. Vendor-recipe magic wands (magic wand + topaz/sapphire/ruby ring + Whetstone → guaranteed added elemental damage) through Acts 1–3 for Caustic Arrow, then optionally a rare bow for the Tornado Shot bridge in Act 4–5.
Act 6 pivots firmly to wands. Re-run the vendor recipe every 4–6 levels on a fresh base. Quill Rain is a budget attack-speed-heavy wand alternative if you can't craft a good base, but vendor-recipe wands usually beat it once you hit L60+.
The endgame target is a rare wand with attack speed, two "added damage" prefixes (flat lightning + flat cold or flat physical), crit chance, and ideally "+1 to level of all projectile gems" on a high-base-crit Imbued Wand or Profane Wand. Red-maps-and-beyond crafted item, not a campaign one. Get to maps on vendor-recipe wands and upgrade from there.
Tree to aim for (by level 90)
Watch out for
- ! Kinetic Fusillade on Ascendant is noticeably weaker than on a full Deadeye until you have cluster jewels — half-Deadeye means half the projectile-damage notables and half the attack-speed scaling. Budget 1–2 divine for a single medium cluster jewel with projectile damage notables by early red maps, or the build feels soft.
- ! Pierce Support is mandatory — the rapid volley still fires individual projectiles that must reach past trash to hit bosses. Without pierce, Kinetic Fusillade stops dead on the first mob.
- ! Greater Volley Support is the 3.28 Mirage Exceptional Support replacing Greater Multiple Projectiles (GMP no longer exists). Tradable, costs around 1 divine week one, few chaos by week two. Essential for clear density — this is the 5th link you save for first.
- ! Path of the Deadeye gives a conditional extra projectile — the notable node reads "+1 to number of projectiles" but some sources of extra projectiles don't stack additively. Always verify in PoB before assuming you have, say, 5 projectiles from Deadeye + Greater Volley + a quiver.
- ! Acrobatics cuts armour/ES effectiveness by 50%. On Ascendant you're already thin on defensive layers compared to a full ascendancy; take it only if you're committing to a pure evasion chassis. If your gear leans hybrid ES/evasion, skip it.
- ! Wrath + Haste + Precision + two heralds over-reserves mana without at least one mana reservation efficiency notable on the tree or an Enlighten support. Drop Precision level before dropping Wrath — Wrath is the biggest DPS multiplier.
- ! Ascendant's Scion tree-center start means you're passive-point hungry through the campaign — prioritize reaching the Ranger projectile cluster and the Shadow crit cluster before spending points on life nodes. Life nodes are cheap to grab later; the travel paths are not.
Early Mapping L70–84
- Swap to Replica Alberon's Warpath boots as soon as Strength hits ~1000 — the Adds 1 to 80 Chaos Damage to Attacks per 80 Strength line becomes the primary damage multiplier and locks in the aspirational archetype
- Pick up Timeclasp moonstone ring (75% early-mapping meta) for Debuffs on you expire 100% faster + skill-duration-reduction that shortens totem lifetime and cycles them faster
- Transition to The Iron Fortress chest to convert Strength's melee phys bonus into +1% Chance to Block Attack Damage per 50 Strength — it's the endgame block anchor


 Kinetic Fusillade
 Ballista Totem
 Less Duration
 Added Cold DamageGreater Volley
Full gear (15 items)
Moonsorrow Weapon 1
- Cannot roll Caster Modifiers
- Socketed Gems are supported by Level 20 Blind
- +10 to Intelligence
- 38% increased Spell Damage
- 265% increased Physical Damage
- 25% increased Lightning Damage
- 10% increased Cast Speed
- 10% chance to Blind Enemies on hit
 Hate Bastion Weapon 2
- +8% to all Elemental Resistances
- +64 to Armour
- +26 to maximum Energy Shield
- +34% to Fire Resistance
- +32% to Cold Resistance
- +47% to Lightning Resistance
- +42 to maximum Life (crafted)
Wilma's Requital Helmet
- +2 to Level of Socketed Fire Gems
- +362 to Accuracy Rating
- 237% increased Energy Shield
- 30% increased Elemental Damage with Attack Skills
- Increases and Reductions to Cast Speed apply to Attack Speed
- Ancestral Bond
 Carrion Shelter Body Armour
- +124 to maximum Life
- +44% to Fire Resistance
- +45% to Cold Resistance
- +44% to Lightning Resistance
- 47% increased Energy Shield (crafted)
Doedre's Tenure Gloves
- +43 to Intelligence
- 100% increased Spell Damage
- 24% reduced Cast Speed
 Ghoul Slippers Boots
- +68 to maximum Life
- 14% increased Rarity of Items found
- +29% to Fire Resistance
- +29% to Cold Resistance
- 35% increased Movement Speed
Warped Timepiece Amulet
- Allocates Surveillance
- +20 to Dexterity and Intelligence
- 10% increased Attack Speed
- 14% increased Cast Speed
- 14% increased Movement Speed
- 14% reduced Skill Effect Duration
- Debuffs on you expire 100% faster
 Fate Eye Ring 1
- +20% to Chaos Resistance
- Adds 9 to 15 Physical Damage to Attacks
- Adds 9 to 18 Cold Damage to Attacks
- 18% increased Lightning Damage
- +32 to Evasion Rating
- Gain 28 Life per Enemy Killed
- +19% to Cold and Chaos Resistances
Apocalypse Nail Ring 2
- +21% to Chaos Resistance
- +30 to Intelligence
- +111 to Evasion Rating
- +21 to maximum Energy Shield
- 39% increased Mana Regeneration Rate
- +17% to Lightning and Chaos Resistances
- Adds 11 to 14 Cold Damage (crafted)
- Adds 1 to 22 Lightning Damage (crafted)
 Agony Harness Belt
- +27 to Strength
- +15% to Fire Resistance
- +37% to Lightning Resistance
- +31% to Chaos Resistance
- Reflects 3 Physical Damage to Melee Attackers
- +54 to maximum Life (crafted)

- 15% reduced Charges per use
- Grants Immunity to Ignite for 11 seconds if used while Ignited
- Removes all Burning when used

- 23% chance to gain a Flask Charge when you deal a Critical Strike
- Removes Curses on use

- 34% increased Duration
- 47% increased Critical Strike Chance during Effect

- 31% increased Duration
- 39% reduced Effect of Curses on you during Effect

- 31% increased Duration
- 43% increased Evasion Rating during Effect
All gem links (7 groups)
-
 Frenzy L17
 -
 Power Charge On Critical L17
 -
 Greater Multiple Projectiles L17
 -
 Grace L17
-
 Cast when Damage Taken L16
- Ballista Totem L19
- Less Duration L18
- Added Cold Damage L17
- Greater Volley L18
- Kinetic Fusillade 18/10
- Wrath L18
- Flame Dash L18
- Sniper's Mark L17
-
 Mark On Hit L16
 - Precision L18
-
 Arcanist Brand L16
 -
 Tornado L16
 -
 More Duration L17
 -
 Hydrosphere L16
How this stage plays (mechanics, defences)
Early-mapping Ascendant at L82 isn't yet on the aspirational Str-stacking chassis — the reference runs a transitional setup with Moonsorrow unique Kinetic Wand, Wilma's Requital helmet (Ancestral Bond built in), and Doppelganger Guise chest for the crit-while-insane clear multiplier. The 5-link in the body armour is Kinetic Fusillade + Ballista Totem + Greater Volley + Added Lightning Damage + Less Duration. Wilma's Requital's "Ancestral Bond" implicit is the shortcut — at this tier the player doesn't need to allocate the keystone from the tree, which saves 2 points for extra damage nodes. "Increases and Reductions to Cast Speed apply to Attack Speed" is the sneaky multiplier on that helmet — spell cast speed passives now scale the ballista's attack rate.
The damage identity at this tier is Wrath aura + Added Lightning Damage support scaling. 88% endgame Wrath pickrate indicates the archetype commits to lightning early; the L82 reference confirms it. Greater Multiple Projectiles (ancient support) sits in the gloves with Frenzy + Power Charge On Critical for charge generation. The main 6th link is Kinetic Fusillade in Body Armour, and Rain of Splinters already contributes +2 projectiles to totems (39% reduced totem damage is a small tax against the massive projectile multiplier). Ascendancy nodes are Ranger Ascendancy (Gathering Winds for tailwind attack speed) + Witch Ascendancy + Path of the Witch — the Ghost Dance keystone from the Ranger path is allocated for the ES-on-evade loop.
The tree at this tier is a mana-free Ghost Dance wander-totem hybrid. Notables include Window of Opportunity, Forces of Nature, Arcing Blows, Multishot, Watchtowers, Fusillade (the eponymous notable), Written in Blood, Sentinel, Whispers of Doom (for the second curse — Conductivity weapon swap for the mana-free curse apply), Dynamo, Blood Drinker, Soul Thief, Harrier, Reflexes. Iron Will is picked up for Str-to-spell-damage conversion that flows into Wrath.
Defence at this tier is Ghost Dance evasion + rare-gear resistance stacking. 2.1k life + 770 ES + 6,250 evasion gives 12k EHP — the tier median is 10.6k, so the reference is slightly over. 28% spell suppression via boots + tree. Resistances cap at 75/75/75 with +34 fire / +61 cold / +58 lightning overcap from Wilma's Requital, Shaper's Seed amulet (nearby allies regen — for the totems), and rare rings. Chaos res is +49% from layered chaos rolls on every rare. 24% attack block via spirit shield is the token block layer; the archetype isn't committed to block until endgame. Steelskin + Cast when Damage Taken in the boots absorbs the occasional hit that slips through evasion.
Classic ballista-totem pace. Plant four totems with Ballista Totem support, Shield Charge to the next pack, repeat. Frenzy + Power Charge On Critical generates both charge types passively while firing. Greater Multiple Projectiles in the gloves fires a secondary spray on self-cast for boss-phase damage. Doppelganger Guise's Unhinge skill is a meme that swings between Sane (36% less phys/chaos taken) and Insane (52% more crit chance) — the reference keeps the level-20 skill gem in the body armour to trigger the swap on demand. Conductivity in the weapon swap applies the curse for totem-damage amplification.
Passive tree (117 points)
The desktop app shows this tier's full tree on an interactive canvas.
Endgame L85–94
- Endgame pivots hard to Str-stacking. Replica Alberon's Warpath boots (69% endgame) lock in the chaos-per-Strength damage chassis, The Iron Fortress chest (72% endgame) delivers +1 Chance to Block Attack per 50 Str turning 2029 Strength into ~40% block, and Ancestral Bond (46% endgame) + Versatile Combatant (44% endgame) + Blood Magic (45% endgame) are the three new keystones. Inertia × 2 is 65% endgame meta — both jewels transform Dex from passives in radius into Str for raw stacking.
- Pick up Watcher's Eye with Determination phys DR or Vitality life regen rolls — 84% aspirational meta confirms it's the correct defensive jewel
- Transition to a Mageblood belt (76% aspirational meta) for permanent flask uptime — the three core utility rolls are Silver Flask (onslaught), Quartz Flask (phasing), and Jade Flask (evasion)
- Anoint Whispers of Doom or craft a Despair-on-hit ring to stack two curses simultaneously — Despair is the cleanest second curse for a chaos-damage totem build


 Kinetic FusilladeGreater VolleyLess Duration
 Volatility
 Concentrated EffectBallista Totem
Full gear (28 items)
 Brood Edge Weapon 1
- Cannot roll Caster Modifiers
- Adds 69 to 150 Chaos Damage
- 90% increased Spell Damage
- +32% to Global Critical Strike Multiplier
- Can have up to 3 Crafted Modifiers (crafted)
- +21 to Strength and Intelligence (crafted)
- 22% increased Critical Strike Chance (crafted)
- Attacks with this Weapon Penetrate 12% Chaos Resistance (crafted)
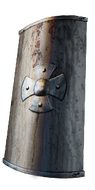 Corpse Rock Weapon 2
- +19 to maximum Life
- +51 to Strength
- 93% increased Armour
- Regenerate 113.6 Life per second
- 18% increased Stun and Block Recovery
- +1 to maximum number of Summoned Totems
- 46% increased Chance to Block (crafted)
 Eagle Nock Weapon 1 Swap
- +17% to Global Critical Strike Multiplier
- +36 to Dexterity
- Adds 4 to 6 Fire Damage
- Adds 64 to 131 Cold Damage
- Adds 8 to 110 Lightning Damage
- 5% increased Attack Speed
- +320 to Accuracy Rating
Maloney's Mechanism Weapon 2 Swap
- Has 1 Socket
- Has 2 Sockets
- Trigger a Socketed Bow Skill when you Attack with a Bow, with a 1 second Cooldown
- 8% increased Attack Speed
- +50 to maximum Life
- 5% chance to Blind Enemies on Hit with Attacks
 Tempest Halo Helmet
- +70 to Armour
- +10% to Fire Resistance
- +1 to Maximum Power Charges
- 1% increased Critical Strike Chance per 10 Strength
- Gain Accuracy Rating equal to your Strength
- Nearby Enemies have -12% to Chaos Resistance
- +70 to maximum Life (crafted)
The Iron Fortress Body Armour
- +1% Chance to Block Attack Damage per 50 Strength
- Chance to Block Spell Damage is Unlucky
- +108 to Strength
- 83% increased Armour
- 10% reduced Movement Speed
- Strength's Damage Bonus instead grants 3% increased Melee Physical Damage per 10 Strength
 Havoc Mitts Gloves
- 3% increased Damage per 100 Strength
- 15% chance to Intimidate Enemies for 4 seconds on Hit
- 14% increased Attack Speed
- +53 to Strength
- Adds 4 to 7 Physical Damage to Attacks
- 72% increased Armour
- +46% to Cold Resistance
- +54 to maximum Life (crafted)
Replica Alberon's Warpath Boots
- 17% increased Strength
- +191 to Armour
- +17% to Chaos Resistance
- 25% increased Movement Speed
- Cannot deal non-Chaos Damage
- Adds 1 to 80 Chaos Damage to Attacks per 80 Strength
Eyes of the Greatwolf Amulet
- Allocates Force of Darkness
- 34% increased Attributes
- 10% additional Physical Damage Reduction
- Implicit Modifier magnitudes are doubled
 Phoenix Nail Ring 1
- +23% to Chaos Resistance
- +56 to Strength
- +21% to Global Critical Strike Multiplier
- +107 to Evasion Rating
- +57 to maximum Life
- Regenerate 5.3 Mana per second
- +38% to Lightning Resistance
- Non-Channelling Skills have -7 to Total Mana Cost (crafted)
 Eagle Knuckle Ring 2
- -1 Prefix Modifier allowed
- +1 Suffix Modifier allowed
- Implicit Modifiers Cannot Be Changed
- 25% increased Suffix Modifier magnitudes
- +76 to Strength
- +46 to Intelligence
- +18 to maximum Energy Shield
- 23% increased Rarity of Items found
- +15% to all Elemental Resistances
- +41 to maximum Life (crafted)
Mageblood Belt
- +42 to Strength
- +50 to Dexterity
- +16% to Fire Resistance
- +25% to Cold Resistance
- Magic Utility Flasks cannot be Used
- Leftmost 4 Magic Utility Flasks constantly apply their Flask Effects to you
- Magic Utility Flask Effects cannot be removed
 Transcendent Flesh Jewel
- -1 Strength per 1 Strength on Allocated Passives in Radius
- +7% to Critical Strike Multiplier per 10 Strength on Unallocated Passives in Radius
- 3% increased Life Recovery Rate per 10 Strength on Allocated Passives in Radius
- 2% reduced Life Recovery Rate per 10 Strength on Unallocated Passives in Radius
 Split Personality Jewel
- This Jewel's Socket has 25% increased effect per Allocated Passive Skill between it and your Class' starting location
- +5 to Strength
- +5 to maximum Life
 The Balance of Terror Jewel
- +15% to all Elemental Resistances
- Immune to Exposure if you've cast Elemental Weakness in the past 10 seconds
- Inflict Withered for 2 seconds on Hit if you've cast Despair in the past 10 seconds
 Bound By Destiny Jewel
- 14% increased Strength if 2 Warlord Items are Equipped
- +3% to maximum Cold Resistance if 4 Redeemer Items are Equipped
- You can apply an additional Curse if 6 Hunter Items are Equipped
 Lethal Pride Jewel
- Commanded leadership over 13219 warriors under Akoya
- Passives in radius are Conquered by the Karui
- Historic
 Dusk Heart Jewel
- Adds 8 Passive Skills
- 2 Added Passive Skills are Jewel Sockets
- Added Small Passive Skills grant: Wand Attacks deal 12% increased Damage with Hits and Ailments
- Added Small Passive Skills also grant: +2% to Cold Resistance
- 1 Added Passive Skill is Fuel the Fight
- 1 Added Passive Skill is Martial Prowess
- 1 Added Passive Skill is Opportunistic Fusilade
 Rain of Splinters Jewel
- 39% reduced Totem Damage
- Totems fire 2 additional Projectiles
Split Personality Jewel
- This Jewel's Socket has 25% increased effect per Allocated Passive Skill between it and your Class' starting location
- +5 to Strength
- +5 to maximum Life
 Unnatural Instinct Jewel
- Allocated Small Passive Skills in Radius grant nothing
- Grants all bonuses of Unallocated Small Passive Skills in Radius
 Inertia Jewel
- +24 to Strength
- Dexterity from Passives in Radius is Transformed to Strength
Inertia Jewel
- +24 to Strength
- Dexterity from Passives in Radius is Transformed to Strength
- 37% reduced Duration
- 25% increased effect
- 12% increased Movement Speed during Effect

- 28% reduced Duration
- 25% increased effect
- 57% increased Armour during Effect

- 26% reduced Duration
- 25% increased effect
- Regenerate 3% of Life per second during Effect (crafted)

- 26% reduced Duration
- 25% increased effect
- 60% reduced Effect of Curses on you during Effect
- 11% reduced Amount Recovered
- Instant Recovery when on Low Life
- Grants Immunity to Bleeding for 8 seconds if used while Bleeding
- Grants Immunity to Corrupted Blood for 8 seconds if used while affected by Corrupted Blood
All gem links (10 groups)
-
 Eternal Blessing L20
 -
 Portal 1/19
 -
 Purity of Elements L20
-
 Enlighten 2/20
 -
 Purity of Fire L16
-
 Purity of Ice L16
-
 Momentum L20
 -
 Faster Attacks L20
 -
 Shield Charge L20
-
 Despair 20/5
 - Precision L20
-
 Vitality L21
 - More Duration L20
-
 Withering Step L20
 - Flame Dash L20
- Cast when Damage Taken L20
- Greater Volley L20
- Kinetic Fusillade 20/20
- Less Duration 20/20
- Volatility 20/20
- Concentrated Effect 20/20
- Ballista Totem 20/20
- Purity of Fire L16
- Purity of Fire L16
-
 Kinetic Blast L19
 - Purity of Ice L16
- Kinetic Blast L19
- Purity of Ice L16
-
 Culling Strike L20
 - Frenzy L20
- Mark On Hit L20
- Sniper's Mark 20/20
How this stage plays (mechanics, defences)
DPS climbs to 5.7M at 62.74% crit chance and 3.44x crit multi. The 6-link becomes Kinetic Fusillade + Ballista Totem + Greater Volley + Less Duration + Volatility + Concentrated Effect, with 104% Less Duration / 94% Greater Volley / 77% Volatility / 75% Ballista Totem / 44% Increased Critical Damage / 27% Void Manipulation / 27% Concentrated Effect meta splits. Volatility is the 3.28 Exceptional support that adds a random-direction damage variance multiplier — against crit-capped builds it trends positive because the high-end rolls outweigh the low-end. Void Manipulation at 27% meta is the chaos-damage multiplier that pairs with Replica Alberon's Warpath's chaos conversion.
The Str-stacking engine is the damage identity. 2029 Strength from The Iron Fortress (+108 Str), Inertia × 2 (+48 Str each), Transcendent Flesh (-1 Str per 1 Str on Allocated Passives in Radius but +7% crit multi per 10 Str on Unallocated — negative Str net but high crit multi), Eyes of the Greatwolf (28% increased Attributes), rare rings with +55 Str each, Havoc Mitts gloves (+53 Str), Phoenix Nail ring (+56 Str). Replica Alberon's Warpath converts that Str directly into flat chaos per hit. Rain of Splinters (54% endgame meta) contributes the +2 projectile multiplier. Bound By Destiny prismatic jewel scales based on Warlord/Redeemer/Hunter item counts — it's a late-game multiplier that's slowly getting to its 87% aspirational ceiling.
Tempest Halo giantslayer helmet grants +1 to Max Power Charges, 1% increased Crit per 10 Str, and Gain Accuracy equal to your Strength — this is the helmet that makes Str-stacking wander-totem work without accuracy gear. Transcendent Flesh in the Marauder-side life wheel is oriented so that the negative Str penalty hits allocated passives that the build doesn't care about (pure life/regen), while the +7% crit multi per 10 Str on Unallocated scales with the full Str pool. Ascendancy adds Path of the Witch for the mana-reservation efficiency line and access to Blood Magic.
EHP climbs to 40k. Life is 7.1k — the Str-stacking engine inherently scales life through Str-to-life nodes and the The Iron Fortress's +108 Str implicit. 74% physical damage reduction from 20k armour (Colossal Tower Shield rare + The Iron Fortress 83% armour). 65% attack block + 19% spell block from The Iron Fortress's Str-based block + the Tower Shield's 46% chance to block. Resistances cap at 75/75/75 with +55% chaos res from rare ring rolls. Vitality aura (50% endgame meta) adds flat life regen — the Ascendant wander-totem uses Vitality as a primary defensive aura, not Determination. Purity of Elements (61% endgame meta) replaces individual elemental res investments. Pantheon is Arakaali + Ryslatha.
Same plant-four-totems-and-shield-charge rhythm, now with tanky Str-stacking reassurance. 2029 Strength feels absurd on the character sheet — every stat line scales with it. Shield Charge + Momentum + Faster Attacks handles traversal. Withering Step + Flame Dash in gloves adds secondary mobility with a wither debuff on enemies. Molten Shell on Cast when Damage Taken catches spike moments. Maloney's Mechanism quiver in the weapon swap triggers socketed bow skills on bow attacks — a stored bow swap for Kinetic Blast-triggered secondary damage, though at this tier the swap is mostly dormant. The build's weakness is chaos-heavy bosses — without CI and with Replica Alberon's leaving the player exposed to chaos, the pantheon + flask anti-chaos rotation matters.
Passive tree (135 points)
The desktop app shows this tier's full tree on an interactive canvas.
Aspirational L95–100
- Aspirational consolidates. Unnatural Instinct (99%), Lethal Pride (99%), Replica Alberon's Warpath (96%), Split Personality (96%), Inertia (91%), Bound By Destiny (87%), Watcher's Eye (84%), Mageblood (76%) are all near-100% pickrates. The reference at L100 runs Widowhail crude bow in the swap (209% increased quiver bonuses) + Maloney's Mechanism quiver for a triggered Kinetic Fusillade bow setup. Point Blank (76% aspirational meta) replaces most of the endgame keystones — the ballista-totems sit on top of the boss, so Point Blank's close-range damage bonus applies.
 Kinetic Fusillade
 Increased Critical DamageGreater VolleyBallista TotemLess DurationVolatility
Full gear (26 items)
Wrath Spire Weapon 1
- Cannot roll Caster Modifiers
- +38% to Global Critical Strike Multiplier
- Adds 71 to 141 Cold Damage
- Adds 70 to 117 Chaos Damage
- 17% increased Attack Speed
- 35% increased Critical Strike Chance
- Attacks with this Weapon Penetrate 13% Chaos Resistance (crafted)
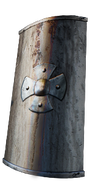 Oblivion Bastion Weapon 2
- +19 to maximum Life
- 74% increased Chance to Block
- +51 to Strength
- 98% increased Armour
- +149 to maximum Life
- +15% to all Elemental Resistances
- +13% to Cold and Chaos Resistances (crafted)
Widowhail Weapon 1 Swap
- 209% increased bonuses gained from Equipped Quiver
Maloney's Mechanism Weapon 2 Swap
- Has 1 Socket
- Has 2 Sockets
- Trigger a Socketed Bow Skill when you Attack with a Bow, with a 1 second Cooldown
- 8% increased Attack Speed
- +62 to maximum Life
- 5% chance to Blind Enemies on Hit with Attacks
Honour Veil Helmet
- +10 to Strength
- +188 to Armour
- +21 to maximum Life
- 14% increased Rarity of Items found
- 1% increased Critical Strike Chance per 10 Strength
- Gain Accuracy Rating equal to your Strength
- Nearby Enemies have -9% to Chaos Resistance
The Iron Fortress Body Armour
- +1% Chance to Block Attack Damage per 50 Strength
- Chance to Block Spell Damage is Unlucky
- +100 to Strength
- 82% increased Armour
- 10% reduced Movement Speed
- Strength's Damage Bonus instead grants 3% increased Melee Physical Damage per 10 Strength
Sorrow Palm Gloves
- 3% increased Damage per 100 Strength
- Gain 1 Rage on Attack Hit
- +127 to maximum Life
- +51 to Strength
- +125 to Armour
- 52% increased Armour
- +38% to Cold Resistance
- +33% to Lightning Resistance (crafted)
Replica Alberon's Warpath Boots
- 17% increased Strength
- +193 to Armour
- +18% to Chaos Resistance
- 25% increased Movement Speed
- Cannot deal non-Chaos Damage
- Adds 1 to 80 Chaos Damage to Attacks per 80 Strength
Warped Timepiece Amulet
- Allocates Surveillance
- +24 to Dexterity and Intelligence
- 22% increased Attack Speed
- 14% increased Cast Speed
- 14% increased Movement Speed
- 20% reduced Skill Effect Duration
- Debuffs on you expire 100% faster
 Empyrean Band Ring 1
- Your Meteor Towers create Burning Ground for 3 seconds on Hit
- +30% to Fire Resistance
- +55 to Strength
- +67 to Evasion Rating
- +9 to maximum Energy Shield
- +48% to Fire Resistance
- +32% to Chaos Resistance
- +54 to maximum Life (crafted)
 Brimstone Turn Ring 2
- Your Chilling Towers have 25% increased effect of Chill
- +30% to Cold Resistance
- +55 to Strength
- Adds 4 to 7 Physical Damage to Attacks
- Adds 10 to 24 Cold Damage to Attacks
- +42% to Lightning Resistance
- +35% to Chaos Resistance
- +48 to maximum Life (crafted)
 Foulborn Meginord's Girdle Belt
- +37 to Strength
- +30 to Strength
- Adds 10 to 20 Physical Damage to Attacks
- 10% increased maximum Life
- +13% to Cold Resistance
- 18% increased Strength
Split Personality Jewel
- This Jewel's Socket has 25% increased effect per Allocated Passive Skill between it and your Class' starting location
- +5 to Strength
- +5 to maximum Life
 Glyph Solace Jewel
- 8% increased Damage
- 14% increased Spell Damage while holding a Shield
- 5% increased maximum Life
- +13% to Lightning Resistance
Bramble Bliss Jewel
- 23% reduced Effect of Curses on you
- Corrupted Blood cannot be inflicted on you
- 14% increased Global Physical Damage
- 14% increased Cold Damage
- 12% increased Projectile Damage
- 3% increased Attack and Cast Speed
Lethal Pride Jewel
- Commanded leadership over 16739 warriors under Rakiata
- Passives in radius are Conquered by the Karui
- Historic
 Ghoul Solace Jewel
- +2% Chance to Block Spell Damage while holding a Shield
- +15 to Strength
- 5% increased Attack Speed while holding a Shield
- +10% to all Elemental Resistances
Unnatural Instinct Jewel
- Allocated Small Passive Skills in Radius grant nothing
- Grants all bonuses of Unallocated Small Passive Skills in Radius
Bramble Cut Jewel
- +3% Chance to Block Attack Damage while holding a Shield
- +15 to Strength
- 5% increased maximum Life
- +12% to Fire and Lightning Resistances
Inertia Jewel
- +24 to Strength
- Dexterity from Passives in Radius is Transformed to Strength
Soul Glimmer Jewel
- +6 to all Attributes
- +16 to Strength
- 5% increased maximum Life
- 9% increased Flask Effect Duration
- 30% reduced Amount Recovered
- Instant Recovery when on Low Life
- Grants Immunity to Bleeding for 6 seconds if used while Bleeding
- Grants Immunity to Corrupted Blood for 6 seconds if used while affected by Corrupted Blood
- 24% reduced Charges per use
- 43% increased Armour during Effect
- 32% increased Duration
- 41% increased Evasion Rating during Effect
- 17% increased Charge Recovery
- 13% increased Movement Speed during Effect

- 29% increased Charge Recovery
- 52% increased Critical Strike Chance during Effect
All gem links (12 groups)
- Kinetic Fusillade L20
-
 Empower 1/10
- Kinetic Fusillade L20
- Kinetic Fusillade L20
- Portal 1/9
- Kinetic Fusillade L20
-
 Cast On Critical Strike L20
 - Sniper's Mark 20/12
- Power Charge On Critical L20
- Frenzy L20
- Cast when Damage Taken 20/16
- More Duration 20/20
-
 Frostblink L3
- Power Charge On Critical 20/20
- Arcanist Brand 20/19
- Tornado L1
- Precision 20/15
- Enlighten 3/18
-
 Determination 20/16
 -
 Tempest Shield 20/17
- Kinetic Fusillade 21/20
- Increased Critical Damage 20/20
- Greater Volley 20/20
- Ballista Totem 20/20
- Less Duration 20/20
- Volatility 20/20
- Shield Charge 20/20
-
 Excommunicate 20/20
 - Faster Attacks 20/23
-
 Summon Spectral Tiger L20
How this stage plays (mechanics, defences)
Aspirational median DPS is 32M at 93k EHP — a 6× jump from endgame. 1864 Strength (slightly lower than endgame's 2029, likely because aspirational shifts some Str to Int for cluster notables), 100% crit chance, 4.28x crit multi. The 6-link is Kinetic Fusillade + Increased Critical Damage + Greater Volley + Ballista Totem + Less Duration + Volatility — with 100% Less Duration / 96% Volatility / 92% Greater Volley / 50% Summon Sacred Wisps / 49% Ballista Totem / 45% Void Manipulation / 33% Increased Critical Damage meta splits. Summon Sacred Wisps (50% aspirational meta) enters here as a secondary damage layer — the wisps orbit the player and pulse damage that scales off minion life, separate from the ballista-totem main damage.
Wrath Spire or similar rare Kinetic Wand replaces the endgame's Brood Edge — the wand rolls chaos-penetration, crit multi, and attack speed. Oblivion Bastion Colossal Tower Shield (rare) stacks 74% chance to block + +149 life + Str + res for the block anchor. Warped Timepiece turquoise amulet (49% endgame / 40% lower at aspirational) trades its slot for Eyes of the Greatwolf on most aspirational builds. Tempest Shield (87% aspirational meta) adds block-on-hit lightning damage + an extra spell block layer. Determination layered with Vitality + Purity of Elements + Precision is the four-aura stack. Point Blank + Utmost Might + As The Mountain + Huntleader + Disintegration are the new tree notables replacing the endgame's Bloodless/Juggernaut set.
EHP median is 93k at aspirational. 6.4k life median. 78% attack block + 38% spell block via The Iron Fortress + Tower Shield + block tree. 62% physical damage reduction. Resistances cap cleanly. Chaos res is +38% on the reference (still not capped), but median chaos res at aspirational sits higher due to Forbidden jewel allocations and rare ring rolls. Mageblood keeps four utility flasks permanently active. Bound By Destiny at 87% pickrate delivers conditional bonuses — typically 15% increased Strength if 2 Warlord Items are Equipped which combined with the Warlord-influenced chest and helmet gives raw Str scaling. Molten Shell + Cast when Damage Taken catches spike moments.
The apex Ascendant ballista-totem experience. Plant four totems that each fire +2 additional projectiles via Rain of Splinters, stand near the boss for Point Blank's close-range damage bonus, watch the boss melt from stacked chaos + lightning hits that scale off Str. Shield Charge + Excommunicate + Faster Attacks is the mobility stack. Cast On Critical Strike in gloves auto-casts Sniper's Mark + Frenzy + Power Charge On Critical on boss crits for charge maintenance. The rhythm is pure plant-charge-repeat. Clear speed is Hierophant-tier relaxed; boss DPS is where Ascendant's borrowed-notable halving shows — it's less than a comparable Hierophant at the same budget.
Passive tree (135 points)
The desktop app shows this tier's full tree on an interactive canvas.