
Leveling L1–68
- Act 1: run Caustic ArrowBuy Caustic Arrow from Nessa after killing Hillock — it clears Act 1 packs on any cheap bow because it scales on gem level, not weapon damage. Blink Arrow from the Mercy Mission quest is your travel skill until Flame Dash unlocks in Act 3. Slot Clarity the moment Nessa sells it (post-Hillock) for mana sustain. Mirage Archer Support is a free parallel DPS source — keep it low-level so you can fit it into any link.
- Act 2: run Caustic ArrowPick up Herald of Thunder and Sniper's Mark from Yeena — Sniper's Mark is your self-cast single-target curse until you swap to Assassin's Mark for crit scaling in Act 6. Bandits: help Alira for mana regen, crit multi, and resists — all three matter once you transition to the crit wand build. Start pathing toward Acuity and the bow wheels even though you'll swap off bow later — the projectile passives apply to wand projectiles too.
- Act 3: run Caustic ArrowGrab Haste from the Library quest reward — attack speed and movement speed on one aura is the backbone of every Deadeye leveling kit. Flame Dash from the Library becomes your travel skill. Lab 1 at the end of Act 3: take Gathering Winds — tailwind is a permanent attack speed multiplier and pairs with every skill you cast from this point on, including the future Kinetic Fusillade volley.
- Act 4–5: run Lightning ArrowSwap to Lightning Arrow once you find or vendor-craft a decent rare bow — it chains cleanly off Gathering Winds tailwind and gives you a preview of the lightning-conversion playstyle the wand will inherit. Pick up Precision at a low level for accuracy without gutting mana. Lab 2 in Act 5: take Endless Munitions — +2 projectiles is a direct density multiplier for both Lightning Arrow now and Kinetic Fusillade after the swap.
- Act 6 — the wand swap: run Kinetic FusilladeThe transition. Buy Kinetic Fusillade from Lilly Roth in Lioneye's Watch and swap to a rare wand with "adds # to # lightning damage to attacks" plus attack speed. Wrath from the Act 6 quest reward is the single biggest leveling damage spike — reserve it immediately and your DPS roughly doubles. Drop Herald of Ice to make mana room; keep Herald of Thunder on. Lilly vendors every regular support gem, so catch up on any missed link here. If your wand rolls physical instead of lightning, swap Wrath for Hatred and the lightning supports for phys equivalents.
- Act 7–9: run Kinetic FusilladeSwap Sniper's Mark for Assassin's Mark from Lilly — power charge generation plus the crit chance debuff on the marked target is the cheapest boss damage you have right now. Wire up a low-level Cast when Damage Taken + Steelskin panic defense — Deadeye is a squishy ascendancy and KF wants you standing still in the overlap zone. Lab 3 in Act 9: Ricochet — every projectile bounces once, which on a dense-volley skill turns a single cast into roughly double pack coverage.
 Caustic Arrow
  Pierce Support
  Mirage Archer Support
  Blink Arrow
  Clarity
 Buy Caustic Arrow from Nessa after killing Hillock — it clears Act 1 packs on any cheap bow because it scales on gem level, not weapon damage. Blink Arrow from the Mercy Mission quest is your travel skill until Flame Dash unlocks in Act 3. Slot Clarity the moment Nessa sells it (post-Hillock) for mana sustain. Mirage Archer Support is a free parallel DPS source — keep it low-level so you can fit it into any link.
Caustic Arrow Pierce Support Mirage Archer Support  Void Manipulation Support Blink Arrow Clarity
  Herald of Thunder
  Sniper's Mark
 Pick up Herald of Thunder and Sniper's Mark from Yeena — Sniper's Mark is your self-cast single-target curse until you swap to Assassin's Mark for crit scaling in Act 6. Bandits: help Alira for mana regen, crit multi, and resists — all three matter once you transition to the crit wand build. Start pathing toward Acuity and the bow wheels even though you'll swap off bow later — the projectile passives apply to wand projectiles too.
Caustic Arrow Pierce Support Mirage Archer Support Void Manipulation Support  Vile Toxins Support
  Flame Dash Clarity
  Haste Herald of Thunder Sniper's Mark
 Grab Haste from the Library quest reward — attack speed and movement speed on one aura is the backbone of every Deadeye leveling kit. Flame Dash from the Library becomes your travel skill. Lab 1 at the end of Act 3: take Gathering Winds — tailwind is a permanent attack speed multiplier and pairs with every skill you cast from this point on, including the future Kinetic Fusillade volley.
 Lightning Arrow Mirage Archer Support
  Added Lightning Damage Support
  Lightning Penetration Support
  Inspiration Support Flame Dash Haste
  Precision Herald of Thunder
  Herald of Ice Sniper's Mark
 Swap to Lightning Arrow once you find or vendor-craft a decent rare bow — it chains cleanly off Gathering Winds tailwind and gives you a preview of the lightning-conversion playstyle the wand will inherit. Pick up Precision at a low level for accuracy without gutting mana. Lab 2 in Act 5: take Endless Munitions — +2 projectiles is a direct density multiplier for both Lightning Arrow now and Kinetic Fusillade after the swap.
 Kinetic Fusillade Added Lightning Damage Support Lightning Penetration Support Inspiration Support
  Elemental Damage with Attacks Support Flame Dash Haste
  Wrath Precision Herald of Thunder Sniper's Mark
 The transition. Buy Kinetic Fusillade from Lilly Roth in Lioneye's Watch and swap to a rare wand with "adds # to # lightning damage to attacks" plus attack speed. Wrath from the Act 6 quest reward is the single biggest leveling damage spike — reserve it immediately and your DPS roughly doubles. Drop Herald of Ice to make mana room; keep Herald of Thunder on. Lilly vendors every regular support gem, so catch up on any missed link here. If your wand rolls physical instead of lightning, swap Wrath for Hatred and the lightning supports for phys equivalents.
Kinetic Fusillade Added Lightning Damage Support Lightning Penetration Support Inspiration Support Elemental Damage with Attacks Support Flame Dash Haste Wrath Precision Herald of Thunder  Cast when Damage Taken
  Steelskin
  Assassin's Mark
 Swap Sniper's Mark for Assassin's Mark from Lilly — power charge generation plus the crit chance debuff on the marked target is the cheapest boss damage you have right now. Wire up a low-level Cast when Damage Taken + Steelskin panic defense — Deadeye is a squishy ascendancy and KF wants you standing still in the overlap zone. Lab 3 in Act 9: Ricochet — every projectile bounces once, which on a dense-volley skill turns a single cast into roughly double pack coverage.
Kinetic Fusillade  Greater Volley Support Lightning Penetration Support Inspiration Support Added Lightning Damage Support Elemental Damage with Attacks Support Flame Dash Haste Wrath Precision Herald of Thunder Cast when Damage Taken Steelskin
  Vaal Haste Assassin's Mark
 Buy Greater Volley Support from a 3.28 Mirage trade listing — it's the new Exceptional Support that replaced GMP, and on a nova-adjacent volley skill the extra projectile count plus the wider spread is the signature 5th link. Run Uber Lab as soon as you hit L68 for Far Shot — the distance damage multiplier pairs cleanly with the hold-at-range KF playstyle and rewards you for the mental habit of staying back from the pack. From here it's a rare-crafting grind: crit wand, life/mana/resist rare pieces, and capping all three resists at 75% resist.
How leveling works
Kinetic Fusillade on a Deadeye is the "just shoot things" version of the archetype — you skip the ballista totem and totem placement dance entirely and fire the volley yourself off a wand. The Deadeye ascendancy was built for exactly this: Gathering Winds stacks tailwind for attack speed, Far Shot multiplies damage at distance, Ricochet makes every projectile bounce into the pack a second time, and Endless Munitions hands you two additional projectiles for free. Put those four together on top of a volley skill that already overlaps densely, and the screen clears itself the moment you hold down left-click.
The honest caveat: Kinetic Fusillade is a more natural fit on a Hierophant totem build than it is on a self-cast Deadeye. The Deadeye wants bow skills that chain, pierce, or fork — and the wand-locked KF does none of those natively. You make it work on Deadeye by leaning entirely on Ricochet and Endless Munitions to multiply the projectile count, then stacking attack speed to make the already-dense volley hit several times a second. If you came here hoping for the slickest possible Deadeye, roll Tornado Shot or Lightning Arrow instead — but if you specifically want KF and you want to play it yourself rather than through totems, this is the cleanest version of that.
Leveling path: Caustic Arrow through Acts 1–3 because it does not care about your weapon, then swap to Lightning Arrow or Tornado Shot on a bow through Acts 4–5 once you have a few passives in the projectile wheels, then the wand + Kinetic Fusillade transition in Act 6 when you hit Lilly Roth and can buy the transfigured gem. Ascendancy order: Gathering Winds (Lab 1 — tailwind is a flat attack speed multiplier that scales everything you do for the rest of the campaign), Endless Munitions (Lab 2 — +2 projectiles is a huge density boost for the volley), Ricochet (Lab 3 — bounces double your effective pack coverage), Far Shot (Uber Lab — the distance-damage multiplier pairs cleanly with the hold-at-range KF playstyle).
Do not burn currency on leveling uniques beyond Goldrim, Wanderlust, and a cheap Tabula Rasa if one falls in your lap. The endgame wants a crafted crit wand with "+1 to Level of All Spell Skill Gems" or "+1 to Level of All Lightning Spell Skill Gems" — those are a red-maps purchase, not a campaign one, and every chaos you spend on transition luxuries comes out of that budget.
Gear while leveling
- · Wand (main hand, Act 6+): rare wand with "adds # to # lightning damage to attacks" (or physical if pairing with Hatred) and attack speed. Opal Wand and Prophecy Wand bases are the endgame target once you can afford them for the high implicit crit chance. A "+1 to Level of All Spell Skill Gems" wand is the ultimate target but red-maps-only.
- · Shield (off hand): any rare int/str shield with life, mana, and three resists. spell crit or attack crit on a rare roll is gold. No specific leveling unique shield to chase.
- · Bow (Acts 1–5, disposable): any bow with flat added damage via the vendor recipe (magic bow + elemental ring + Blacksmith's Whetstone). Quill Rain is the standout leveling-tier alternative if you want raw attack speed on a budget. Throw it away at Act 6.
- · Body armour: a 4-link hybrid ES/evasion chest with life and resists bridges to maps cleanly. Tabula Rasa is a 6-link goldmine if cheap but do not farm for one — the endgame wants a crafted rare chest.
- · Helmet: Goldrim for all elemental resists at once during Acts 1–5 — swap to a rare with life + resists once it outperforms. The "Kinetic Fusillade has X% increased damage" enchant is the best helmet slot upgrade once you can farm it.
- · Gloves: rare gloves with life, mana, resists, and ideally attack speed. Maligaro's Virtuosity is a strong unique option at L21 for crit multi but skip it if you're short on resists.
- · Boots: Wanderlust for the freeze immunity and 20% move speed through early acts. Swap to rare boots with life + 30% movement + three resists by Act 6. Movement speed on boots is non-negotiable for Deadeye quality of life.
- · Rings / amulet: life, mana, resists, and crit multi on the amulet. Le Heup of All covers attribute shortages cheaply. Atziri's Foible is a solid budget amulet until a crafted rare with crit multi outperforms.
- · Flasks: life flask with bleed removal, mana flask (reservation is tight with Wrath + Haste + Precision), quicksilver, granite + iron skin roll, and a diamond flask once you can buy one — the crit roll is a direct damage multiplier for the endgame crit pivot.
Weapon progression
Through Acts 1–5 use vendor-recipe bows (magic bow + elemental ring + Blacksmith's Whetstone → guaranteed element-flat roll) or a cheap Quill Rain. The Act 6 swap is wand + shield — not dual wands, not a staff. Kinetic Fusillade requires a wand and grays out with anything else equipped. Look for a wand with "adds # to # lightning damage to attacks" plus attack speed as the transition piece; a ~5c crafted rare covers this in league start week one.
Opal Wand and Prophecy Wand bases are the endgame target once you can afford them — higher base crit chance translates to a huge damage multiplier once you invest in Acuity and the crit wheels on the tree. The ultimate endgame upgrade is a rare wand with three or more "added damage" prefixes plus attack speed, crit chance, and ideally "+1 to Level of All Lightning Spell Skill Gems" — but this is a red-maps-and-beyond purchase, not a campaign one. Any 4-link wand with Greater Volley Support + Lightning Penetration Support + Inspiration Support clears yellow maps cleanly once you have Wrath + Ricochet online.
Tree to aim for (by level 90)
Watch out for
- ! Kinetic Fusillade is wand-only — it grays out the moment you equip a bow or dual-wield a second wand. Plan the wand pickup for Act 6 with Lilly Roth, and do not buy or pre-craft a bow-only support gem (like a bow-specific enchant) hoping it will carry over.
- ! Kinetic Fusillade is a transfigured gem — it does NOT drop from Lilly Roth in Act 6 like a regular support. You get it from the transfiguration font reward after completing Normal Labyrinth. If Lab 1 is still ahead of you at Act 6, run it before attempting the wand swap or you will sit on a vanilla Kinetic Blast placeholder.
- ! Greater Volley Support is a 3.28 Mirage Exceptional Support that replaced Greater Multiple Projectiles (which no longer exists). It is tradable, not a quest reward — budget around 1 divine for a leveled copy during league start week one, dropping to a few chaos by week two. Until you buy it, Lesser Multiple Projectiles Support or regular Elemental Damage with Attacks Support is the placeholder.
- ! Far Shot only pays off if you actually stand back from the pack — at point-blank range the multiplier inverts and you deal LESS damage than baseline. If you're a "run into the middle of the pack and unload" player by instinct, Deadeye's KF is the wrong build for you. Practise the hold-at-range cadence during Acts 4–9 so Uber Lab feels natural, not jarring.
- ! Wrath + Haste + Precision + Herald of Thunder together will over-reserve your mana pool unless you pick up at least one reservation efficiency notable on the tree by Act 7. Drop Precision level first if mana is tight, not Wrath — Wrath is the build's single biggest DPS multiplier and non-negotiable.
- ! Deadeye is a fragile ascendancy — you have no inherent defensive layer beyond Quartz Infusion-style phasing effects from the tree. A Cast when Damage Taken + Steelskin setup from L10 onward is mandatory, and you should cap life + all three resists at 75% resist before entering maps. Do NOT skip the panic-defense link because "I'll add it later" — you will die to a blue pack in yellow maps.
Endgame L85–94
- Endgame commits to the Str-stacking chassis but keeps evasion-based defence instead of full armour pivot. The L94 reference runs rare Kinetic Wand (Damnation Goad) with Adds 16 to 319 Lightning Damage + 84% Spell Damage + +23% crit multi + 25% crit chance + 13% attack speed. The off-hand is a rare Harmonic Spirit Shield (Storm Spell) with 96% increased ES + +139 life + 71% Spell Damage. Ghost Dance (36% endgame) is the primary keystone — the Deadeye leverages evasion + Ghost Dance's ES-on-evade loop for its defensive profile.
- Transition to The Iron Fortress body armour to unlock Str-based block — the +100 Str implicit combined with Iron Reflexes-adjacent tree converts the character into a dual armour-evasion tank
- Pick up Mageblood belt (90% aspirational meta) for permanent four-flask uptime — the Quicksilver, Granite, Diamond, Ruby rotation trivialises every ailment and positioning problem
- Craft a rare Impossible Escape setup with two jewels — Magebane radius + Acrobatics radius — for maximum keystone flexibility


 Kinetic Fusillade
 Less Duration
 Volatility
 Sacred Wisps
 Increased Critical DamageGreater Volley
Full gear (27 items)
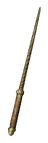 Damnation Goad Weapon 1
- Quality does not increase Physical Damage
- 1% increased Critical Strike Chance per 4% Quality
- Cannot roll Caster Modifiers
- Adds 16 to 319 Lightning Damage
- 84% increased Spell Damage
- Adds 71 to 137 Cold Damage
- 25% increased Critical Strike Chance
- +23% to Global Critical Strike Multiplier
- 13% increased Attack Speed (crafted)
 Storm Spell Weapon 2
- 12% increased Spell Damage
- 71% increased Spell Damage
- 96% increased Energy Shield
- +139 to maximum Life
- +29% to Fire Resistance
- +24% to Cold Resistance
- 26% increased Stun and Block Recovery
 Kraken Branch Weapon 1 Swap
- 27% increased Spell Damage
- Adds 15 to 29 Physical Damage
- 20% increased Fire Damage
- Adds 20 to 46 Cold Damage to Spells
- 33% increased Critical Strike Chance
- 33% increased Mana Regeneration Rate
 Havoc Chant Weapon 2 Swap
- Adds 1 to 9 Lightning Damage to Spells and Attacks
- 32% reduced Attribute Requirements
- 59% increased Lightning Damage
- +81 to maximum Mana
- 32% increased Mana Regeneration Rate
 Damnation Ward Helmet
- 8% increased Mana Reservation Efficiency of Skills
- 21% reduced Mana Cost of Attacks
- +138 to Evasion Rating
- 79% increased Evasion and Energy Shield
- +29 to maximum Energy Shield
- +37% to Cold Resistance
- +41% to Lightning Resistance
- +34% to Chaos Resistance
- +70 to maximum Life (crafted)
 Havoc Shroud Body Armour
- 10% of Physical Damage from Hits taken as Lightning Damage
- +1% to maximum Lightning Resistance
- +197 to Evasion Rating
- 100% increased Evasion and Energy Shield
- +58 to maximum Energy Shield
- +37% to Fire Resistance
- +44% to Cold Resistance
- +33% to Lightning Resistance
- 21% increased Evasion and Energy Shield (crafted)
- +19 to maximum Life (crafted)
 Blood Fist Gloves
- +6% chance to Suppress Spell Damage
- Gain 1 Rage on Attack Hit
- +13% chance to Suppress Spell Damage
- +47 to Evasion Rating
- +18 to maximum Energy Shield
- +125 to maximum Life
- +65 to maximum Mana
- +31% to Lightning Resistance
- 10% increased Attack Speed (crafted)
 Bramble Pace Boots
- 19% increased Cooldown Recovery Rate of Travel Skills
- +8% to Chaos Resistance
- +12% chance to Suppress Spell Damage
- 33% increased Evasion and Energy Shield
- +73 to maximum Life
- +43% to Fire Resistance
- +34% to Lightning Resistance
- 30% increased Movement Speed
- 14% increased Stun and Block Recovery
Warped Timepiece Amulet
- Allocates Lethality
- +22 to Dexterity and Intelligence
- 21% increased Attack Speed
- 13% increased Cast Speed
- 11% increased Movement Speed
- 19% reduced Skill Effect Duration
- Debuffs on you expire 100% faster
 Maelstrom Knot Ring 1
- Your Chilling Towers have 25% increased effect of Chill
- +12% to Fire and Cold Resistances
- +54 to Intelligence
- Adds 5 to 8 Fire Damage to Attacks
- +107 to maximum Life
- +37% to Fire Resistance
- +31% to Chaos Resistance
- +30 to maximum Energy Shield (crafted)
Timeclasp Ring 2
- Your Seismic Towers have 25% increased Stun Duration
- +19 to maximum Energy Shield
- 15% increased Attack Speed
- 10% increased Cast Speed
- 19% reduced Skill Effect Duration
- 7% of Damage taken Recouped as Mana
- 12% of Damage taken Recouped as Life
- Unaffected by Temporal Chains
 Pandemonium Harness Belt
- +20 to maximum Energy Shield
- +55 to Strength
- +121 to maximum Life
- +65 to maximum Mana
- +45% to Cold Resistance
- +32% to Chaos Resistance
- 29% increased Elemental Damage with Attack Skills (crafted)
 Grim Barb Jewel
- Adds 9 to 18 Fire Damage to Attacks
- +24 to maximum Life
- 3 to 43 Added Lightning Damage with Wand Attacks
- 46% chance to Avoid Bleeding
Whispering Stare Jewel
- +28 to maximum Life
- +29 to maximum Mana
- 49% chance to Avoid being Frozen
- 40% chance to Avoid being Ignited
- 4 to 42 Added Lightning Damage with Wand Attacks
 Phoenix Sliver Jewel
- Adds 12 Passive Skills
- 2 Added Passive Skills are Jewel Sockets
- Added Small Passive Skills grant: 12% increased Attack Damage while holding a Shield
- Added Small Passive Skills also grant: +4% to Chaos Resistance
- Added Small Passive Skills also grant: +7 to Maximum Energy Shield
- 1 Added Passive Skill is Martial Prowess
- 1 Added Passive Skill is Prodigious Defence
Rapture Vessel Jewel
- Adds 8 Passive Skills
- 2 Added Passive Skills are Jewel Sockets
- Added Small Passive Skills grant: Wand Attacks deal 12% increased Damage with Hits and Ailments
- Added Small Passive Skills also grant: +3 to Dexterity
- 1 Added Passive Skill is Explosive Force
- 1 Added Passive Skill is Martial Prowess
- 1 Added Passive Skill is Storm's Hand
Replica Reckless Defence Jewel
- +6% Chance to Block Spell Damage
- +4% Chance to Block Attack Damage
- +10% chance to be Frozen, Shocked and Ignited
Watcher's Eye Jewel
- 6% increased maximum Energy Shield
- 5% increased maximum Life
- 4% increased maximum Mana
- 72% increased Critical Strike Chance while affected by Wrath
- Gain 15% of Physical Damage as Extra Lightning Damage while affected by Wrath
- Unaffected by Temporal Chains while affected by Haste
Impossible Escape Jewel
- Passive Skills in Radius of Magebane can be Allocated without being connected to your tree
- Passage
 Lethal Pride Jewel
- Commanded leadership over 13562 warriors under Kaom
- Passives in radius are Conquered by the Karui
- Historic
 The Light of Meaning Jewel
- Passive Skills in Radius also grant 6% increased Lightning Damage
Ancient Goad Jewel
- Adds 3 to 36 Lightning Damage to Attacks
- +25 to maximum Life
- 2 to 50 Added Lightning Damage with Wand Attacks
- 3% chance to gain Phasing for 4 seconds on Kill

- Gain 1 Charge when you are Hit by an Enemy
- Grants Immunity to Bleeding for 12 seconds if used while Bleeding
- Grants Immunity to Corrupted Blood for 12 seconds if used while affected by Corrupted Blood

- 47% less Duration
- Immunity to Freeze and Chill during Effect

- 17% increased Duration
- 54% increased Critical Strike Chance during Effect

- +17 to Maximum Charges
- 6% increased Movement Speed during Effect

- 46% less Duration
- Immunity to Bleeding and Corrupted Blood during Effect
All gem links (8 groups)
-
 Kinetic Rain L20
 -
 Kinetic Bolt L20
 -
 Kinetic Blast 20/20
-
 Tornado L2
 -
 Spellslinger L20
 -
 Power Charge On Critical L20
-
 Mark On Hit L20
 -
 Lifetap L20
 - Sniper's Mark L20
-
 Frostblink L4
-
 Automation L20
 - Clarity L1
-
 Sigil of Power L20
- Less Duration 20/20
- Volatility 20/20
- Kinetic Fusillade 20/20
- Sacred Wisps 20/20
- Increased Critical Damage L19
- Greater Volley 20/20
-
 Shield Charge L4
 -
 Momentum L20
 -
 Faster Attacks L20
-
 Tempest Shield L20
 -
 Arctic Armour L20
 - Precision L6
- Wrath 20/20
-
 Unknown Gem L1
How this stage plays (mechanics, defences)
DPS climbs to 4.56M at 97% crit chance and 4.38x crit multi — higher per-budget than Hierophant or Champion at the same tier. Median endgame DPS is 2.65M, so the reference sits well above median. The 6-link is Kinetic Fusillade + Less Duration + Volatility + Sacred Wisps + Increased Critical Damage + Greater Volley, with endgame support meta split as 103% Less Duration / 93% Greater Volley / 61% Volatility / 56% Sacred Wisps / 53% Increased Critical Damage / 36% Void Manipulation. Sacred Wisps is the minion-aura damage layer that bridges ballista damage with a secondary orbiting-wisp source.
Wrath (56% endgame) + Precision (88% endgame) + Flesh and Stone (40% endgame) + Arctic Armour (present on this reference) + Tempest Shield is the aura stack. Ghost Dance + Impossible Escape viridian jewel (Passage into Magebane) delivers the defensive identity without the Deadeye ascendancy needing to help. Watcher's Eye prismatic jewel (57% endgame) contributes 72% increased Crit Chance while affected by Wrath, Gain 15% of Physical Damage as Extra Lightning Damage while affected by Wrath, and Unaffected by Temporal Chains while affected by Haste. Timeclasp (93% endgame) + Warped Timepiece (68% endgame) stack skill-effect-duration reduction for faster totem cycling. Lethal Pride (62% endgame) + Inertia (44% endgame) + The Iron Fortress (39% endgame) + Replica Alberon's Warpath (39% endgame) are the Str-stacking pieces — note that endgame Deadeye pickrates for these are lower than Ascendant's, indicating many endgame Deadeyes take an alternate non-Str pivot. Replica Reckless Defence cobalt jewel (+6% spell block, +4% attack block, +10% chance to be Frozen/Shocked/Ignited) is an unusual reference pick — the block rolls are standalone value, the ailment downside is mitigated by flasks.
EHP 29k is below the tier median of 31.6k. 3k life, 1.8k ES, 10.1k evasion. 90% spell suppression from Harmonic Spirit Shield + Damnation Ward helmet (+13% spell suppression) + boots (+12% spell suppression) + Blood Fist gloves (+13% + +6% spell suppression). 31% attack block + 35% spell block via shield + Tempest Shield. 0% physical damage reduction — this is the defensive vulnerability. Phys mitigation lives entirely in evasion + Ghost Dance + spell suppress layers. Resistances cap at 75/75/76 with +65% chaos res from layered chaos rolls — actually well-capped here. Watcher's Eye's Haste line grants Temporal Chains immunity. Cast when Damage Taken + Steelskin catches phys spikes. Pantheon is Brine King + Shakari for stun + chaos poison immunity.
Fast tempo, high damage. 8.99 attacks per second base — the Deadeye's Tailwind + Frenzy charge + Harrier + True Strike tree notables compound attack speed to well above the other ballista variants. Automation + Steelskin + Sigil of Power + Clarity in boots covers auto-triggered defensive/offensive cycles. Spellslinger + Tornado + Power Charge On Critical in weapon fires a triggered Tornado on attack for crowd control. Frostblink + Mark On Hit + Lifetap + Sniper's Mark in gloves handles movement + auto-mark. The weapon swap stores Kinetic Rain + Kinetic Bolt + Kinetic Blast as stored skill gems for dormant-slot leveling. The feel is fast clear + fast boss — Deadeye's damage ceiling trivialises encounters that Hierophant or Champion still have to wait on.
Passive tree (128 points)
The desktop app shows this tier's full tree on an interactive canvas.
Aspirational L95–100
- Aspirational is where Deadeye's ceiling explodes. Median DPS 56.5M, median EHP 125k. The reference at L100 runs rare Omen Wand with Pandemonium Barb (Item sells for much more to vendors implicit — this is a corrupted wand with a benchmark corruption), The Iron Fortress (82% aspirational), Replica Alberon's Warpath (83% aspirational), Mageblood (90% aspirational), Lethal Pride (95% aspirational), Timeclasp (95% aspirational), Watcher's Eye (95% aspirational), Bound By Destiny (80% aspirational). Impossible Escape at 88% aspirational is near-universal. Iron Will (83% aspirational) + Versatile Combatant (77% aspirational) + Point Blank (75% aspirational) are the three anchor keystones.


 Kinetic FusilladeVoid ManipulationLess DurationGreater VolleyIncreased Critical DamageVolatility
 Concentrated Effect
Full gear (33 items)
Pandemonium Barb Weapon 1
- Quality does not increase Physical Damage
- 1% increased Critical Strike Chance per 4% Quality
- Item sells for much more to vendors
- 1% increased Spell Damage per 16 Strength
- Adds 63 to 154 Chaos Damage
- 18% increased Attack Speed
- 28% increased Critical Strike Chance
- +33% to Global Critical Strike Multiplier
- Attacks with this Weapon Penetrate 15% Chaos Resistance
- 66% increased Spell Damage (crafted)
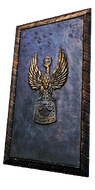 Kraken Fend Weapon 2
- +30 to maximum Life
- +2% to all maximum Resistances
- +53 to Strength
- 65% increased Armour
- +151 to maximum Life
- +35% to Chaos Resistance
- 50% increased Chance to Block (crafted)
The Supreme Truth Weapon 1 Swap
- 30% increased Elemental Damage
- Attacks with this weapon inflict Hallowing Flame on Hit
- +1 to Level of Socketed Gems
- 60% increased Intelligence Requirement
- 80% increased Physical Damage
- 18% increased Attack Speed
- 3% increased Experience gain
The Supreme Truth Weapon 2 Swap
- 30% increased Elemental Damage
- Attacks with this weapon inflict Hallowing Flame on Hit
- +1 to Level of Socketed Gems
- 60% increased Intelligence Requirement
- 92% increased Physical Damage
- 15% increased Attack Speed
- 3% increased Experience gain
 Hypnotic Veil Helmet
- +56 to Strength
- +108 to maximum Life
- +47% to Lightning Resistance
- 6% of Physical Damage from Hits taken as Fire Damage
- 1% increased Critical Strike Chance per 10 Strength
- Gain Accuracy Rating equal to your Strength
- 69% increased Armour (crafted)
The Iron Fortress Body Armour
- Quality does not increase Defences
- Grants +1 to Strength per 2% Quality
- 5% increased maximum Energy Shield
- +1% to all maximum Resistances
- +1% Chance to Block Attack Damage per 50 Strength
- Chance to Block Spell Damage is Unlucky
- +115 to Strength
- 86% increased Armour
- 10% reduced Movement Speed
- Strength's Damage Bonus instead grants 3% increased Melee Physical Damage per 10 Strength
 Brimstone Fist Gloves
- 3% increased Damage per 100 Strength
- Gain 1 Rage on Attack Hit
- +58 to Strength
- +27 to Armour
- +141 to maximum Life
- +47% to Fire Resistance
- +35% to Chaos Resistance
- 19% increased Projectile Speed (crafted)
- 16% increased Projectile Damage (crafted)
Replica Alberon's Warpath Boots
- 18% increased Strength
- +238 to Armour
- +14% to Chaos Resistance
- 24% increased Movement Speed
- Cannot deal non-Chaos Damage
- Adds 1 to 94 Chaos Damage to Attacks per 80 Strength
 Sol Rosary Amulet
- Allocates Force of Darkness
- -2 Prefix Modifiers allowed
- -1 Suffix Modifier allowed
- Implicit Modifiers Cannot Be Changed
- 100% increased Explicit Modifier magnitudes
- 19% increased Attributes
- 26% increased Strength
- 2% increased Damage per 15 Strength
 Brood Twirl Ring 1
- Left ring slot: 15% reduced Skill Effect Duration
- Right ring slot: 15% increased Skill Effect Duration
- +64 to Strength
- +25% to Global Critical Strike Multiplier
- +114 to maximum Life
- +32% to Chaos Resistance
- 3 to 6 Fire Damage per Endurance Charge
- Non-Channelling Skills have -7 to Total Mana Cost (crafted)
Timeclasp Ring 2
- 6% increased Strength
- 6% increased Intelligence
- 15% increased Attack Speed
- 12% increased Cast Speed
- 20% reduced Skill Effect Duration
- 6% of Damage taken Recouped as Mana
- 8% of Damage taken Recouped as Life
- Unaffected by Temporal Chains
Mageblood Belt
- +42 to Strength
- +46 to Dexterity
- +20% to Fire Resistance
- +23% to Cold Resistance
- Magic Utility Flasks cannot be Used
- Leftmost 4 Magic Utility Flasks constantly apply their Flask Effects to you
- Magic Utility Flask Effects cannot be removed
Entropy Splinter Jewel
- Adds 12 Passive Skills
- 2 Added Passive Skills are Jewel Sockets
- Added Small Passive Skills grant: 10% increased Spell Damage
- Added Small Passive Skills have 35% increased Effect
- Added Small Passive Skills also grant: +4 to All Attributes
- Added Small Passive Skills also grant: +10 to Maximum Life
- Added Small Passive Skills also grant: +8 to Strength
 Transcendent Flesh Jewel
- -1 Strength per 1 Strength on Allocated Passives in Radius
- +7% to Critical Strike Multiplier per 10 Strength on Unallocated Passives in Radius
- 3% increased Life Recovery Rate per 10 Strength on Allocated Passives in Radius
- 2% reduced Life Recovery Rate per 10 Strength on Unallocated Passives in Radius
 Emperor's Mastery Jewel
- 7% increased Attributes
- 4% increased maximum Life
- 3% increased Character Size
- 5% increased Global Defences
 Split Personality Jewel
- This Jewel's Socket has 25% increased effect per Allocated Passive Skill between it and your Class' starting location
- +5 to Strength
- +5 to maximum Life
 Emperor's Might Jewel
- 6% increased Strength
- 10% increased Damage
- 3% increased Character Size
Lethal Pride Jewel
- Commanded leadership over 12667 warriors under Kaom
- Passives in radius are Conquered by the Karui
- Historic
Impossible Escape Jewel
- Passive Skills in Radius of Acrobatics can be Allocated without being connected to your tree
- Passage
 Inertia Jewel
- +24 to Strength
- Dexterity from Passives in Radius is Transformed to Strength
Watcher's Eye Jewel
- 6% increased maximum Energy Shield
- 4% increased maximum Life
- 4% increased maximum Mana
- 8% additional Physical Damage Reduction while affected by Determination
- +37% to Chaos Resistance while affected by Purity of Elements
- 1.13% of Damage leeched as Life while affected by Vitality
Split Personality Jewel
- This Jewel's Socket has 25% increased effect per Allocated Passive Skill between it and your Class' starting location
- +5 to Strength
- +5 to maximum Life
 Bound By Destiny Jewel
- 15% increased Strength if 2 Warlord Items are Equipped
- +3% to maximum Chance to Block Attack Damage if 4 Elder Items are Equipped
- +1 to Level of all Lightning Skill Gems if 6 Crusader Items are Equipped
Vivid Glimmer Jewel
- Adds 12 Passive Skills
- 2 Added Passive Skills are Jewel Sockets
- Added Small Passive Skills grant: 10% increased Spell Damage
- Added Small Passive Skills have 35% increased Effect
- Added Small Passive Skills also grant: +4 to All Attributes
- Added Small Passive Skills also grant: +8 to Maximum Life
- Added Small Passive Skills also grant: +8 to Strength
 Unnatural Instinct Jewel
- Allocated Small Passive Skills in Radius grant nothing
- Grants all bonuses of Unallocated Small Passive Skills in Radius
 Rational Doctrine Jewel
- 1% increased Cast Speed
- +6 to maximum Life
- +2 to maximum Mana
- You have Consecrated Ground around you while stationary if Strength is your highest Attribute
- 25% chance to create Profane Ground on Critical Strike if Intelligence is your highest Attribute
- Effects of Consecrated Ground you create Linger for 4 seconds
- Effects of Profane Ground you create Linger for 4 seconds
Inertia Jewel
- +24 to Strength
- Dexterity from Passives in Radius is Transformed to Strength
Luminous Vessel Jewel
- Adds 8 Passive Skills
- 2 Added Passive Skills are Jewel Sockets
- Added Small Passive Skills grant: 12% increased Attack Damage while holding a Shield
- Added Small Passive Skills also grant: +3 to All Attributes
- 1 Added Passive Skill is Fuel the Fight
- 1 Added Passive Skill is Heavy Hitter
- 1 Added Passive Skill is Veteran Defender

- 141% increased Charges per use
- 44% less Duration
- 12% increased Area of Effect during Effect
- Skills fire 2 additional Projectiles during Effect
- 33% reduced Duration
- 25% increased effect
- Regenerate 3% of Life per second during Effect (crafted)
- 42% increased Charge Recovery
- 25% reduced effect
- 55% increased Critical Strike Chance during Effect
- 28% reduced Duration
- 25% increased effect
- 60% increased Armour during Effect

- 30% reduced Duration
- 37% less Duration
- 25% increased effect
- Immunity to Bleeding and Corrupted Blood during Effect
All gem links (8 groups)
- Precision L21
-
 Vaal Clarity L20
 -
 Vitality L21
 -
 Arrogance 20/20
-
 Portal 1/2
 -
 Cast on Death L1
-
 Kinetic Flux L2
 -
 Void Shockwave L2
 -
 Scornful Herald L3
- Void Manipulation 21/20
- Kinetic Fusillade 20/20
- Less Duration 21/20
- Greater Volley 21/20
- Increased Critical Damage 21/20
- Volatility 21/20
- Concentrated Effect L1
-
 Determination L21
 -
 Purity of Elements 21/20
 -
 Enlighten 4/20
 -
 Flesh and Stone 21/20
- Automation 20/20
-
 Withering Step 20/20
 -
 Cooldown Recovery 3/20
 -
 Increased Area of Effect 20/20
 -
 More Duration L1
- Cooldown Recovery L2
-
 Call the Pyre L2
- Sniper's Mark 21/20
- Mark On Hit 21/20
-
 Enhance L4
How this stage plays (mechanics, defences)
DPS on the reference reads 120M — above the aspirational median of 56.5M, so this is a well-optimised tier-ceiling build. 89% crit chance, 4.6x crit multi, 7.35 attacks per second. The 6-link is Kinetic Fusillade + Void Manipulation + Less Duration + Greater Volley + Increased Critical Damage + Volatility (all L21 with 20% quality) + Concentrated Effect as the 7th socket. Void Manipulation at 75% aspirational is the chaos-damage multiplier that pairs with Replica Alberon's chaos scaling — this is the highest chaos-damage support pickrate across any KF variant.
Dying Sun ruby flask (Skills fire 2 additional Projectiles during Effect) is the damage-multiplier flask that compounds with Rain of Splinters and Endless Munitions — a single totem fires base + 2 (Splinters) + 1 (Endless Munitions) + 2 (Dying Sun) = +5 projectiles. Cluster jewel economy is dense: Entropy Splinter + Vivid Glimmer large clusters deliver Attribute-per-small-passive scaling, medium clusters add Fuel the Fight + Heavy Hitter + Veteran Defender. Emperor's Mastery + Emperor's Might prismatic/crimson jewels add 7% attributes + 4% life + 10% damage + 3% character size stacks. Rational Doctrine cobalt jewel creates Consecrated/Profane Ground based on highest attribute — at 3060 Strength on the reference this is pure Consecrated Ground uptime for ~100% crit strike vs enemies on Consecrated Ground. The Supreme Truth crystal sceptre in weapon swap applies Hallowing Flame on hit + grants +1 to all gem levels + 3% increased Experience gain — the Exp gain implicit is why it's held in a dormant slot for level-100 grinding.
EHP 102k on the reference, with median at 125k. 7.1k life. 78% attack block + 72% spell block via The Iron Fortress's Str-based block + Versatile Combatant. 88% physical damage reduction — the transition from endgame's 0% PDR to aspirational's 88% PDR is the jump that makes the archetype survivable at pinnacle content. 18% spell suppression (lower than endgame because aspirational trades suppress for armour). Resistances cap at 75/78/78 with +78% chaos res. Mageblood's Granite Flask + Diamond Flask + Quicksilver + Ruby rotation stays permanent. Watcher's Eye with Determination + Purity of Elements + Vitality rolls stacks 8% phys DR, +37% chaos res, and 1.13% leech in one jewel. Pantheon is Lunaris + Tukohama.
The apex KF experience. 7.35 attacks per second with Tailwind stacks + Dying Sun +2 projectiles + Endless Munitions +1 projectile + Rain of Splinters +2 projectiles means every totem attack fires 10-12 projectiles in an arc. Void Shockwave + Kinetic Flux + Scornful Herald in weapon swap stores dormant skill gems. Automation + Withering Step + Cooldown Recovery + Increased Area of Effect in boots covers auto-wither debuff + increased AoE on triggered skills. Precision + Vaal Clarity + Vitality + Arrogance in gloves is the aura stack; Arrogance reserves Vitality on life for the The Ivory Tower-style ES-per-reserved-life scaling (though this reference doesn't use Ivory Tower). The feel is almost-degenerate damage + permanent Tailwind + Mageblood flask smoothness + double block resilience. Pinnacle bosses fall in seconds; T17 maps are trivial.
Passive tree (134 points)
The desktop app shows this tier's full tree on an interactive canvas.