
Leveling L1–68
- Act 1: run Holy Flame TotemHoly Flame Totem is the Marauder quest reward from "Enemy at the Gate" (Hillock). Plant two totems, they do the work while you run around. Pick up Flame Wall from Nessa for a cheap damage booster over the totems' line. No auras or movement skill yet — save Dash / Flame Dash for Act 3 when you have the int.
- Act 2: run Holy Flame TotemPurity of Fire drops as an Act 2 quest reward (Sharp and Cruel) — slot it immediately even unlinked, the 4% max fire res is huge. Bandits: kill all for +2 passives. Grab Flammability from the Intruders in Black quest and self-cast it on rares.
- Act 3: run Holy Flame TotemBuy Scorching Ray from Clarissa at L12 — use it as a single-target on rares/bosses while totems clear packs. Lab 1 in Act 3: take Tasalio, Cleansing Water (fire res + regen is the build-defining pick). Grab Herald of Ash from Clarissa too for extra burn scaling, and pick up Flame Dash for movement.
- Act 4–5: run Scorching RayScorching Ray becomes your main damage as bosses tank more — the fire resistance debuff from channelling is the real value. Keep Holy Flame Totem as a secondary setup for clear. Pick up Vitality for regen (Act 4 Kitava fight prep) and use Steelskin as a panic button. Lab 2 in Act 6: take Ramako, Sun's Light for regen + chance to ignite.
- Act 6–7 (L45+): run Scorching RayEquip Rise of the Phoenix the moment you hit L45 — +8% max fire res makes everything after this easier. Pick up Determination from the Act 6 Brine King quest reward for flat phys mitigation, and wire up a low-level Cast when Damage Taken + Immortal Call + Molten Shell panic setup. Start stacking life regen on rings/amulet (watch for "% of life regenerated" rolls). Do NOT cast Righteous Fire yet — you need Lab 3 first.
- Act 8–9 (L60 RF transition): run Righteous FireThe transition. Requirements before you cast Righteous Fire: (1) 75% resist+3 overcap with Purity of Fire active, (2) at least 2% life regenerated per second from the tree + regen rolls, (3) Rise of the Phoenix equipped. If you've done Lab 3 (Arohongui, Moon's Presence), even better — the fire penetration carries the damage. Keep Scorching Ray slotted as a single-target supplement; Righteous Fire alone is too slow for bosses at this stage.
 Holy Flame Totem
  Onslaught Support
  Summon Phantasm Support
  Flame Wall
 Holy Flame Totem is the Marauder quest reward from "Enemy at the Gate" (Hillock). Plant two totems, they do the work while you run around. Pick up Flame Wall from Nessa for a cheap damage booster over the totems' line. No auras or movement skill yet — save Dash / Flame Dash for Act 3 when you have the int.
Holy Flame Totem Summon Phantasm Support  Elemental Focus Support
  Combustion Support
  Purity of Fire Flame Wall
  Flammability
 Purity of Fire drops as an Act 2 quest reward (Sharp and Cruel) — slot it immediately even unlinked, the 4% max fire res is huge. Bandits: kill all for +2 passives. Grab Flammability from the Intruders in Black quest and self-cast it on rares.
Holy Flame Totem Summon Phantasm Support Elemental Focus Support Combustion Support  Controlled Destruction Support
  Flame Dash Purity of Fire
  Herald of Ash
  Scorching Ray Flammability
 Buy Scorching Ray from Clarissa at L12 — use it as a single-target on rares/bosses while totems clear packs. Lab 1 in Act 3: take Tasalio, Cleansing Water (fire res + regen is the build-defining pick). Grab Herald of Ash from Clarissa too for extra burn scaling, and pick up Flame Dash for movement.
Scorching Ray  Efficacy Support
  Burning Damage Support
  Swift Affliction Support Flame Dash Purity of Fire
  Vitality Herald of Ash Holy Flame Totem
  Steelskin Flammability
 Scorching Ray becomes your main damage as bosses tank more — the fire resistance debuff from channelling is the real value. Keep Holy Flame Totem as a secondary setup for clear. Pick up Vitality for regen (Act 4 Kitava fight prep) and use Steelskin as a panic button. Lab 2 in Act 6: take Ramako, Sun's Light for regen + chance to ignite.
Scorching Ray Efficacy Support Burning Damage Support Swift Affliction Support Elemental Focus Support Flame Dash Purity of Fire  Determination Herald of Ash
  Cast when Damage Taken Support
  Immortal Call
  Molten Shell Flammability
 Equip Rise of the Phoenix the moment you hit L45 — +8% max fire res makes everything after this easier. Pick up Determination from the Act 6 Brine King quest reward for flat phys mitigation, and wire up a low-level Cast when Damage Taken + Immortal Call + Molten Shell panic setup. Start stacking life regen on rings/amulet (watch for "% of life regenerated" rolls). Do NOT cast Righteous Fire yet — you need Lab 3 first.
 Righteous Fire Elemental Focus Support Burning Damage Support Efficacy Support Flame Dash Purity of Fire Determination Herald of Ash Scorching Ray Cast when Damage Taken Support Immortal Call Molten Shell Flammability
 The transition. Requirements before you cast Righteous Fire: (1) 75% resist+3 overcap with Purity of Fire active, (2) at least 2% life regenerated per second from the tree + regen rolls, (3) Rise of the Phoenix equipped. If you've done Lab 3 (Arohongui, Moon's Presence), even better — the fire penetration carries the damage. Keep Scorching Ray slotted as a single-target supplement; Righteous Fire alone is too slow for bosses at this stage.
Righteous Fire Elemental Focus Support Burning Damage Support Efficacy Support Swift Affliction Support Flame Dash Purity of Fire Determination Herald of Ash  Fire Trap Cast when Damage Taken Support
  Vaal Molten Shell Immortal Call Flammability
 Kitava fight: drop Righteous Fire during the -30% res phases or you will die to the self-burn. After Act 10 finishes, your fire res uncaps at 75% resist again — re-verify overcap before running maps. Swap in Fire Trap as a secondary damage source for tanky rares, and upgrade Molten Shell to Vaal Molten Shell on the Cast when Damage Taken chain. Uber Lab ASAP for Hinekora, Death's Fury (explosion chance on kill, now 10% in 3.28). Exceptional support gems from Mirage maps replace your supports one by one in red maps.
How leveling works
Righteous Fire is a self-cast fire degen aura that burns both you and nearby enemies, scaling with maximum life and spell damage. You cannot cast it early — you need overcapped fire resistance, strong life regen, and Purity of Fire before the self-burn stops killing you. So the Chieftain levels as a Holy Flame Totem / Scorching Ray caster through the campaign, then pivots to Righteous Fire once the sustain checks are met (typically L60–68). The ascendancy's fire regen, leech, and endurance-charge generation make the transition smoother than any other class.
The recommended path: Holy Flame Totem from the Act 1 quest reward carries you through Acts 1–3, add Scorching Ray at L12 as a ramping single-target, then lean on the totem for clear and Scorching Ray for bosses until Act 6–7. Around L60, after Lab 2, pick up Rise of the Phoenix and Purity of Fire, verify you have ~2% life regen and 78%+ fire resistance, and ignite yourself. Chieftain points taken in order: Tasalio, Cleansing Water → Ramako, Sun's Light → Valako → Arohongui. Tasalio, Cleansing Water is the build-defining pick — the fire resistance and regen are what let you sustain Righteous Fire at all.
No leveling uniques are mandatory, but Goldrim, Wanderlust, Tabula Rasa, and Springleaf (early) or Meginord's Girdle all pull weight. Rise of the Phoenix at L45 is the single most important unique for the transition — have one ready in your stash by Act 6. Save your currency for maps; the RF Chieftain's early-mapping gear (Doryani's Prototype, regen chest, life flasks with bleed remove) is cheap but cumulatively important.
Gear while leveling
- · Weapon: any +1 to Fire Skill Gems wand or sceptre levels your Scorching Ray and Righteous Fire — craft one with an Essence of Rage or buy a rolled one. Damage on the weapon itself is nearly irrelevant (Righteous Fire does not scale with weapon damage).
- · Body armour: Tabula Rasa until maps for the 6-link. After Lab 3, swap to any armour/ES chest with life + resists; regen rolls here are gold. Doryani's Prototype is the endgame goal but do NOT equip it before maps (it zeroes your fire res and kills you instantly under Righteous Fire).
- · Helmet: prioritise life and resists during the acts. Around Lab 3, craft a fire-gem-level enchant if possible — the "Righteous Fire has X% increased Damage" helm enchant is the best slot upgrade you can get.
- · Gloves / boots: flat life + resists + 30% movement on boots. Wanderlust is a strong early boot slot (no movement requirement and freeze immunity). Life-regen rolls on gloves help the Righteous Fire transition if you are close to the edge.
- · Rings / amulet: life, fire res, and any life-regen percentage you can find. Le Heup of All works fine through Acts 1–6. Target a fire-damage amulet with "regenerate X life per second" for the transition window.
- · Flasks: granite flask with "of Iron Skin", a bubbling life flask with "of Staunching" (bleed removal), a ruby flask is non-negotiable for the Righteous Fire sustain window (fire res boost + less fire damage taken), a quicksilver, and a basalt flask once you can buy one. Keep the ruby flask up on any fire-damage map mod.
Weapon progression
RF Chieftain does not scale with weapon damage — the skill is a self-cast degen that scales with maximum life, fire damage over time mods, and skill level. Vendor-recipe early: any magic wand + Ruby Ring + Orb of Alteration gives you a rolled fire wand. Around L20 buy or craft a "+1 to Level of Fire Skill Gems" wand or sceptre (Essence of Rage on a wand base is the cheapest path). One +1 fire sceptre plus a shield carries you all the way to maps; the endgame upgrade is a +2 Fire Gems / +1 Socketed Gems sceptre with spell damage and cast speed, but this is a multi-divine upgrade that waits until red maps.
Tree to aim for (by level 68)
Watch out for
- ! Do NOT cast Righteous Fire before you have 78%+ fire resistance (with Purity of Fire running), 2% life regen, and Rise of the Phoenix equipped. Casting early kills you in 2–3 seconds. When in doubt, verify in PoB or just delay the transition by one more act — the Scorching Ray phase is perfectly viable into white maps.
- ! Kitava at the end of Act 10 cuts all resistances by 30%. Drop Righteous Fire before the resist phases or you will die to the self-burn spike. After killing Kitava, your fire res is uncapped at 75% resist — re-equip gear or change flasks to hit overcap again before running maps.
- ! Elemental reflect map mods will kill you under Righteous Fire because your own burning damage bounces back. Always check map mods in white/yellow maps; reroll reflect. Abaxoth and Merveil in the campaign can also hurt if you facetank them during Righteous Fire transition zones.
- ! Doryani's Prototype is the endgame chest but will instant-kill you if equipped before you have Rise of the Phoenix and a Ruby Flask active. Treat it as a maps-only item, not a leveling upgrade.
Early Mapping L70–84
- Pick up the remaining Chieftain ascendancy notables — Ngamahu, Flame's Advance then Ramako, Sun's Light — to lift max fire resist further and scale fire-degen
- Swap the rare Ebony Tower Shield for Rise of the Phoenix to stack more max fire res and ignite immunity, then rebuild block on a rare Crested Tower Shield once the tree supports Glancing Blows


 Consecrated Path of Endurance
 Overexertion
 Pulverise
 Fist of War
 Melee Physical Damage
Full gear (15 items)
Tidebreaker Weapon 1
- 10% increased Strength
- Socketed Gems are Supported by Level 20 Endurance Charge on Melee Stun
- +40 to Intelligence
- Adds 74 to 342 Physical Damage
- 10% increased Physical Damage per Endurance Charge
- 25% reduced Enemy Stun Threshold with this Weapon
 Brimstone Visage Helmet
- 6% of Physical Damage from Hits taken as Cold Damage
- 20% reduced Mana Cost of Attacks
- 37% increased Armour
- 15% increased Stun and Block Recovery
- +44% to Fire Resistance
- +48% to Cold Resistance
- +15% to Lightning and Chaos Resistances (crafted)
Utula's Hunger Body Armour
- 75% increased Armour
- Recover 3% of Life on Kill
- 31% increased Stun and Block Recovery
- +993 to maximum Life if there are no Life Modifiers on other Equipped Items
 Blood Claw Gloves
- Inflict Fire Exposure on Hit, applying -11% to Fire Resistance
- 8% increased Attack Speed
- +41% to Lightning Resistance
- Adds 4 to 43 Lightning Damage to Attacks
- +41% to Fire Resistance
- +15% to Lightning and Chaos Resistances (crafted)
Death's Door Boots
- +27 to Strength
- 200% increased Armour and Energy Shield
- +13% to all Elemental Resistances
- 25% increased Movement Speed
- +1 to Maximum Endurance Charges
- 50% increased Elemental Ailment Duration on you
- Bleeding cannot be inflicted on you
 Sol Idol Amulet
- Allocates Clever Thief
- +29 to Intelligence
- +35 to all Attributes
- +50 to Dexterity
- Adds 10 to 18 Physical Damage to Attacks
- 32% increased Armour
- +51 to maximum Energy Shield
- +15% to Fire and Chaos Resistances (crafted)
Kaom's Sign Ring 1
- Wrath has 17% increased Aura Effect
- Grants Level 10 Enduring Cry Skill
- +16 to Strength
- +1 to Maximum Endurance Charges
Kaom's Sign Ring 2
- Cannot be Poisoned
- Grants Level 10 Enduring Cry Skill
- +10 to Strength
- +1 to Maximum Endurance Charges
 Blood Twine Belt
- +25 to Strength
- +43% to Cold Resistance
- +47 to maximum Energy Shield
- +43% to Lightning Resistance
- +13% to Cold and Chaos Resistances (crafted)
 Kraken Wound Jewel
- Corrupted Blood cannot be inflicted on you
- +8 to Strength and Dexterity
- 18% increased Critical Strike Chance with Fire Skills
- 17% increased Burning Damage

- 66% reduced Amount Recovered
- Instant Recovery
- Grants Immunity to Bleeding for 9 seconds if used while Bleeding
- Grants Immunity to Corrupted Blood for 9 seconds if used while affected by Corrupted Blood

- 17% increased effect
- Melee Weapon Damage Penetrates 19% Elemental Resistances

- +22 to Maximum Charges
- 52% reduced Effect of Shock on you during Effect

- Gain 3 Charges when you are Hit by an Enemy
- 49% reduced Effect of Curses on you during Effect

- +28 to Maximum Charges
- 57% increased Armour during Effect
All gem links (8 groups)
-
 Frostblink L2
 -
 Blood Rage L1
 -
 Herald of Purity L20
 -
 Blood and Sand 6/18
-
 Autoexertion L20
 -
 Battlemage's Cry L1
 - Flammability L20
-
 Seismic Cry L1
 -
 Intimidating Cry L2
-
 War Banner L21
-
 Faster Attacks L20
 - Cast when Damage Taken L1
-
 Leap Slam L20
- Consecrated Path of Endurance 21/20
- Overexertion 20/20
- Pulverise 21/20
- Fist of War 20/20
- Melee Physical Damage 20/20
-
 Rallying Cry L21
 -
 Urgent Orders L21
 -
 Lifetap L1
 -
 Infernal Cry L21
-
 Enduring Cry L10
- Enduring Cry L10
How this stage plays (mechanics, defences)
Righteous Fire is an unusual main skill — it is self-cast and runs as a permanent fire-degen aura, so there is no attack, no projectile, and no crit swing to track. The character sets themselves on fire; that burn is amplified into a scaling aura that chews through every monster standing near you. DPS comes from the character's own internal fire damage being multiplied, not from any weapon hit, which is why the reference carries a Void Sceptre with fire-DoT-multiplier rolls instead of a physical mainhand. The main 6-link lives in Cloak of Flame and runs Righteous Fire + Burning Damage + Elemental Focus + Swift Affliction + Efficacy + Lifetap — every support here is a pure fire-DoT or burning-damage multiplier, and Lifetap solves mana cost on the self-cast.
The damage chain is: base Righteous Fire burn → Purity of Fire aura lifts max fire resist above 88% with 168 overcap, letting RF's self-damage penalty be absorbed while the offensive burn scales off the fire-res-over-cap line from Holy Fire and tree mods → Cloak of Flame also converts 40% of physical damage taken as fire, layering defence with offence on the same chest. Secondary fire pressure comes from Fire Trap (helmet-linked with Trap and Mine Damage + Swift Affliction) for boss burn bursts, and Flammability curse on hit chops enemy fire resistance. The tree threads Marauder life-and-fire notables — Holy Fire, Breath of Flames, Divine Judgement, Arsonist, Warrior's Blood, Constitution, Heart of the Warrior — and the single Chieftain ascendancy notable allocated at this point is Tasalio, Cleansing Water for the 8% life regen line that keeps the self-ignite sustainable.
Defence is the classic RF stack: 5.7k life, 60% physical damage reduction from 6.3k armour + 3 Endurance charges via Enduring Cry, 88% max fire resistance (with 168% overcap), and 4% life regen routed through Tasalio, Cleansing Water and tree regen mods — the regen has to outpace the RF self-degen with a healthy surplus, and it does. Immortal Flesh belt contributes 400 flat life regen and -45 physical damage taken from attacks, at the cost of -16% to all elemental resistances which the build offsets with helmet and ring rolls. The Ebony Tower Shield gives 43% block as a bonus physical layer. Spell suppress is 0 — the archetype doesn't touch suppress; it trades that pillar for armour + max-res + block + regen. Pantheon is Brine King / Abberath.
You walk forward and things die around you. No aiming, no cast rhythm, no combo. Shield Charge (linked with Faster Attacks + Frostblink) handles traversal, Enduring Cry refreshes Endurance charges and taps life regen, and Fire Trap goes down under rare packs or bosses for an extra burn layer. The rhythm is steady movement and occasional flask presses rather than twitch response. Single-target is entirely passive — stand in melee range and the aura burn finishes the job.
Passive tree (121 points)
The desktop app shows this tier's full tree on an interactive canvas.
Endgame L85–94
- The endgame jump keeps Cloak of Flame and Immortal Flesh as the unchangeable pillars, but everything else upgrades: the rare Void Sceptre becomes Nebulis, the plain Amber Amulet becomes a crafted Turquoise (Behemoth Pendant), boots become Annihilation's Approach, helmet becomes Voll's Vision, and the shield is re-rolled as a rare Crested Tower Shield (Grim Watch) pushing block higher. The fourth ascendancy point is allocated and Glancing Blows is taken on the tree.
- Re-roll the Turquoise Amulet for a crafted Amber or Jade with tailored life + attributes + resistance, or pivot to an Ashes of the Stars once cluster jewels come online for the gem-quality multiplier

 Righteous FireBurning DamageSwift AfflictionElemental FocusLifetapEfficacy
Full gear (20 items)
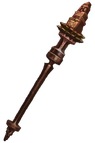 Onslaught Star Weapon 1
- 32% increased Elemental Damage
- 91% increased Fire Damage
- Adds 4 to 46 Lightning Damage to Spells
- 83% increased Spell Critical Strike Chance
- +29% to Global Critical Strike Multiplier
- +1 to Level of all Fire Spell Skill Gems
- +20% to Fire Damage over Time Multiplier (crafted)
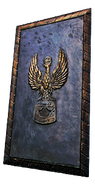 Pandemonium Ward Weapon 2
- +30 to maximum Life
- 99% increased Armour
- +94 to maximum Life
- Regenerate 19.7 Life per second
- +42% to Fire Resistance
- Recover 5% of Life when you Block
- 49% increased Chance to Block (crafted)
 Ghoul Guardian Helmet
- 5% chance to Ignite
- 8% increased Area of Effect
- +120 to maximum Life
- Regenerate 103.8 Life per second
- +43% to Fire Resistance
- +21% to Chaos Resistance
- +1 to Level of Socketed AoE Gems (crafted)
- 10% increased Area of Effect (crafted)
Cloak of Flame Body Armour
- +74% to Fire Resistance
- 69% increased Ignite Duration on Enemies
- Reflects 100 Fire Damage to Melee Attackers
- 40% of Physical Damage taken as Fire Damage
 Storm Grip Gloves
- Inflict Fire Exposure on Hit, applying -11% to Fire Resistance
- Ignites you inflict spread to other Enemies within 1.2 metres
- +33% to Chaos Resistance
- +55 to Dexterity
- 77% increased Armour and Evasion
- +108 to maximum Life
- 18% increased Life Regeneration rate
- 12% increased Area of Effect (crafted)
- 15% increased Area Damage (crafted)
 Ambush Spark Boots
- While a Pinnacle Atlas Boss is in your Presence, Gain 9% of Physical Damage as Extra Fire Damage
- Drops Scorched Ground while moving, lasting 3 seconds
- 12% increased Life Regeneration rate
- +46 to Armour
- +128 to maximum Life
- Regenerate 95.4 Life per second
- +40% to Fire Resistance
- 20% increased Movement Speed (crafted)
- 11% chance to gain Onslaught for 4 seconds on Kill (crafted)
 Empyrean Rosary Amulet
- Allocates Ash, Frost and Storm
- +36 to Strength
- +23% to Damage over Time Multiplier
- +473 to Accuracy Rating
- +83 to maximum Life
- +1 to Level of all Fire Skill Gems
- +15% to Fire and Chaos Resistances (crafted)
 Doom Finger Ring 1
- +27% to Chaos Resistance
- +51% to Fire Resistance
- 32% increased Fire Damage
- +62 to Evasion Rating
- +106 to maximum Life
- +53 to maximum Mana
- +24 to Dexterity and Intelligence (crafted)
 Apocalypse Hold Ring 2
- +15% to Cold and Lightning Resistances
- +24% to Chaos Resistance
- 34% increased Fire Damage
- Adds 2 to 23 Lightning Damage to Attacks
- +1 to maximum Energy Shield
- +103 to maximum Life
- +30 to Dexterity and Intelligence (crafted)
Mageblood Belt
- +28 to Strength
- +31 to Dexterity
- +20% to Fire Resistance
- +25% to Cold Resistance
- Magic Utility Flasks cannot be Used
- Leftmost 2 Magic Utility Flasks constantly apply their Flask Effects to you
- Magic Utility Flask Effects cannot be removed
 Rapture Ruin Jewel
- Adds 8 Passive Skills
- 2 Added Passive Skills are Jewel Sockets
- Added Small Passive Skills grant: 12% increased Fire Damage
- Added Small Passive Skills also grant: +5% to Cold Resistance
- Added Small Passive Skills also grant: +27 to Evasion
- 1 Added Passive Skill is Disorienting Display
- 1 Added Passive Skill is Prismatic Heart
Empyrean Star Jewel
- +7% to Fire Damage over Time Multiplier
- 16% increased Fire Damage
- 6% increased maximum Life
- 27% increased Stun and Block Recovery
 Glyph Essence Jewel
- 18% increased Critical Strike Chance with Fire Skills
- 5% increased maximum Life
- +2% to maximum Fire Resistance
- 20% increased Damage with Bleeding
Rapture Scar Jewel
- +8% to Physical Damage over Time Multiplier
- 8% increased Attack Speed with Maces or Sceptres
- 7% increased maximum Life
- 7% increased Projectile Speed
Rapture Sliver Jewel
- 14% increased Evasion Rating
- 10% increased Melee Damage
- +8% to Fire Damage over Time Multiplier
- 6% increased maximum Life
Phoenix Scar Jewel
- 16% increased Fire Damage
- 12% increased Melee Damage
- +8% to Fire Damage over Time Multiplier
- 6% increased maximum Life
- 25% increased Duration
- 37% Chance to Avoid being Stunned during Effect

- +19 to Maximum Charges
- 34% chance to Avoid being Chilled during Effect
- 34% chance to Avoid being Frozen during Effect

- 19% increased Duration
- 0.4% of Spell Damage Leeched as Energy Shield during Effect
- 18% increased Duration
- 49% less Duration
- Immunity to Bleeding and Corrupted Blood during Effect
All gem links (7 groups)
- Purity of Fire L20
- Frostblink L20
-
 Punishment L20
 - Lifetap L20
- Enduring Cry L20
- Swift Affliction L20
- Fire Trap L20
-
 Trap and Mine Damage L20
 - Lifetap L20
- Burning Damage 20/20
- Swift Affliction 20/20
- Elemental Focus 20/20
- Righteous Fire 21/20
- Lifetap 20/20
- Efficacy 20/20
- Faster Attacks L20
- Lifetap L20
-
 Shield Charge L20
-
 Bladefall of Trarthus 20/13
 - Determination L20
-
 Flesh and Stone L20
 -
 Tempest Shield L20
-
 Unknown Gem L1
How this stage plays (mechanics, defences)
Nebulis is the signature offensive pivot — its line "10% increased Elemental Damage per 1% Fire, Cold, or Lightning Resistance above 75%" turns the overcapped fire resistance that Purity of Fire + ascendancy + Cloak of Flame's +75% fire res had been producing anyway into a pure damage multiplier. With fire res over-cap sitting at 172% and cold/lightning both at 23% overcap, the sceptre stacks hundreds of percent more elemental damage before any other multiplier enters the equation. Voll's Vision helmet grants permanent Inner Conviction and fortification on hit, and Annihilation's Approach layers kill-explosion chain-clear on top of the aura.
The main Righteous Fire 6-link stays in Cloak of Flame with the same support stack — Burning Damage + Swift Affliction + Efficacy + Elemental Focus + Increased Area of Effect + Lifetap — because RF's scaling ceiling is bound by burn multipliers, not by adding more elements. Aura slots carry Purity of Fire, Malevolence, Flesh and Stone, and Summon Skitterbots, with Flammability in a Cast when Damage Taken + Immortal Call setup in the gloves as both curse-delivery and defensive panic button. Ascendancy is now the full Chieftain lineup: Hinekora, Death's Fury, Valako, Storm's Embrace, Tasalio, Cleansing Water, Ramako, Sun's Light. Note that despite the gear upgrade the reference's 337k DPS sits close to the early-mapping number — RF does not scale via crit chance, crit multiplier, attack speed, or added damage supports. The sheet grows via burn multiplier, fire pen, and Nebulis's overcap line, all of which are incremental rather than multiplicative explosions. What actually grew is the defensive and ignite-propagation ceiling, not raw DPS printed on the character sheet.
Glancing Blows combined with the Crested Tower Shield unlocks 75% attack block and 75% spell block — the double block cap is the endgame defensive identity. 68% physical damage reduction from 7.9k armour and Valako, Storm's Embrace, 90% max fire/cold/lightning resistance with 172% fire overcap, and 2.9k life regen per second layered with Immortal Flesh's flat regen. EHP 34k looks lower than early-mapping's 37k, but that number is misleading — it doesn't reflect Glancing Blows's double-block halving reads, nor Hinekora's 3.28 ascendancy-triggered damage mitigation on big hits. The one compromise is 1% chaos resistance — the reference intentionally dumps chaos res to squeeze other stats in, and pantheon shifts to Brine King / Gruthkul to partially plug that gap. CWDT + Immortal Call catches physical spike moments.
Same walk-forward feel, now with tank-level reassurance. Shield Charge (Faster Attacks + Lifetap) traverses, Enduring Cry keeps Endurance charges topped on rare-pack entry (only 1 in the snapshot because the reference was idle), and Fire Trap still handles priority boss burn. The double 75% block is the biggest felt change — hits that would have chunked the early-mapping character glance off entirely, and the on-block line from the shield ("Recover 5% of Life when you Block") turns block events into partial heals.
Passive tree (127 points)
The desktop app shows this tier's full tree on an interactive canvas.
Aspirational L95–100
- Aspirational keeps Nebulis, Cloak of Flame, and the Glancing Blows + Tower Shield double-block pattern, but rebuilds everything else around Mageblood. The belt swap is transformative — Immortal Flesh is finally dropped, flask uptime goes permanent on four utility flasks, and every other slot is either a crafted influenced rare or a swapped unique. Full Chieftain ascendancy complete, and the endgame Voll's Vision / Annihilation's Approach identity is replaced with pure rares chasing stat ceiling.


 Righteous FireElemental FocusEfficacySwift Affliction
Full gear (28 items)
Nebulis Weapon 1
- Quality does not increase Physical Damage
- Grants 1% increased Area of Effect per 4% Quality
- +14 to Dexterity
- 45% increased Damage
- 45% increased Elemental Damage
- 109% increased Implicit Modifier magnitudes
- 20% increased Cast Speed
- 10% increased Elemental Damage per 1% Fire, Cold, or Lightning Resistance above 75%
Svalinn Weapon 2
- +20 to maximum Life
- 15% Chance to Block Spell Damage
- +126 to Ward
- -10% to maximum Chance to Block Attack Damage
- -10% to maximum Chance to Block Spell Damage
- Chance to Block is Lucky
- Trigger a Socketed Elemental Spell on Block, with a 0.25 second Cooldown
Lifesprig Weapon 1 Swap
- 12% increased Spell Damage
- +1 to Level of Socketed Spell Gems
- 22% increased Spell Damage
- 8% increased Cast Speed
- +18 to maximum Life
- +17 to maximum Mana
- Regenerate 6 Life over 1 second when you Cast a Spell
Lifesprig Weapon 2 Swap
- 9% increased Spell Damage
- +1 to Level of Socketed Spell Gems
- 28% increased Spell Damage
- 5% increased Cast Speed
- +17 to maximum Life
- +20 to maximum Mana
- Regenerate 8 Life over 1 second when you Cast a Spell
 Torment Corona Helmet
- Socketed Gems are Supported by Level 20 Increased Area of Effect
- Socketed Gems are Supported by Level 18 Burning Damage
- Socketed Gems deal 30% more Elemental Damage
- 80% increased Armour
- Regenerate 126 Life per second
- 30% increased Burning Damage
- 14% increased Area of Effect
- +1 to Level of Socketed AoE Gems (crafted)
- 10% increased Area of Effect (crafted)
Cloak of Flame Body Armour
- +1 to Level of Socketed Gems
- +69% to Fire Resistance
- 72% increased Ignite Duration on Enemies
- Reflects 100 Fire Damage to Melee Attackers
- 40% of Physical Damage taken as Fire Damage
Plague Vise Gloves
- 0.4% of Fire Damage Leeched as Life
- Ignites you inflict spread to other Enemies within 1.4 metres
- 21% increased Life Regeneration rate
- +100 to Armour
- +118 to maximum Life
- Regenerate 63.6 Life per second
- +35% to Chaos Resistance
- 12% increased Area of Effect (crafted)
- 16% increased Area Damage (crafted)
Annihilation's Approach Boots
- +1 to Level of Socketed Gems
- Grants Level 20 Approaching Flames Skill
- 95% increased Armour and Evasion
- 30% increased Movement Speed
- Cannot be Chilled
- Cannot be Frozen
- Take 6000 Fire Damage per Second while Flame-Touched
- Gain Adrenaline when you become Flame-Touched
- Lose Adrenaline when you cease to be Flame-Touched
 Corpse Locket Amulet
- Allocates Testudo
- +24 to Dexterity and Intelligence
- +26% to Damage over Time Multiplier
- Grants Level 30 Aspect of the Spider Skill
- +98 to maximum Life
- +1 to Level of all Skill Gems
- +18% to Fire and Chaos Resistances
- +1 to Level of all Fire Skill Gems
 Maelstrom Knot Ring 1
- -2 Prefix Modifiers allowed
- +1 Suffix Modifier allowed
- Implicit Modifiers Cannot Be Changed
- 50% increased Suffix Modifier magnitudes
- +25% to Damage over Time Multiplier
- 56% increased Fire Damage
- +79% to Fire Resistance
- +56% to Chaos Resistance
- +55 to maximum Life (crafted)
 Kalandra's Touch Ring 2
- Reflects opposite Ring
Mageblood Belt
- +42 to Strength
- +60 to Dexterity
- +23% to Fire Resistance
- +15% to Cold Resistance
- Magic Utility Flasks cannot be Used
- Leftmost 4 Magic Utility Flasks constantly apply their Flask Effects to you
- Magic Utility Flask Effects cannot be removed
 Unnatural Instinct Jewel
- 5% increased Area of Effect
- 23% reduced Bleed Duration on you
- Allocated Small Passive Skills in Radius grant nothing
- Grants all bonuses of Unallocated Small Passive Skills in Radius
Maelstrom Eye Jewel
- +6% to Damage over Time Multiplier
- +6% to Fire Damage over Time Multiplier
- 5% increased maximum Life
- 13% increased Damage with One Handed Weapons
 Watcher's Eye Jewel
- 5% increased maximum Energy Shield
- 6% increased maximum Life
- 4% increased maximum Mana
- +22% to Damage over Time Multiplier while affected by Malevolence
- Regenerate 1.07% of Life per second while affected by Vitality
 Inspired Learning Jewel
- Corrupted Blood cannot be inflicted on you
- With 4 Notables Allocated in Radius, When you Kill a Rare monster, you gain 1 of its Modifiers for 20 seconds
 Foulborn The Red Dream Jewel
- Gain 9% of Fire Damage as Extra Chaos Damage
- Passives granting Fire Resistance or all Elemental Resistances in Radius also grant increased Maximum Life at 50% of its value
 Impossible Escape Jewel
- Passive Skills in Radius of Conduit can be Allocated without being connected to your tree
- Passage
 The Light of Meaning Jewel
- 5% increased Area of Effect
- Passive Skills in Radius also grant 6% increased Fire Damage
 Rational Doctrine Jewel
- 5% increased Damage over Time
- 4% increased Fire Damage
- 4% increased Projectile Speed
- You have Consecrated Ground around you while stationary if Strength is your highest Attribute
- 25% chance to create Profane Ground on Critical Strike if Intelligence is your highest Attribute
- Effects of Consecrated Ground you create Linger for 4 seconds
- Effects of Profane Ground you create Linger for 4 seconds
 Forbidden Flesh Jewel
- Allocates Aspect of Carnage if you have the matching modifier on Forbidden Flame
 Forbidden Flame Jewel
- Allocates Aspect of Carnage if you have the matching modifier on Forbidden Flesh
 Voices Jewel
- Adds 3 Jewel Socket Passive Skills
- Adds 3 Small Passive Skills which grant nothing

- 35% increased Charge Recovery
- Enemies you Kill during Effect have a 25% chance to Explode, dealing a tenth of their maximum Life as Damage of a Random Element

- 31% reduced Duration
- 25% increased effect
- 14% increased Movement Speed during Effect
- 35% reduced Duration
- 25% increased effect
- 60% increased Armour during Effect
- 31% reduced Duration
- 25% increased effect
- 34% chance to Freeze, Shock and Ignite during Effect
- 27% reduced Duration
- 25% increased effect
- Regenerate 3% of Life per second during Effect (crafted)
All gem links (12 groups)
- Righteous Fire 20/20
- Elemental Focus 20/20
- Efficacy 21/20
- Swift Affliction 20/20
- Righteous Fire L20
- Righteous Fire L20
- Righteous Fire L20
- Righteous Fire L20
- Righteous Fire L20
- Righteous Fire L20
-
 Searing Bond of Detonation 21/23
 - Elemental Focus 20/23
- Burning Damage 20/20
- Lifetap 20/20
- Controlled Destruction 20/20
-
 Empower 4/20
-
 Enlighten 4/20
 -
 Malevolence L21
 - Tempest Shield 20/20
- Purity of Fire 21/20
-
 Momentum 20/20
 - Faster Attacks 20/20
- Shield Charge 20/20
-
 Portal 1/20
-
 Detonate Dead of Scavenging 21/20
 -
 Summon Flame Golem 20/20
- Vitality L20
-
 Unearth L1
 -
 Faster Casting 20/20
-
 Approaching Flames L20
-
 Aspect of the Spider L30
- Unknown Gem L1
- Unknown Gem L1
How this stage plays (mechanics, defences)
The full armour-stacking Chieftain identity emerges. 1.08M DPS, 85k EHP, 9.2k life — the life pool nearly doubles from the endgame reference while DPS triples. Nebulis continues to scale off overcapped elemental resistance, now amplified by Mageblood keeping four max-rolled utility flasks permanently up: a Cinderswallow Urn (life-on-ignited-kill + 15% more damage against ignited enemies — every enemy is ignited via RF's burn), a Quicksilver for movement, a Granite for +3000 armour, and a Gold Flask for rarity while mapping. The Righteous Fire 6-link shifts to Swift Affliction + Elemental Focus + Increased Area of Effect + Burning Damage + Lifetap in the Cloak of Flame — large AoE becomes the clear multiplier at pinnacle scale.
The helmet is a crafted Archdemon Crown (Empyrean Peak) with the rare prefix "Socketed Gems deal 30% more Elemental Damage" and +2 skill gems — the Fire Trap 4-link socketed there hits harder than the main 6-link for single-target burn bursts. Gloves (Victory Palm, Precursor Gauntlets) carry the unusual "Ignites you inflict spread to other Enemies within 1.2 metres" — RF ignites every standing enemy so this effectively doubles the clear radius. The unique Kalandra's Touch ring mirrors the other ring slot (Armageddon Circle, a high-life/crafted Cogwork Ring with fire pen + resistances), effectively doubling every stat on that ring — the classic Mageblood-era optimisation. The tree picks up The Adorned unique jewel which multiplies the magnitude of every magic jewel socketed — the eight Vivid Viridian / Crimson "of the Phoenix" / "of Zealousness" magic jewels on the tree each contribute max fire res, burning damage multi, or life regen, and The Adorned scales all of them at once. Cluster jewels add Sadist, Burning Bright, and life-regen notables. Spell suppress finally climbs to 24% as a small chaos-defense bonus from boot rolls; it isn't the build's defensive plan.
The pinnacle armour-stacker RF defensive profile: 72% physical damage reduction from 10.3k armour + Mageblood's Granite Flask uptime + 3 Endurance charges, 75% attack block + 75% spell block from Glancing Blows and the Ezomyte Tower Shield, 93% max fire resistance with 198% overcap, and 3.4k life regen layered with life regen flasks and ascendancy. Chaos resistance caps at 75% — the endgame's 1% is fully solved here through Victory Palm gloves (+33% chaos res), rolled rings, and Shakari pantheon. Mageblood's Ruby Flask equivalent (via magic flask mods — actually no Ruby in this setup, the magic res comes from rings, boots, and Purity of Fire) plus 3 Endurance charges sustained through Enduring Cry mean physical one-shots are nearly impossible. Cast when Damage Taken + Immortal Call absorbs the uncounterable ones. Brine King remains the major pantheon; Shakari covers chaos.
The true armour-stacker Chieftain power fantasy. Packs evaporate on approach — RF's aura + Victory Palm's ignite spread + Increased Area of Effect means a rare dying in one corner of the screen ignites the rest through chain-ignite propagation. Bosses die to Fire Trap's burst plus sustained aura pressure. Mageblood removes every flask-timing anxiety; Glancing Blows + 75% double block plus 72% phys DR plus 85k EHP means combat feels like wading through enemies rather than dancing around them. The character's speed cap is now tied to Shield Charge and map traversal, not clear speed — every pack is already dead when you arrive.
Passive tree (134 points)
The desktop app shows this tier's full tree on an interactive canvas.